Dinner · Part 2 of 3: Instructions
Loaded Cheesy Jalapeño Bacon Cornbread Skillet Step-by-step instructions
- Prep
- Cook
- Total
- Serves
- 8
Before you start
Before starting, measure all ingredients. Shred the cheddar, cook and crumble the bacon, and dice the jalapeños. Beat the eggs and melt the butter. Place a rack in the middle of the oven and preheat to 400°F (200°C).
Have all your tools ready: a large mixing bowl, a whisk, a rubber spatula, and a 10-inch cast-iron skillet. The skillet will be preheated with butter, so make sure it's clean and dry before placing it in the oven.
Ingredients at a glance (12)
- 1 cup cornmeal
- 1 cup all-purpose flour
- 2 tbsp sugar
- 1 tbsp baking powder
- 1 tsp salt
- 2 large eggs, beaten
- 3/4 cup buttermilk
- 1/3 cup unsalted butter, melted
- 1 1/2 cups sharp cheddar cheese, shredded
- 6 slices cooked bacon, crumbled
- 2 fresh jalapeños, diced
- 2 tbsp honey
Instructions
Mix and Prepare
- Mix the Dry IngredientsIn a large bowl, whisk together the cornmeal, flour, sugar, baking powder, and salt until well combined. Make a well in the center.Look for The dry mixture should be uniform with no lumps of baking powder.Tip Use a whisk to break up any clumps in the cornmeal.
- Combine the Wet IngredientsIn a separate bowl, whisk the beaten eggs, buttermilk, and melted butter until smooth. Pour the wet mixture into the well of the dry ingredients.Look for The wet mixture should be a uniform pale yellow.Tip Make sure the melted butter is not too hot, or it might cook the eggs.
- Fold in the Add-insStir until just combined, then gently fold in the shredded cheddar, crumbled bacon, and diced jalapeños. Do not overmix.Look for The batter should be thick and shaggy, with the add-ins evenly distributed.Tip Reserve a few bits of cheddar and bacon for the top if desired.
At the end of this phase, you should have a thick, shaggy batter with the add-ins evenly distributed. The dry and wet mixtures should be fully combined with no streaks of flour.
The batter should look moist and slightly lumpy, not smooth. The skillet should be preheating in the oven, and all your ingredients should be ready to go. This phase should take about 10 minutes.
Bake in the Skillet
- Preheat the SkilletPlace a 10-inch cast-iron skillet in the oven and preheat to 400°F (200°C). Once hot, carefully remove the skillet and add a pat of butter, swirling to coat the bottom and sides.Look for The butter should sizzle immediately and foam lightly.Tip Use oven mitts; the handle will be very hot.
- Pour and SizzlePour the batter into the hot skillet. It should sizzle as it hits the buttered surface. Spread it evenly.Look for The edges should start setting immediately.Tip The sizzle is a good sign—it creates a crispy crust.
- Bake Until GoldenBake at 400°F (200°C) for 22 minutes, or until the top is golden brown, puffed, and a toothpick inserted into the center comes out clean. The internal temperature of the cornbread should reach 200°F (93°C) for a fully set crumb.Look for The top should be deeply golden and the edges crispy.Safe temperature 160°F (71°C) internal temperature (egg dishes)Tip Rotate the skillet halfway through for even browning.
The cornbread should be baking in the oven at 400°F (200°C). You'll notice the edges starting to set and brown within the first few minutes. The kitchen will smell of butter and cornmeal. After 22 minutes, the top should be golden brown, and a toothpick inserted in the center should come out clean. The cornbread should be puffed and slightly cracked on top.
Glaze and Serve
- Brush with HoneyRemove the skillet from the oven and immediately brush the hot cornbread with the honey. Let it soak in.Look for The honey should bubble and glaze the surface.Tip Brush generously while the cornbread is hot for maximum absorption.
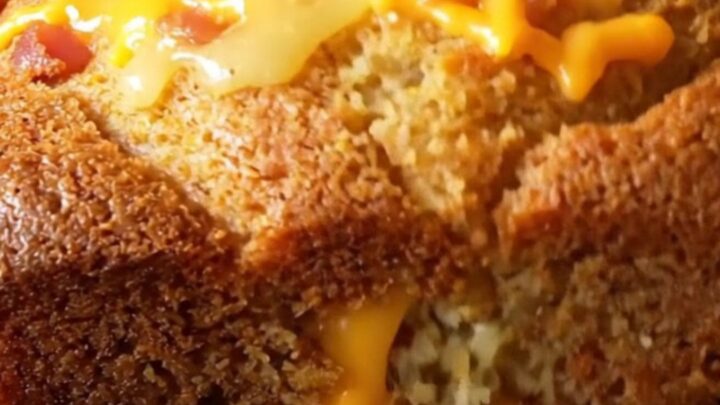
- Slice and ServeLet the cornbread cool for 5 minutes, then slice into wedges and serve warm. Pull apart a piece to show the melted cheese and moist crumb.Look for The interior should be moist and tender, with visible cheese pockets.Tip Use a serrated knife for clean slices.
After brushing with honey, the surface should be glossy and sticky. The cornbread should be slightly cooled but still warm. When you slice into it, the interior should be moist and tender, with visible pockets of melted cheese and bits of bacon. The honey should have soaked in, adding a subtle sweetness. Serve immediately for the best texture.
Common mistakes
One common mistake is overmixing the batter, which can make the cornbread tough and dense. Stir until the dry ingredients are just moistened, and then stop. Another mistake is not preheating the skillet enough; the sizzle is essential for a crispy crust.
If the skillet isn't hot, the cornbread will absorb too much butter and become greasy. Also, be careful not to overbake, as that will dry out the cornbread. Check at 20 minutes and adjust.
How to tell it’s done
The cornbread is done when the top is a deep golden brown and the edges have pulled away from the skillet slightly. A toothpick inserted into the center should come out clean, with no wet batter clinging to it.
The internal temperature should read at least 200°F (93°C) in the center. The cornbread will be puffed and fragrant, and the cheese should be melted and bubbly. Let it cool for a few minutes before slicing to allow the crumb to set.
- Egg dishes: 160°F (71°C) in the thickest part
Up next · Part 3 of 3
4 variations · storage & make-ahead · 5 answers · printable card
Tips, FAQ & printable recipe (Part 3)← Back to the ingredients (Part 1)