Breakfast · Part 2 of 3: Instructions
Loaded Biscuits and Sausage Gravy Breakfast Casserole Step-by-step instructions
- Prep
- Cook
- Total
- Serves
- 8
Before you start
Before beginning, preheat the oven to 375°F (190°C) and grease a grey ceramic baking dish with butter or nonstick cooking spray. Measure out the sausage gravy, biscuits, and shredded cheese so they are ready to use.
If the gravy is cold from the refrigerator, warm it slightly on the stovetop or in the microwave so it pours easily. This preparation ensures a smooth and quick assembly process once you begin layering the ingredients.
Ingredients at a glance (3)
- 8 oz biscuits, store-bought or made ahead
- 2 cups sausage gravy, store-bought or made ahead
- 1 1/2 cups shredded cheese
Instructions
Preparing the Biscuits
- Prepare the BiscuitsGrease a grey ceramic baking dish. Cut or tear the tender biscuits into bite-sized pieces and arrange them in an even, single layer across the bottom of the prepared dish to create a solid base for the casserole.Look for The biscuit pieces are distributed evenly.Tip Use pre-baked biscuits for a quick and easy assembly.
At the end of this phase, the baking dish is prepared and the biscuits are ready. The bottom of the grey ceramic dish is lined with an even layer of bite-sized biscuit pieces. The pieces should be distributed uniformly across the pan, creating a solid and even foundation that is ready to be smothered in the rich sausage gravy.
Assembling the Casserole Layers
- Pour the Sausage GravyPour the rich, creamy sausage gravy evenly over the biscuit pieces in the baking dish. Ensure that all the biscuit pieces are well coated with the gravy so they absorb the savory flavors during baking.Look for The biscuits are fully covered with gravy.Tip Warm the gravy slightly beforehand so it pours easily.
- Add the Cheese LayerSprinkle the shredded cheese uniformly over the top of the sausage gravy layer. Cover the entire surface to ensure every bite has a perfect balance of savory gravy and melted cheese.Look for The cheese forms an even blanket over the gravy.Tip Use a blend of cheddar and mozzarella for maximum stretch.
At this point, the casserole is fully assembled and ready for the oven. The biscuit pieces are completely covered with a thick, velvety layer of warm sausage gravy, and the top is blanketed with a generous, even layer of shredded cheese. There should be no large gaps, ensuring a beautiful, uniform melt across the entire surface.
Baking to Golden Perfection
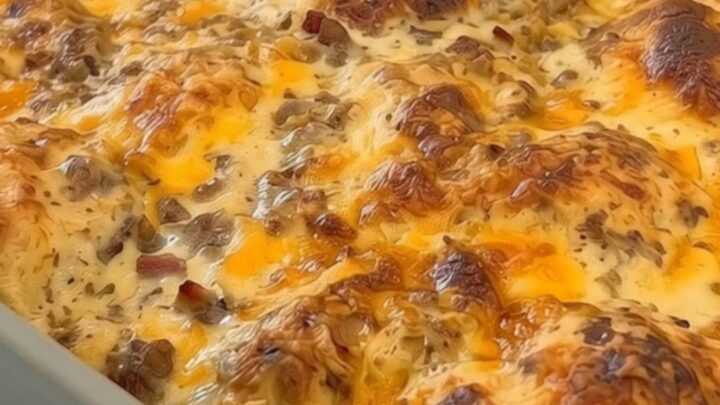
- Bake until Golden and BubblingBake the assembled casserole in a preheated oven at 375°F (190°C) for 15 to 20 minutes. The cheese should melt completely and bubble around the edges, forming a beautiful deep golden crust.Look for The cheese is bubbling and golden brown.Tip Let the casserole rest for 5 minutes before slicing.
After baking, the casserole will be piping hot and steaming. The cheese on top should be fully melted, bubbling vigorously around the edges, and browned to a deep golden hue.
The biscuit pieces inside will have softened and absorbed the gravy, and the entire dish will have a rich, savory aroma that indicates it is ready to serve.
Common mistakes
One common mistake is pouring cold gravy over the biscuits, which prevents the casserole from heating evenly in the oven. Another error is overcrowding the pan with biscuit pieces that are cut too large, leading to uneven baking.
Lastly, avoid using a gravy that is too thin, as it can sink to the bottom and make the biscuits soggy instead of keeping them tender and pillowy. Ensuring the gravy is thick and warm guarantees the best results.
How to tell it’s done
To determine if the casserole is fully cooked, look for a bubbling, deep golden-brown cheese crust and puffed, tender biscuits. The gravy should be bubbling around the edges of the dish, and the center should be hot throughout.
Let the casserole rest for about 5 minutes before slicing to allow the layers to set slightly, making it much easier to serve clean, beautiful portions that hold their shape on the plate.
Up next · Part 3 of 3
2 variations · storage & make-ahead · 3 answers · printable card
Tips, FAQ & printable recipe (Part 3)← Back to the ingredients (Part 1)