Breakfast · Part 2 of 3: Instructions
Loaded Biscuits and Sausage Gravy Breakfast Casserole Step-by-step instructions
- Prep
- Cook
- Total
- Serves
- 8
Before you start
Before starting, ensure all ingredients are ready for assembly. Preheat the oven to 375°F (190°C) so it is ready for the baking phase.
Have the baking dish greased and ready on the counter, and ensure the workspace is clean and organized to manage the stovetop cooking efficiently. Having everything measured and prepped makes the assembly process seamless and quick.
Ingredients at a glance (3)
- 1 lb breakfast sausage
- 8 count refrigerated biscuit dough, store-bought or made ahead
- 2 cups shredded Colby Jack cheese
Instructions
Stovetop Sausage Preparation
- Brown the sausageBrown the breakfast sausage in a large skillet over medium-high heat until fully cooked. Ensure the internal temperature reaches 160°F (71°C) to verify it is safe to eat.Look for The sausage should be browned and cooked through.Safe temperature 160°F (71°C) internal temperature (ground meat)Tip Drain excess fat if preferred for a lighter texture.
The sausage is thoroughly browned and cooked through, showing no traces of pink remaining in any of the crumbled pieces. The kitchen should smell deeply aromatic, with the meat sizzle subsiding into rendered drippings that are ready to be combined with the biscuits.
Casserole Assembly
- Assemble the casseroleCut the refrigerated biscuits into quarters and place them into the bottom of a greased 9x13 inch baking dish. Add the cooked sausage over the biscuit pieces. Sprinkle the shredded Colby Jack cheese generously over the top.Look for The biscuits should be evenly distributed and covered with sausage and cheese.Tip Press the biscuits slightly into the dish so they bake evenly.
The cut biscuit pieces form an even base across the ceramic dish, blanketed thoroughly with the savory cooked sausage crumbles.
A generous layer of shredded Colby Jack cheese covers the entire surface, ensuring no exposed biscuit corners dry out during the upcoming bake.
Baking and Finishing
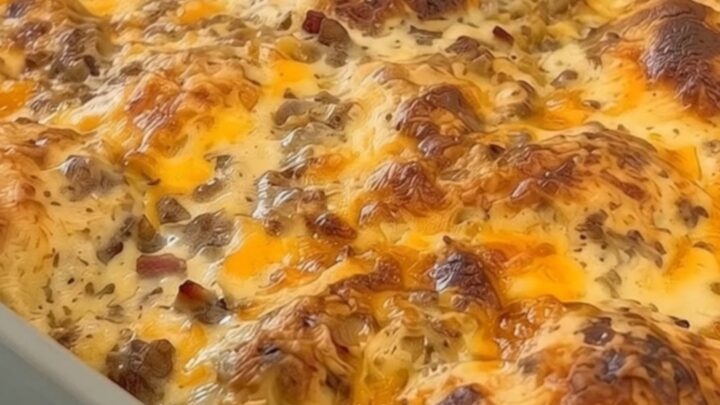
- Bake and servePlace the baking dish into a preheated 375°F oven and bake for 20 to 25 minutes until the biscuits are golden brown and the cheese is melted and bubbling. Remove from the oven and let the casserole rest for 5 minutes before slicing and serving warm.Look for The top should be golden brown and the cheese should be bubbling at the edges.Tip Letting the casserole rest helps the structure set, making it easier to slice.
The casserole emerges hot and fragrant, displaying a rich golden-brown hue across the top with cheese bubbling actively around the rim. The biscuit dough has puffed into tender pillows, and slicing yields a cohesive, cheese-pulling portion that holds together cleanly.
Common mistakes
Avoid over-crowding the baking dish with too many biscuit pieces, as this can prevent the center from baking through properly.
Do not skip the resting time after taking the dish out of the oven, as the casserole needs a few minutes to settle and firm up. Finally, ensure the heat is kept at medium while browning the sausage to prevent burning.
How to tell it’s done
The casserole is done when the biscuits are cooked through and golden brown on top, and the cheese is fully melted and bubbling.
A knife inserted into the center should come out clean, and the dish should be hot throughout. The internal temperature of the sausage was previously confirmed to be 160°F (71°C) during the stovetop phase.
- Ground meat: 160°F (71°C) in the thickest part
Up next · Part 3 of 3
2 variations · storage & make-ahead · 3 answers · printable card
Tips, FAQ & printable recipe (Part 3)← Back to the ingredients (Part 1)