Desserts · Part 1 of 3: Ingredients
Lemon Blackberry Ricotta Puff Pastry Pinwheels in 30 Minutes
- Prep
- Cook
- Total
- Serves
- 8
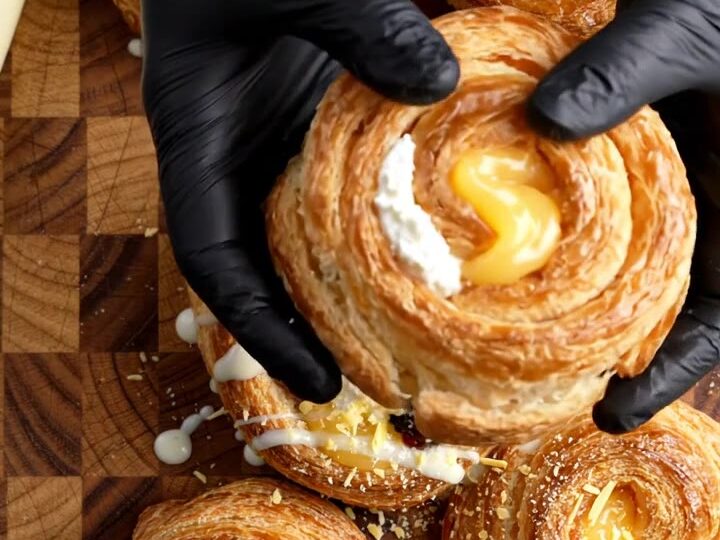
Puff pastry turns golden and flaky while a spoonful of creamy ricotta and bright lemon curd bake into every center. Fresh blackberries and a fine shower of grated white chocolate finish each pinwheel with color and texture, so you get a pastry that looks special and comes together with very little work.
These lemon blackberry ricotta pinwheels take a simple sheet of store-bought puff pastry and turn it into a pastry with a bright, layered filling. The method is straightforward: cut the pastry into squares, add a spoonful of ricotta and a dollop of lemon curd, fold the edges into a pinwheel, brush with egg wash and bake.
The fruit and lemon keep the richness balanced, and the white glaze and grated chocolate add a delicate sweetness on top. Serve them warm or at room temperature for brunch, a afternoon gathering or a dessert table with little effort and good results.
Ingredients
Pastry
- 1 sheet store-bought puff pastry, thawed
Filling
- 1/2 cup whole-milk ricotta cheese
- 2 tbsp lemon curd, store-bought or made ahead
Topping
- 1 cup fresh blackberries, plus extra for the center
- 1 lemon, sliced, plus whole lemons for garnish
Egg wash
- 1 large egg, beaten with 1 tbsp water for egg wash
Glaze
- 1/2 cup confectioners' sugar
- 2 oz white chocolate, for grating and drizzling
Why this recipe works
Puff pastry rises in the oven because its cold butter layers release steam as they bake. Keeping the squares cold until they go into the oven is what produces those separate flaky layers, so the pinwheels stay light instead of dense.
Folding the edges around the filling holds the ricotta and lemon curd in place while the pastry sets and browns around them.
Egg wash gives the pastry its golden, glossy surface and helps it brown evenly. The ricotta stays creamy because it bakes only until it is set and warm, not dried out.
The lemon curd adds sharp acidity that cuts through the cheese, and the blackberries, placed after baking, keep their color and juiciness instead of turning dark and soft in the heat.
Notes and substitutions
Choose a whole-milk ricotta for the best creamy texture in the center. Part-skim ricotta works too, but drain it in a fine strainer for about 20 minutes first so the filling does not loosen in the oven. Lemon curd is sold in most supermarkets near the jams; apricot jam with a little grated lemon zest is a reasonable stand-in if you cannot find it.
You need only a cutting board, a sharp knife, a parchment-lined sheet pan and a pastry brush. A box grater is useful for the white chocolate, which grates into fine curls when it is cold.
Frozen blackberries can replace fresh ones; thaw them and pat them dry so they do not leave too much liquid on the pastry. Keep a small bowl ready for the glaze so it is easy to drizzle right after baking.
- whole-milk ricotta: part-skim ricotta, drained for 20 minutes in a fine strainer for a thicker filling
- lemon curd: apricot jam with a little grated lemon zest
- fresh blackberries: frozen blackberries, thawed and patted dry
Equipment
- Wooden cutting board
- Sharp knife
- Parchment-lined sheet pan
- Box grater
- Pastry brush
- Small bowl for the glaze
Up next · Part 2 of 3
7 steps · 18 min of cooking · what to look for at each stage
Step-by-step instructions (Part 2)