Dinner · Part 2 of 3: Instructions
Juicy Honey Garlic Pork Roast with Herb Crust Step-by-step instructions
- Prep
- Cook
- Total
- Serves
- 6
Before you start
Before beginning the cooking process, gather all necessary kitchen tools and preheat the oven to ensure a smooth workflow. Remove the pork loin roast from the refrigerator approximately thirty minutes prior to cooking, allowing it to lose its chill and cook more evenly.
Pat the surface of the meat completely dry with paper towels, as excess moisture will steam rather than sear, preventing the desired browned crust from forming. Measure out the honey, mince the garlic, and prep the fresh herbs so everything is within arm's reach.
Ingredients at a glance (5)
- 3 lb boneless pork loin roast
- 3 sprigs fresh thyme
- 2 sprigs fresh rosemary
- 1/3 cup honey
- 4 cloves garlic, minced
Instructions
Searing and Herb Infusion
- Prepare the Pork RoastPat the pork loin roast completely dry with paper towels to ensure a clean, dry surface for searing. Let the roast sit at room temperature for up to thirty minutes before cooking to ensure even heat distribution throughout the meat during the searing process.Look for The meat surface should be completely dry to the touch.Tip A dry surface is essential for achieving a deep, golden-brown crust.
- Sear with Fresh HerbsHeat a heavy skillet over medium-high heat. Place the pork roast in the hot skillet along with the fresh thyme and fresh rosemary sprigs. Sear the roast for two to three minutes on each side until a rich, golden-brown crust forms, allowing the herbs to sizzle and release their aromatic oils directly onto the meat.Look for The pork should have a beautifully browned crust on all sides.Tip Press the herb sprigs gently against the roast to maximize flavor transfer.
At the end of this phase, the pork loin should exhibit a beautifully browned, even crust on all sides, and the kitchen should be filled with the fragrant aroma of toasted rosemary and thyme.
The herbs in the skillet will have softened and released their essential oils into the cooking fat, coating the seared meat with a savory base layer of flavor before it enters the oven.
Glazing and Roasting
- Prepare and Apply the GlazeIn a small bowl, whisk together the honey and minced garlic until thoroughly combined. Place the seared pork roast into a baking pan or keep it in the skillet if oven-safe. Use a pastry brush to generously coat the entire top and sides of the browned roast with the sweet honey garlic glaze.Look for The roast should be completely and evenly coated in the sticky glaze.Tip Keep a small amount of glaze aside to brush on near the end of roasting.
- Roast to PerfectionTransfer the glazed roast to an oven preheated to 375°F (190°C). Roast for thirty-five to forty-five minutes, or until a digital meat thermometer inserted into the thickest part of the meat registers 145°F (63°C). Remove the roast from the oven and let the meat rest for at least 3 minutes to allow the juices to redistribute.Look for The glaze should be bubbly and caramelized, and the internal temperature must reach 145°F (63°C).Safe temperature 145°F (63°C) internal temperature (steaks, chops and roasts)Tip If the honey glaze begins to darken too quickly, tent the roast loosely with foil.
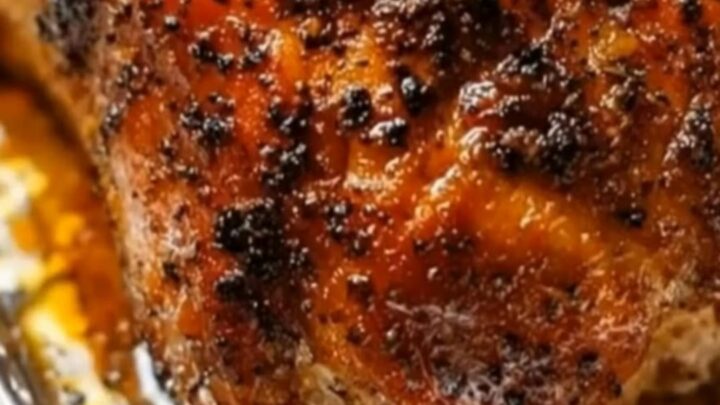
At this point, the honey garlic glaze should be deeply caramelized and bubbly, forming a sticky, golden-brown lacquer over the entire surface of the roast. The pork must reach an internal temperature of 145°F (63°C) at its thickest part, indicating it is safely cooked through while remaining incredibly juicy and tender.
Resting and Carving
- Carve and ServeTransfer the rested pork roast to a clean cutting board. Using a sharp carving knife, carve the roast into even slices, allowing the glistening juices to pool. Arrange the slices on a serving platter and spoon any remaining pan juices over the top before serving.Look for The meat should slice cleanly without tearing, revealing a juicy center.Tip Always slice against the grain for the most tender texture.
After resting for at least three minutes, the pork roast is ready to be carved. The juices will have redistributed throughout the meat, ensuring each slice is moist and tender. When sliced, the meat should display a glistening, juicy interior with a beautiful caramelized outer crust that holds its shape perfectly under the knife.
Common mistakes
One common mistake is skipping the searing step or rushing through it, which results in a pale, less flavorful roast lacking the signature caramelized crust. Another frequent error is overcooking the pork out of fear of undercooking; pork loin is a lean cut and will dry out quickly if cooked past the recommended temperature.
Always rely on a digital meat thermometer rather than visual cues alone, and never slice into the roast immediately after removing it from the oven, as this causes all the precious juices to run out onto the cutting board.
How to tell it’s done
To determine perfect doneness, insert a digital meat thermometer into the thickest part of the pork loin roast. The safe internal temperature for whole cut meat is 145°F (63°C). Once this temperature is reached, remove the roast from the oven immediately.
It is absolutely crucial to let the meat rest for at least 3 minutes before carving; this resting period allows the muscle fibers to relax and reabsorb the hot juices, ensuring every slice is exceptionally tender and moist.
- Steaks, chops and roasts: 145°F (63°C) in the thickest part, then a 3-minute rest
Up next · Part 3 of 3
2 variations · storage & make-ahead · 3 answers · printable card
Tips, FAQ & printable recipe (Part 3)← Back to the ingredients (Part 1)