Dinner · Part 2 of 3: Instructions
Herb-Roasted Chicken with Baby Potatoes and Green Beans Step-by-step instructions
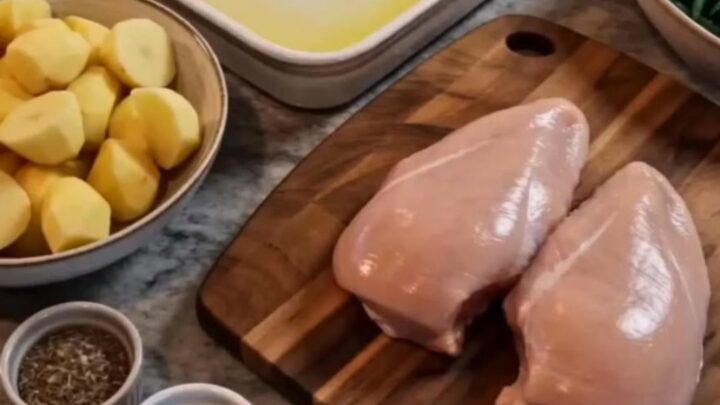
- Prep
- Cook
- Total
- Serves
- 4
Before you start
Before starting the cooking process, gather all ingredients and equipment on a clean workspace. Preheat the oven to 400°F (200°C) to ensure it is hot enough to sear the chicken and crisp the potatoes.
Wash the baby potatoes and green beans thoroughly under cold running water, then pat them completely dry with paper towels. Cut the potatoes in half and trim the tough stem ends off the green beans. Pat the chicken breasts dry to remove excess moisture.
Ingredients at a glance (5)
- 4 boneless, skinless chicken breasts
- 1 lb baby potatoes, halved
- 12 oz green beans, trimmed
- 3 tbsp olive oil
- 1 tbsp mixed dried herbs
Instructions
Prepping the Vegetables and Chicken
- Prepare the Vegetables and ChickenPreheat the oven to 400°F (200°C). Wash and halve the baby potatoes. Trim the stem ends from the green beans. Pat the chicken breasts dry with paper towels to ensure a good sear. Place the halved baby potatoes into a large mixing bowl, ready for seasoning.Look for The oven is preheated and vegetables are prepped.Tip Drying the chicken thoroughly prevents it from steaming instead of roasting.
- Season the Potatoes and ChickenDrizzle two tablespoons of olive oil over the baby potatoes in the bowl. Sprinkle with half of the dried herbs. Toss well to coat the potatoes evenly. Rub the remaining olive oil and dried herbs over all sides of the chicken breasts.Look for Potatoes and chicken are thoroughly coated in oil and herbs.Tip Use your hands to rub the seasonings into the chicken for maximum flavor distribution.
At the end of this prep phase, the baby potatoes and green beans are evenly coated in olive oil and dried herbs. The chicken breasts sit ready on the cutting board, completely dry on the surface and ready to absorb the seasonings. The kitchen should smell faintly of dried herbs and olive oil, indicating that the base flavors are well established before any heat is applied.
Arranging and Roasting the Dish
- Arrange the Baking DishPlace the seasoned chicken breasts in the center of a large ceramic baking dish. Arrange the seasoned baby potatoes around the chicken in a single layer. Toss the trimmed green beans with a tiny splash of oil and place them in the remaining spaces of the dish.Look for All ingredients are arranged in a single layer without overcrowding.Tip Keep the potatoes cut-side down on the dish to get them extra crispy.
- Roast the Chicken and VegetablesPlace the baking dish in the preheated oven and roast for 25 to 30 minutes. The chicken is cooked safely when a meat thermometer inserted into the thickest part of the breast registers 165°F (74°C). The potatoes should be fork-tender and the green beans slightly blistered.Look for Chicken reaches an internal temperature of 165°F (74°C) and juices run clear.Safe temperature 165°F (74°C) internal temperature (poultry)Tip If the green beans are very thin, add them halfway through the cooking time.
As the baking dish finishes roasting, the kitchen fills with the rich, savory aroma of roasted chicken and sizzling herbs. The chicken breasts should have a golden-brown exterior, and the baby potatoes will appear wrinkled and golden at the edges.
The green beans should look tender, slightly blistered, and vibrant green. A quick check with a meat thermometer inserted into the thickest part of the chicken must read 165°F (74°C).
Resting and Slicing the Chicken
- Rest and Slice the ChickenRemove the baking dish from the oven. Transfer the roasted chicken breasts to a clean cutting board and let them rest for 5 minutes. Leave the potatoes and green beans in the warm dish. Slice the rested chicken crosswise and serve alongside the roasted vegetables.Look for The chicken has rested and slices cleanly without losing its juices.Tip Spoon the remaining pan juices over the sliced chicken just before serving.
After resting for several minutes, the chicken breasts will feel firm yet yielding when pressed. Slicing through the meat reveals a glistening, juicy interior with steam rising gently from the cut. The juices should run completely clear, and the exterior herb crust remains intact on each slice. The potatoes and green beans are hot, tender, and ready to be plated alongside the sliced chicken.
Common mistakes
One common mistake is crowding the baking dish, which traps steam and causes the potatoes and green beans to boil rather than roast. Ensure there is some space between the ingredients so hot air can circulate freely.
Another error is adding the green beans too early if they are very thin, as they can overcook and turn mushy. If using very thin green beans, consider adding them to the dish halfway through the baking time to maintain their crisp-tender texture.
How to tell it’s done
Determining doneness accurately is critical for both safety and texture. The chicken breasts are cooked through when a meat thermometer inserted into the thickest part reads exactly 165°F (74°C).
Avoid relying solely on visual cues like color, as chicken can sometimes look white before it is fully safe to eat. The potatoes are done when they can be easily pierced with a fork without resistance, and the green beans should be tender but still retain a slight bite.
- Poultry: 165°F (74°C) in the thickest part
Up next · Part 3 of 3
2 variations · storage & make-ahead · 3 answers · printable card
Tips, FAQ & printable recipe (Part 3)← Back to the ingredients (Part 1)