Dinner · Part 2 of 3: Instructions
Herb Butter Lemon Capers Snow Crab: 10-Minute Prep Crockpot Seafood Step-by-step instructions
- Prep
- Cook
- Total
- Serves
- 6
Before you start
Before starting, ensure the snow crab clusters are thawed if frozen. Rinse them briefly and pat dry. Peel and devein the shrimp if not already done. Slice the Meyer lemons into thin rounds, about 1/4-inch thick. Drain the capers.
Make the parsley-garlic scampi butter if not using store-bought: mix 6 tablespoons softened butter with 2 minced garlic cloves, 2 tablespoons chopped fresh parsley, and a pinch of salt. Have the white wine measured. No other prep is needed; the slow cooker does the rest.
Ingredients at a glance (8)
- 2 lb snow crab clusters
- 2 lb raw jumbo shrimp, peeled and deveined
- 2 Meyer lemons, thinly sliced
- 1/4 cup capers, drained
- 1/2 cup dry white wine
- 6 tbsp parsley-garlic scampi butter, softened
- 2 cups cooked jasmine rice, for serving
- lemon wedges, for serving
Instructions
Assemble the Slow Cooker
- Layer the SeafoodPlace the snow crab clusters and jumbo shrimp in the slow cooker, spreading them evenly across the bottom. The crab can be left in clusters; the shrimp should be in a single layer as much as possible.Look for The seafood should cover the bottom of the slow cooker in an even layer.Tip If the shrimp are frozen, thaw them in the refrigerator overnight before adding.
- Add Lemon and CapersArrange the Meyer lemon slices over the seafood, tucking them between the crab clusters. Sprinkle the drained capers evenly over the top.Look for The lemon slices should cover the seafood, and the capers should be visible.Tip Use thin lemon slices so they soften during cooking.
- Pour in the WinePour the white wine over the seafood and lemon-caper mixture. Tilt the slow cooker slightly to distribute the wine, but do not stir.Look for The wine should pool slightly at the bottom of the slow cooker.Tip A crisp Sauvignon Blanc or Pinot Grigio works well.
- Top with Scampi ButterDot the parsley-garlic scampi butter over the top of the seafood in six thick pats. Place them evenly so they melt and distribute as the slow cooker heats.Look for The butter pats should be visible on top of the seafood.Tip If the butter is very cold, it will melt more slowly, which is fine.
At the end of this phase, the slow cooker is filled with layers of snow crab clusters and jumbo shrimp. Meyer lemon slices are nestled between the seafood, and capers are scattered over the top. The white wine has been poured, and six thick pats of parsley-garlic scampi butter sit on the surface, ready to melt.
The ingredients look vibrant and fresh, with the bright yellow lemons contrasting against the pink shrimp and red crab shells. The butter is still solid, but the aroma of garlic and parsley is already evident.
Slow-Cook on Low
- Cover and Cook on LowCover the slow cooker and cook on low for 4 hours, or until the shrimp are opaque and the crab is heated through. Do not lift the lid during the first 3 hours to keep the heat steady.Look for After 4 hours, the butter should be melted and the liquid gently bubbling.Safe temperature 145°F (63°C) internal temperature (shellfish)Tip Cooking on low prevents the shrimp from turning rubbery.
- Check for DonenessCheck that the shrimp are pink and opaque, and the crab meat is hot. The internal temperature of the seafood should reach 145°F (63°C). If not, cover and cook for another 30 minutes.Look for The shrimp should curl slightly and be firm to the touch.Safe temperature 145°F (63°C) internal temperature (shellfish)Tip Use an instant-read thermometer to verify the temperature.
After 4 hours on low, the slow cooker is filled with a simmering golden butter sauce. The shrimp are pink and curled, and the crab clusters are steaming. The lemon slices have softened, and the capers have plumped.
The sauce is gently bubbling at the edges, and the kitchen smells of garlic, butter, and seafood. The butter has fully melted and blended with the wine and lemon juice, creating a glossy emulsion. The seafood should be cooked through; check that the shrimp are opaque and the crab is hot.
Serve the Seafood Boil
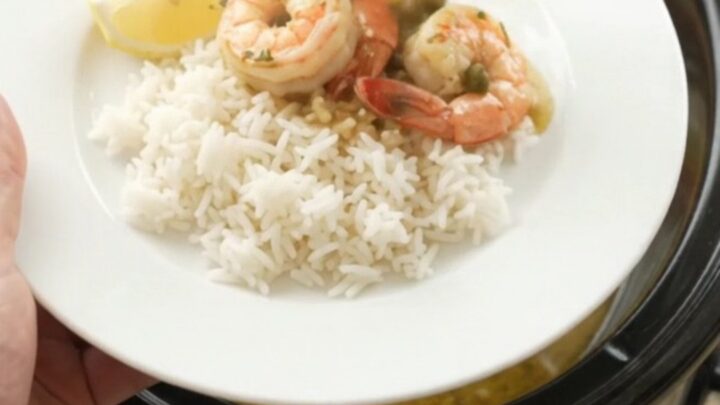
- Scoop and ServeUsing a slotted spoon, lift the crab clusters and shrimp from the butter sauce, letting the excess drip back into the slow cooker. Serve immediately over steamed jasmine rice with lemon wedges on the side.Look for The seafood should be glistening with the herb butter sauce.Tip Spoon some of the sauce over the rice for extra flavor.
When serving, the slotted spoon lifts the crab clusters and shrimp from the butter bath, with the sauce dripping back into the pot. The seafood is glistening with the herb butter sauce, and the lemon slices and capers cling to the meat. The jasmine rice is fluffy and ready to soak up the sauce. The dish looks abundant and inviting, with the bright lemon wedges adding a final pop of color. The aroma is rich and savory, promising a satisfying meal.
Common mistakes
One common mistake is lifting the lid too often during cooking. Every time the lid is removed, heat escapes, extending the cooking time and potentially making the shrimp rubbery. Another is using frozen seafood without thawing, which can lower the temperature and increase cooking time unevenly.
Overcooking is also a risk; shrimp become tough if left too long. Stick to the recommended time and check early. Finally, avoid stirring the pot; the delicate crab clusters can break apart, and the shrimp can become mushy.
How to tell it’s done
The dish is done when the shrimp are pink and opaque throughout, and the crab meat is heated through. The internal temperature of the seafood should reach 145°F (63°C) as measured with an instant-read thermometer inserted into the thickest part of the shrimp or crab leg. The butter should be fully melted and the sauce gently bubbling. The shrimp should be firm to the touch but still juicy. If the shrimp are still translucent, cover and cook for another 15-30 minutes.
- Shellfish: 145°F (63°C) in the thickest part
Up next · Part 3 of 3
4 variations · storage & make-ahead · 5 answers · printable card
Tips, FAQ & printable recipe (Part 3)← Back to the ingredients (Part 1)