Dinner · Part 2 of 3: Instructions
Golden Cheeseburger Bombs with Soft Yeast Dough Step-by-step instructions
- Prep
- Cook
- Total
- Serves
- 4
Before you start
Preheat the oven to 375°F (190°C). Line a baking sheet with parchment paper. If using homemade yeast dough, allow it to come to room temperature and rise according to your recipe. Prepare the filling ingredients: sear the beef patties until browned on both sides but not fully cooked through (they will finish in the oven).
Grill the tomato slices until lightly charred. Caramelize the onions in a skillet with a little oil or butter until soft and golden. Have the cheddar slices and sesame seeds ready. Lightly flour a work surface.
Ingredients at a glance (7)
- 1 lb homemade or store-bought soft yeast dough
- 4 slices yellow cheddar cheese
- 4 seared beef burger patties (about 4 oz each)
- 1 large tomato, grilled
- 1 cup caramelized onions
- 1 large egg yolk
- 1 tbsp white sesame seeds
Instructions
Building the Filling
- Prepare the Dough CupsLightly flour a work surface. Divide the soft yeast dough into 4 equal pieces. Roll each piece into a ball, then flatten into a 5-inch round. Press each round into a small ceramic cup, letting the edges overhang. Place a slice of cheddar in the bottom of each dough-lined cup.Look for The dough should be thin enough to fit the cup but not tear, with overhang for sealing.Tip Use cups that are oven-safe up to 375°F (190°C).
- Layer the FillingPlace a grilled tomato slice over the cheddar in each cup. Add a seared beef patty on top, pressing gently. Spoon a generous pile of caramelized onions over the patty, filling the cup to the top.Look for The filling should be level with the rim of the cup.Tip If the patties are larger than the cup, trim them to fit.
At the end of this phase, you have four dough-lined cups, each with a slice of cheddar, a grilled tomato slice, a seared beef patty, and a generous mound of caramelized onions.
The filling should be level with the rim, and the dough edges should overhang evenly. The colors are vibrant—golden dough, red tomato, brown beef, and amber onions. The aroma is savory and sweet.
Sealing and Baking
- Seal the DoughGather the overhanging dough up and over the filling. Pinch and twist the seams tightly at the top to completely enclose the filling in a neat round bun ball. Ensure there are no gaps.Look for The dough should form a smooth, sealed ball with no filling visible.Tip Wet fingers slightly if the dough is too dry to stick.
- Invert and BrushCarefully invert the dough balls onto a parchment-lined baking sheet, seam side down. In a small bowl, whisk the egg yolk with 1 tablespoon of water. Brush the tops of the dough balls with the egg wash.Look for The dough balls should be evenly coated with egg wash for a golden shine.Tip Avoid brushing too much egg wash, which can pool and create spots.
- Sprinkle Sesame SeedsSprinkle the white sesame seeds evenly over the egg-washed dough balls, covering the tops generously.Look for Seeds should stick to the egg wash and cover the surface.Tip Press gently so the seeds adhere.
- Bake the BombsBake in a preheated oven at 375°F (190°C) for 20 minutes, until the dough is puffed and golden brown. The internal temperature of the beef patties should reach 160°F (71°C).Look for The bombs should be deep golden brown and sound hollow when tapped.Safe temperature 160°F (71°C) internal temperature (ground meat)Tip If the tops brown too quickly, tent loosely with foil.
The dough balls are sealed, brushed with egg wash, and sprinkled with sesame seeds. They are placed on the baking sheet, ready for the oven. After baking, they are puffed, golden, and glossy, with sesame seeds toasted. The kitchen smells of fresh bread and beef. The bombs look irresistible, with steam rising from the seams.
Resting and Serving
- Cool SlightlyRemove the baking sheet from the oven and let the bombs rest for 3 to 5 minutes. This allows the cheese to set slightly and prevents burns when tearing open.Look for The bombs will be very hot; the cheese will be molten.Tip Use a serrated knife or tear with hands.
- Serve WarmServe the cheeseburger bombs warm, whole or torn open to reveal the melted cheddar and juicy filling. Enjoy immediately.Look for The cheese should be oozing and the dough tender.Tip Pair with a simple green salad or pickles.
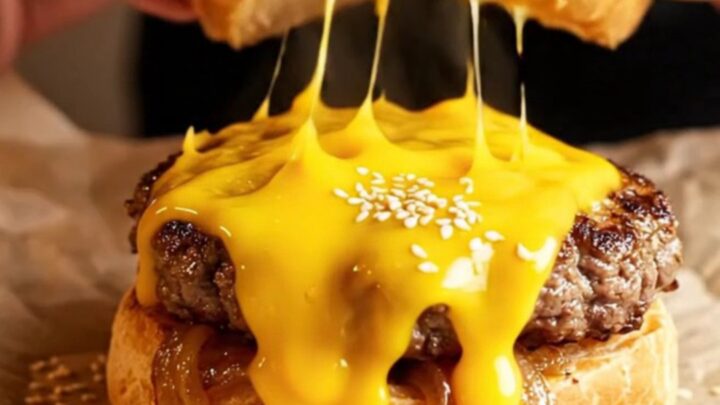
After a short rest, the bombs are warm and fragrant. When torn open, the cheese is melted and stretchy, the beef is juicy, and the onions are sweet. The dough is tender and airy. Serve immediately while the cheese is still oozing. The contrast of textures and temperatures is perfect.
Common mistakes
A common mistake is overfilling the cups, which makes sealing difficult and can cause the bombs to burst open during baking. Keep the filling level with the rim. Another pitfall is using cold dough, which is stiff and hard to seal; let it warm to room temperature.
Also, ensure the edges are tightly pinched—any gaps will let the cheese leak out. Finally, don't skip the egg wash; it's essential for the golden shine.
How to tell it’s done
The cheeseburger bombs are done when the dough is puffed, deeply golden brown, and sounds hollow when tapped on the bottom. The internal temperature of the beef patties should read 160°F (71°C) on an instant-read thermometer inserted through the dough.
If the tops brown too quickly, cover loosely with foil for the last few minutes. Let rest for 3 minutes before serving to allow the cheese to set slightly and avoid burns.
- Ground meat: 160°F (71°C) in the thickest part
- Egg dishes: 160°F (71°C) in the thickest part
Up next · Part 3 of 3
4 variations · storage & make-ahead · 5 answers · printable card
Tips, FAQ & printable recipe (Part 3)← Back to the ingredients (Part 1)