Desserts · Part 2 of 3: Instructions
Golden Brown Butter Pistachio Raspberry Financiers Step-by-step instructions
- Prep
- Cook
- Total
- Serves
- 12
Before you start
Before starting, ensure all ingredients are at room temperature, as this helps with the emulsification process. Prepare your ingot molds by brushing them thoroughly with softened butter, which is crucial for achieving that characteristic crisp, lacy edge.
Preheat your oven to 390°F (199°C) at least 20 minutes before baking to ensure a steady, hot environment, and have your piping bag ready to go to make filling the molds clean and efficient.
Ingredients at a glance (6)
- 150 g unsalted butter
- 120 g roasted pistachio flour
- 150 g icing sugar
- 50 g all-purpose flour
- 4 egg whites
- 36 fresh raspberries
Instructions
Butter and Dry Mix
- Prepare Brown ButterPlace the butter in a small saucepan over medium heat. Cook the butter, swirling the pan occasionally, until it turns a deep amber color and develops a nutty aroma. Remove from the heat immediately to prevent burning and let it cool slightly.Look for The butter solids turn golden brown and smell like toasted hazelnuts.Tip Watch the butter closely during the final minute, as it transitions from golden to burnt very quickly.
- Mix Dry IngredientsIn a large mixing bowl, whisk together the roasted pistachio flour, icing sugar, and all-purpose flour until well combined. Ensure there are no large lumps of sugar or flour remaining in the mixture.Look for The dry mixture should look uniform and light green in color.Tip Sifting the icing sugar and flour beforehand helps ensure a smooth, lump-free batter.
The butter should be a clear, deep amber color with toasted bits at the bottom, and the dry ingredients should be thoroughly whisked into a uniform, pale green mixture that is lump-free.
Creating the Batter
- Combine BatterAdd the egg whites to the dry ingredients and whisk until incorporated. Gradually pour in the warm amber brown butter while whisking constantly. Continue mixing until the batter is smooth, glossy, and fully emulsified.Look for The batter should be thick, smooth, and have a rich, nutty scent.Tip Ensure the butter is warm but not boiling hot when adding it to the eggs to maintain the proper texture.
The batter must be thick, emulsified, and glossy. When you whisk the butter into the egg whites and dry ingredients, it should come together into a smooth, cohesive, and rich-smelling paste.
Baking to Perfection
- Pipe and BakeTransfer the batter into a piping bag and pipe it into buttered gold ingot molds. Press 3 fresh raspberries into the top of each mold. Bake at 390°F (199°C) for 14 minutes until the edges are crisp and lacy. To cook the eggs through to a safe 160°F (71°C), bake for longer, though this will change the desired jammy texture.Look for The edges of the financiers should be deep golden brown and crisp.Safe temperature 160°F (71°C) internal temperature (egg dishes)Tip Do not overfill the molds, as the cakes will puff slightly while baking.
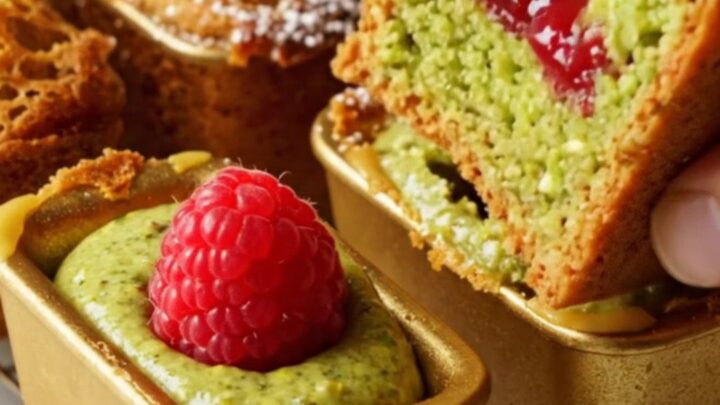
The financiers are finished when the edges look lacy and caramelized. The raspberries should be slightly sunken into the tops, appearing soft and jammy against the golden cake surface once fully baked.
Common mistakes
A common mistake is burning the butter; it should be amber-colored and smell nutty, not black or acrid. Another error is over-mixing the batter, which can lead to a tough texture rather than the desired moist, tender crumb.
Finally, failing to properly grease the molds will cause the cakes to stick, destroying their delicate shape when you try to unmold them, so take extra care during the preparation stage.
How to tell it’s done
The financiers are done when the edges have turned a deep, rich golden brown and the tops feel set to the touch.
The internal temperature of the cake, specifically the egg-based structure, should reach 160°F (71°C) to ensure the cakes are fully cooked through.
They should be firm enough to release easily from the molds after resting for a few minutes on a cooling rack.
- Egg dishes: 160°F (71°C) in the thickest part
Up next · Part 3 of 3
2 variations · storage & make-ahead · 3 answers · printable card
Tips, FAQ & printable recipe (Part 3)← Back to the ingredients (Part 1)