Dinner · Part 2 of 3: Instructions
Glazed Beef Meatloaf and Roasted Potatoes Step-by-step instructions
- Prep
- Cook
- Total
- Serves
- 6
Before you start
Start by preheating the oven to 375°F (190°C) to ensure a consistent cooking temperature. While the oven heats, wash and cube the potatoes into uniform one-inch pieces to promote even roasting.
Have all ingredients measured and ready to keep the assembly process efficient and organized before cooking begins. Ensure the baking pan is clean and ready to receive the meat and potatoes for a seamless transition into the oven.
Ingredients at a glance (2)
- 2 lbs ground beef
- 4 cups potatoes, cubed
Instructions
Preparation
- Prepare the IngredientsCut the potatoes into uniform cubes to ensure even roasting. Shape the ground beef into a loaf form directly in the baking pan, placing the potato cubes around the meat.Look for The potatoes are cut into even pieces.Tip Uniform sizes help the potatoes cook at the same rate.
The potatoes are cut into uniform cubes, and the ground beef is shaped into a compact loaf. The ingredients are arranged in the baking pan, ready for the oven. Everything should be clean and organized, ensuring that the meat is positioned centrally to allow the potatoes to roast evenly in the surrounding space.
Roasting
- Roast the MeatloafPlace the pan in the oven preheated to 375°F (190°C). Roast until the beef reaches an internal temperature of 160°F (71°C).Look for The meat is browned and the potatoes are golden.Safe temperature 160°F (71°C) internal temperature (ground meat)Tip Ensure the thermometer is inserted into the center.
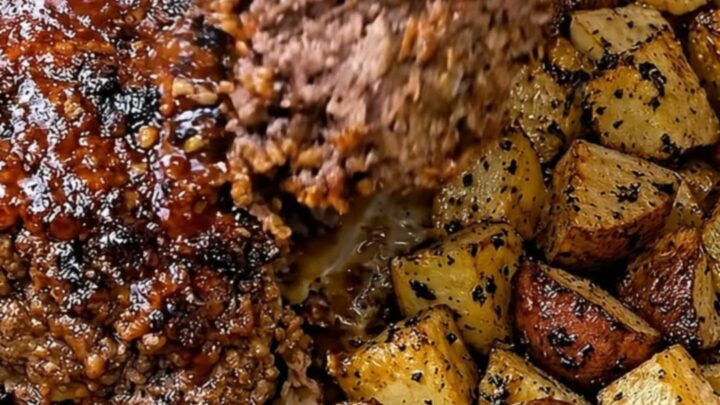
The meatloaf should be firm to the touch, and the glaze should be bubbling slightly around the edges, indicating that the sugars have caramelized.
The potatoes should be golden and crispy, having absorbed the savory juices from the meat during the roasting process in the oven. The kitchen should smell savory and aromatic.
Resting
- Rest and ServeRemove the pan from the oven and let the meatloaf rest for at least 10 minutes before slicing. This ensures the juices redistribute for a moist texture.Look for The meat is firm enough to slice.Tip Use a sharp knife for clean slices.
During the resting phase, the meatloaf will firm up slightly, making it easier to slice without crumbling. The juices within the meat will redistribute, ensuring that the center remains moist. Once rested, the loaf should slice cleanly into thick, attractive portions ready for immediate serving to family or guests.
Common mistakes
A common mistake is cutting the potatoes into uneven sizes, which causes some to burn while others remain undercooked. Another error is failing to let the meatloaf rest before slicing, which will cause the juices to escape, resulting in a dry loaf.
Finally, overcrowding the pan can prevent the potatoes from crisping properly. Always arrange the ingredients in a single layer to ensure even heat distribution and optimal texture.
How to tell it’s done
The meatloaf is perfectly done when it reaches an internal temperature of 160°F (71°C) at the thickest part of the loaf. Use a reliable digital meat thermometer to verify this, as visual cues can be misleading.
The glaze should appear dark and slightly tacky on the surface, and the potatoes should be fork-tender with a deep golden-brown crust. Allowing the meat to rest for at least 10 minutes is crucial for maintaining the juices.
- Ground meat: 160°F (71°C) in the thickest part
Up next · Part 3 of 3
2 variations · storage & make-ahead · 3 answers · printable card
Tips, FAQ & printable recipe (Part 3)← Back to the ingredients (Part 1)