Desserts · Part 2 of 3: Instructions
Giant Ferrero Rocher Dome Cake for Celebrations Step-by-step instructions
- Prep
- Cook
- Total
- Serves
- 12
Before you start
Before beginning, ensure all ingredients are measured and ready, especially the chocolate, which should be melted and kept warm but not hot. Prepare the hemisphere bowl by lining it thoroughly with plastic wrap, leaving enough overhang to easily lift the cake out later.
If using a pre-made sponge, cut it into pieces that will fit the curvature of your bowl. Ensure you have a wire rack and a baking sheet ready for the final glazing step to manage the chocolate flow effectively.
Ingredients at a glance (7)
- 1 layer hazelnut sponge cake, made ahead or store-bought
- 1 cup crushed crepe dentelle feuilletine wafers
- 3/4 cup melted Gianduja hazelnut chocolate
- 8 oz mascarpone cheese
- 1 cup Nutella hazelnut spread
- 2 cups milk chocolate, melted
- 3/4 cup roasted hazelnuts, chopped
Instructions
Preparing the filling and crunch
- Prepare the crunchy layerIn a medium bowl, combine the crushed crepe dentelle feuilletine wafers with the melted Gianduja hazelnut chocolate. Stir until the wafers are thoroughly coated in the chocolate, creating a crisp, uniform texture for the crunchy layer of the cake.Look for The mixture should look like a thick, chocolate-covered crumble that holds its shape when pressed.Tip Ensure the chocolate is slightly cooled before mixing to keep the wafers from losing their crispness immediately.
- Whip the Nutella fillingPlace the mascarpone cheese and Nutella into a mixing bowl. Using an electric mixer, whip the ingredients together on medium speed until the mixture is smooth, fluffy, and well-combined, ensuring no streaks of mascarpone remain in the cream.Look for The mixture should be light, airy, and hold stiff peaks when the beaters are lifted.Safe temperature 160°F (71°C) internal temperature (egg dishes)Tip Use room temperature mascarpone to ensure a smooth, lump-free filling that incorporates easily with the hazelnut spread.
The filling should be smooth, light, and creamy with a distinct hazelnut flavor. The crunchy layer should be well-coated in chocolate but still retain the texture of the crushed wafers. Check that both components are ready before proceeding to the assembly stage, as the assembly requires a quick and organized workflow to ensure the layers are evenly distributed within the hemisphere bowl.
Assembling the dome
- Assemble the domeLine a hemisphere bowl with plastic wrap. Place a layer of hazelnut sponge at the bottom. Spread the whipped Nutella cream over the sponge, then add the crunchy feuilletine mixture. Repeat the layers as desired and finish with a final piece of sponge. Chill for two hours.Look for The dome should feel firm to the touch after the chilling process is complete.Tip Press down gently on each layer as you assemble to eliminate air pockets and ensure a compact, professional-looking dome.
The assembled dome should be compact and tightly wrapped in plastic. Ensure there are no gaps between the sponge and the cream layers, as this creates a more stable cake. Once in the refrigerator, the cake should remain undisturbed for at least two hours to allow the structure to firm up properly, ensuring a clean and professional unmolding process later on.
Glazing the cake
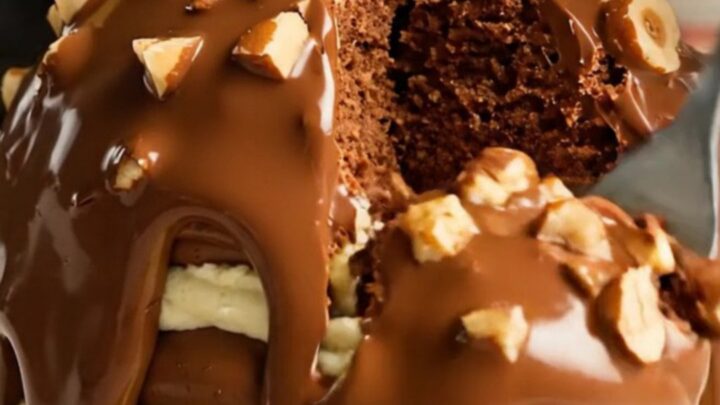
- Apply the hazelnut chocolate shellUnmold the chilled cake onto a wire rack. In a small bowl, stir together the melted milk chocolate and chopped roasted hazelnuts. Pour the warm mixture over the dome, ensuring it coats the entire surface evenly to create a glossy, crackly shell.Look for The chocolate should set into a smooth, shiny, and crackly shell as it cools over the chilled cake.Tip Place a tray under the wire rack to catch any excess chocolate for easy cleanup after glazing.
The final cake should be perfectly smooth and coated in a shiny, crackly layer of milk chocolate. The chopped hazelnuts should be evenly distributed throughout the shell, providing a tactile, crunchy contrast to the soft interior.
Before serving, check that the entire surface is fully covered and the chocolate has hardened, ensuring a beautiful, professional presentation for the final centerpiece.
Common mistakes
Avoid over-whipping the mascarpone and Nutella mixture, as this can cause the cream to become too dense or separate. When pouring the chocolate shell, ensure it is not too hot, as excessive heat can melt the filling underneath and ruin the layered structure.
Additionally, do not skip the chilling phase, as the cake needs this time to stabilize and set its shape; attempting to glaze a room-temperature cake will result in the shell sliding off before it can set properly.
How to tell it’s done
The cake is considered done once it has been thoroughly chilled for at least two hours, allowing the internal structure to firm up completely. When the final shell is applied, the chocolate should set within minutes, creating a hard, glossy surface that crackles when tapped.
The internal temperature of the filling, which contains mascarpone and Nutella, should remain cold, ensuring a refreshing and stable consistency that is easy to slice through without collapsing.
- Egg dishes: 160°F (71°C) in the thickest part
Up next · Part 3 of 3
2 variations · storage & make-ahead · 3 answers · printable card
Tips, FAQ & printable recipe (Part 3)← Back to the ingredients (Part 1)