Dinner · Part 2 of 3: Instructions
Garlic Parmesan Cheeseburger Bombs Step-by-step instructions
- Prep
- Cook
- Total
- Serves
- 8
Before you start
Before beginning, ensure all ingredients are measured and ready for assembly. Preheat your oven to 350°F (175°C) to ensure it is ready for the final baking phase. Have your skillet, baking sheet, and pastry brush positioned within easy reach to streamline the cooking process.
Preparing your workspace in this manner minimizes stress and allows you to focus on the assembly of the cheeseburger bombs, resulting in a more enjoyable and efficient kitchen experience.
Ingredients at a glance (7)
- 1 lb ground beef
- 1 tbsp burger seasoning
- 8 slices cheddar cheese
- 8 slider buns
- 4 tbsp melted butter
- 1 tsp garlic powder and herbs
- 2 tbsp grated parmesan cheese
Instructions
Browning the beef
- Prepare the beef fillingHeat a large skillet over medium-high heat. Add the ground beef and season with the burger seasoning. Cook until browned and fully cooked through to an internal temperature of 160°F (71°C). Drain any excess fat if necessary and set aside to cool slightly.Look for The beef should be browned with no pink remaining.Safe temperature 160°F (71°C) internal temperature (ground meat)Tip Ensure the meat is not too greasy before placing it inside the buns.
The beef is fully cooked and aromatic, with a deep brown color and no signs of pink. It should be well-seasoned and slightly cooled before being transferred to the buns. Ensure that any excess fat has been drained to keep the final sliders from becoming oily.
Assembling the sliders
- Assemble the bombsOpen the slider buns. Place a generous spoonful of the cooked ground beef onto the bottom half of each bun. Fold the slices of cheddar cheese and place them directly over the hot beef to encourage melting. Close the buns with the top halves.Look for The cheese should be positioned centrally to ensure it melts evenly.Tip Press down gently on the tops to secure the filling inside.
Each bun should be evenly filled with a portion of the beef and a slice of cheese. The sliders should look uniform and compact, ready for the final layer of garlic butter. The cheese should be neatly tucked inside so it does not spill out during the baking process.
Baking to perfection
- Glaze and bakeIn a small bowl, whisk together the melted butter, garlic powder, and herbs. Brush the mixture generously over the tops of the assembled sliders. Sprinkle the grated parmesan cheese over the butter-glazed tops. Bake in a preheated oven at 350°F (175°C) for about 10 to 12 minutes, or until the buns are golden brown and the cheese is fully melted and bubbling.Look for The tops should be golden brown and fragrant with garlic.Tip Keep a close eye on the oven to prevent the parmesan from burning.
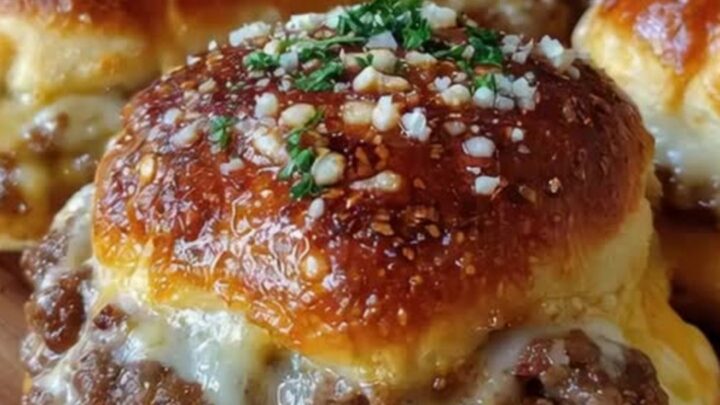
The sliders emerge from the oven golden, glistening, and fragrant with garlic and herbs. The cheese should be thoroughly melted, and the buns should have a light crispness on top. The parmesan should be toasted to a light golden hue, signaling that they are ready to be served warm.
Common mistakes
A common mistake is overcrowding the skillet when browning the beef, which can lead to steaming instead of searing. Ensure the pan is hot and the beef has enough room to brown evenly.
Another error is using too much butter, which can make the buns excessively greasy; apply the butter mixture sparingly with the pastry brush to achieve a delicate, crispy coating rather than a soggy one. Always monitor the oven closely during the final bake to avoid burning the parmesan cheese.
How to tell it’s done
The cheeseburger bombs are perfectly done when the slider buns achieve a beautiful, deep golden-brown color and the parmesan topping is toasted.
The internal temperature of the beef filling should have reached 160°F (71°C) during the initial browning phase, and the cheese should be visibly melted and bubbling at the center of each slider.
Allow the finished bombs to rest for 5 minutes before serving to ensure the cheese sets slightly for the best texture.
- Ground meat: 160°F (71°C) in the thickest part
Up next · Part 3 of 3
2 variations · storage & make-ahead · 3 answers · printable card
Tips, FAQ & printable recipe (Part 3)← Back to the ingredients (Part 1)