Dinner · Part 1 of 3: Ingredients
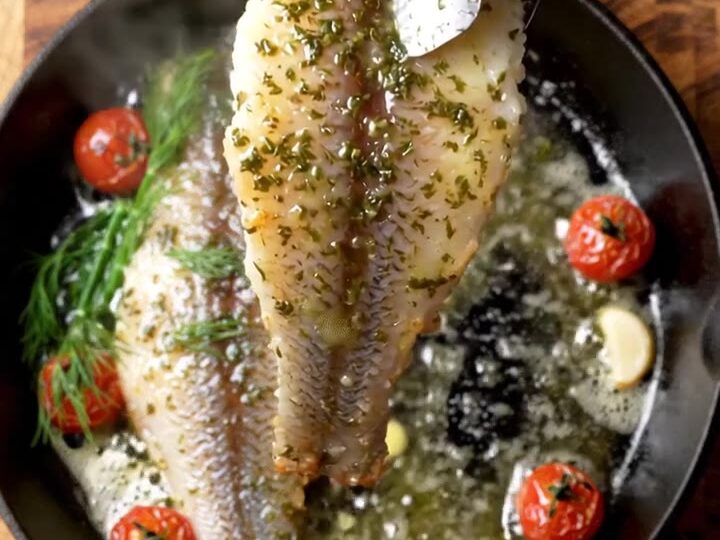
Garlic Herb Butter Pan-Seared Arctic Char with Crispy Skin
- Prep
- Cook
- Total
- Serves
- 2
Crispy skin, foaming garlic butter and blistered tomatoes come together in one skillet. This arctic char dish is a fast, satisfying dinner that looks special on the plate and needs only one pan to cook and serve.
Arctic char has a delicate, rosy flesh and a thin skin that turns very crisp when it hits hot fat. This recipe uses that contrast: fillets are seared skin-side up in melted butter, flipped until the skin is golden, and finished with garlic, herbs and fresh dill.
Cherry tomatoes cook in the same butter until they split and blister, so the sauce and the garnish come from the pan itself. The whole dish takes about 25 minutes from start to finish, which makes it a practical choice for a weeknight dinner or a relaxed meal for two. Serve it straight from the skillet with a spoon for the butter, and with the crisp skin still crackling.
Ingredients
- 2 skin-on arctic char fillets, about 6 oz each
- 1 tsp coarse salt, plus more to taste
- 4 cloves garlic, minced, plus 2 whole cloves
- 2 tbsp chopped fresh herbs, such as parsley or chives
- 4 tbsp unsalted butter
- 1 cup cherry tomatoes
- fresh dill sprigs, for serving
- hard cheese, finely grated, for serving (optional)
Why this recipe works
Searing skin-side down in fat is the classic way to get crisp skin on fish. Starting skin-side up in melted butter lets the heat build gently, and the butter baste keeps the flesh moist while the top stays tender.
The flip comes once the skin is set and golden, so the fillets release easily from the pan and the skin does not tear. Spooning the foaming butter over the fish during cooking also carries garlic and herb flavour into the flesh without any extra sauce to prepare.
Cherry tomatoes behave differently from fish: they release water, soften and blister in hot butter within a few minutes. Adding them around the fillets lets their juices mingle with the browned butter, which becomes a loose, fragrant sauce.
Tucking whole garlic cloves and dill sprigs into the bubbling butter at the end infuses the fat with a mellow garlic note and a fresh herbal aroma, without burning the garlic that is already minced into the seasoning.
Notes and substitutions
Choose fillets of similar thickness so they cook at the same pace in one skillet. Arctic char is usually sold skin-on, which is essential for this method; ask the fishmonger to pin-bone the fillets so you do not have to. Salmon or trout fillets work well as substitutes because they also have skin that crisps, though the cooking time may shift slightly with thickness.
A black cast iron skillet holds heat evenly and gives a deep, golden crust on the skin, which is why it is the pan of choice here. A stainless steel or carbon steel skillet of similar size also works.
Use a sharp knife to score the flesh, a fine-hole box grater for the cheese, and tongs for flipping. For the herbs, parsley or chives are fine alternatives to chopped fresh herbs if dill is hard to find, but keep the dill sprigs for tucking into the butter.
- arctic char: salmon or trout fillets of similar thickness, skin-on
- cherry tomatoes: grape tomatoes, halved if large
- hard cheese: Parmesan or Pecorino, or leave it out
Equipment
- black cast iron skillet
- sharp knife
- wooden cutting board
- fine-hole box grater
- tongs
- small bowl
Up next · Part 2 of 3
5 steps · 12 min of cooking · what to look for at each stage
Step-by-step instructions (Part 2)