Dinner · Part 2 of 3: Instructions
Garlic Butter Chicken Bites with Creamy Parmesan Fettuccine Step-by-step instructions
- Prep
- Cook
- Total
- Serves
- 4
Before you start
Before starting, bring a large pot of salted water to a boil for the pasta. Cut the chicken into uniform 1-inch pieces so they cook evenly. Mince the garlic, grate the parmesan, and chop the parsley.
Have all ingredients measured and within reach—the cooking moves quickly once the skillet is hot. Set out a large skillet, tongs, and a wooden spoon.
Ingredients at a glance (9)
- 1 1/2 lb boneless, skinless chicken breasts, cut into 1-inch pieces
- 1 tsp kosher salt
- 1/2 tsp black pepper
- 4 tbsp unsalted butter, divided
- 6 cloves garlic, minced
- 12 oz fettuccine pasta
- 1 1/2 cups heavy cream
- 1 cup grated parmesan cheese
- 2 tbsp fresh parsley, chopped
Instructions
Pasta and Seasoning
- Cook the pastaBring a large pot of salted water to a boil. Add the fettuccine and cook according to package instructions until al dente. Reserve about 1 cup of pasta water, then drain the pasta and set aside.Look for Pasta is tender but still has a slight bite at the center.Tip Don't rinse the pasta; the starch helps the sauce cling.
- Season the chickenPat the chicken pieces dry with paper towels. Season evenly with kosher salt and black pepper.Look for Chicken is evenly coated with seasoning.Tip Dry chicken browns better and avoids steaming.
The fettuccine is cooked al dente and drained, with a cup of pasta water reserved. The chicken pieces are seasoned and ready to go. The kitchen smells of nothing yet—the real aroma is about to start.
The pasta should be glossy and not sticky, and the chicken should be at room temperature for no more than 30 minutes before cooking.
Searing and Sauce
- Sear the chickenMelt 2 tablespoons of butter in a large skillet over medium-high heat. Add the chicken in a single layer and cook without moving for 3-4 minutes until golden brown. Flip and cook another 3-4 minutes until the chicken is cooked through and reaches 165°F (74°C) in the thickest piece. Transfer the chicken to a plate.Look for Chicken is golden on both sides and no longer pink inside.Safe temperature 165°F (74°C) internal temperature (poultry)Tip Don't overcrowd the pan; cook in batches if needed.
- Make the garlic butterReduce the heat to medium and add the remaining 2 tablespoons of butter to the same skillet. Once melted, add the minced garlic and cook, stirring constantly, for 30-60 seconds until fragrant but not browned.Look for Garlic is aromatic and just starting to soften.Tip Watch closely; burnt garlic turns bitter.
- Build the saucePour in the heavy cream and bring to a gentle simmer, scraping up any browned bits from the bottom of the skillet. Let the cream bubble softly for 2-3 minutes until it thickens slightly.Look for Sauce coats the back of a spoon lightly.Tip Keep the heat moderate to avoid curdling the cream.
- Add the parmesanReduce the heat to low and gradually whisk in the grated parmesan, a handful at a time, until the sauce is smooth and the cheese is fully melted.Look for Sauce is glossy and thickened, with no cheese clumps.Tip Add cheese off the boil to keep it silky.
The chicken is golden brown on both sides and cooked through. The skillet now holds a garlicky, buttery sauce that is thick enough to coat a spoon. The garlic is fragrant but not scorched. The cream is simmering gently, and the parmesan has melted into a smooth, glossy sauce with no lumps.
Combining and Serving
- Combine and finishReturn the chicken to the skillet along with any accumulated juices. Add the drained fettuccine and toss to coat everything in the sauce. If the sauce is too thick, splash in some reserved pasta water a tablespoon at a time until it reaches the desired consistency.Look for Pasta is fully coated and chicken is glistening.Tip Toss gently with tongs to avoid breaking the pasta.
- Garnish and serveSprinkle the chopped parsley over the pasta and chicken. Serve immediately, twirling the fettuccine into nests and placing the chicken bites alongside.Look for Parsley adds a fresh green contrast to the golden sauce.Tip Twirl a portion with tongs and lift to create a neat swirl.
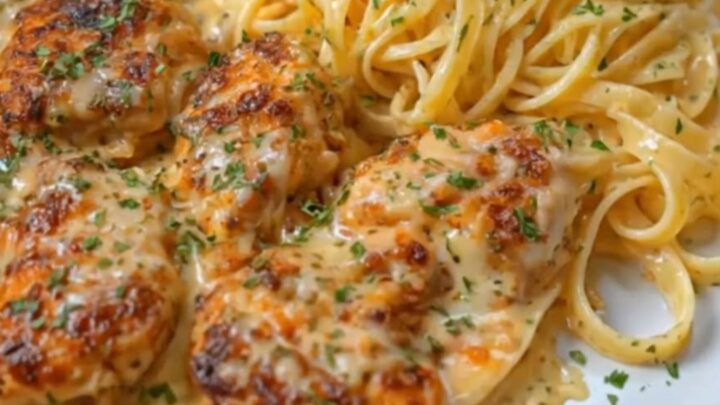
The chicken is back in the skillet, nestled among the fettuccine, and everything is coated in a silky, creamy sauce. The parsley adds a fresh, green finish. The dish looks luxurious—golden chicken bites beside twirled pasta, with the sauce glistening under the light. Serve immediately while hot and creamy.
Common mistakes
Overcrowding the skillet is the most common mistake—it causes the chicken to steam instead of sear, resulting in pale, rubbery pieces. Another frequent issue is overheating the cream, which can cause it to separate.
Keep the heat at a gentle simmer when adding the cream, and never boil the sauce after the parmesan is added. Finally, don't skip the pasta water; it's the key to a smooth, clingy sauce.
How to tell it’s done
The chicken is done when the thickest piece registers 165°F (74°C) on an instant-read thermometer. The sauce is ready when it coats the back of a spoon and is thick enough to leave a trail when you drag a finger through it.
The pasta should be al dente—tender but still firm to the bite. The final dish should be glossy, with the sauce clinging to the noodles and chicken.
- Poultry: 165°F (74°C) in the thickest part
Up next · Part 3 of 3
4 variations · storage & make-ahead · 5 answers · printable card
Tips, FAQ & printable recipe (Part 3)← Back to the ingredients (Part 1)