Dinner · Part 2 of 3: Instructions
French Onion Rigatoni Skillet: One Pan, Golden Cheese Crust Step-by-step instructions
- Prep
- Cook
- Total
- Serves
- 4
Before you start
Start by slicing the yellow onions into thin, even half-moons on a wooden cutting board. Thin slices cook down evenly and turn silky rather than stringy. Smash the garlic cloves lightly with the flat side of a knife so they release their aroma, and pull the thyme leaves from the sprigs, keeping the sprigs whole for cooking. Grate the Gruyère over a box grater and set it aside in a bowl.
Bring a large pot of salted water to a boil for the rigatoni, and set a colander in the sink. Measure the broth and have the black pepper ready. Setting out everything before the heat goes on keeps the onions from scorching while you hunt for an ingredient, and it makes the stovetop part of the recipe move smoothly from one step to the next.
Ingredients at a glance (9)
- 3 lb yellow onions, thinly sliced
- 4 tbsp unsalted butter
- 3 cloves garlic, smashed
- 4 sprigs fresh thyme, plus leaves for serving
- 1 tsp kosher salt, plus more to taste
- 8 oz dry rigatoni
- 2 1/2 cups low-sodium beef broth
- 1/2 tsp freshly ground black pepper, plus more for serving
- 6 oz Gruyère cheese, freshly grated
Instructions
Caramelizing the onions
- Caramelize the onionsMelt the butter in a 12-inch cast-iron skillet over medium heat. Add the sliced onions, the salt and the thyme sprigs. Cook, stirring every few minutes, until the onions turn deep golden brown and jammy, about 35 to 45 minutes.Look for Onions are soft, jammy and deep golden-brown, with a sweet, toasted smell.Tip Scrape the browned bits from the bottom of the pan often; they add color and flavor to the sauce.
- Add garlic and thymeLower the heat to medium-low. Add the smashed garlic cloves and stir for about 1 minute, until fragrant. Remove the thyme sprigs from the skillet and discard the stems, keeping the leaves in the pan.Look for The garlic smells sweet and aromatic, and the onions look glossy.Tip Stir constantly once the garlic goes in so it does not scorch.
The onions should look soft, shrunken and deep golden-brown, with a jammy, sweet smell filling the kitchen. They should release a little liquid and cling together in the skillet. Before you move on, check that the browned bits on the bottom of the pan are amber rather than black. If the onions are still pale and crisp, keep cooking over medium heat for a few more minutes, stirring often. If the pan looks dry and the onions start to darken too fast, lower the heat slightly and add a tablespoon of water to loosen them. Once the onions are jammy and evenly colored, the base of the sauce is ready, and the garlic and thyme can go in to finish the aromatics before the pasta joins the pan.
Building the saucy pasta
- Cook the rigatoniBring a large pot of salted water to a boil. Cook the rigatoni until just tender, about 2 minutes less than the package time. Drain well and set aside.Look for Pasta is tender with a slight bite in the center.Tip Undercooking slightly keeps the pasta from turning soft once it bakes.
- Stir in pasta and brothPour the broth into the skillet with the onions and bring to a simmer. Add the drained rigatoni and black pepper, and stir until the pasta is coated and the liquid is slightly reduced.Look for The pasta is coated in a glossy, onion-flecked sauce with little liquid left.Tip Use a wooden spoon to scrape the bottom of the skillet so nothing sticks.
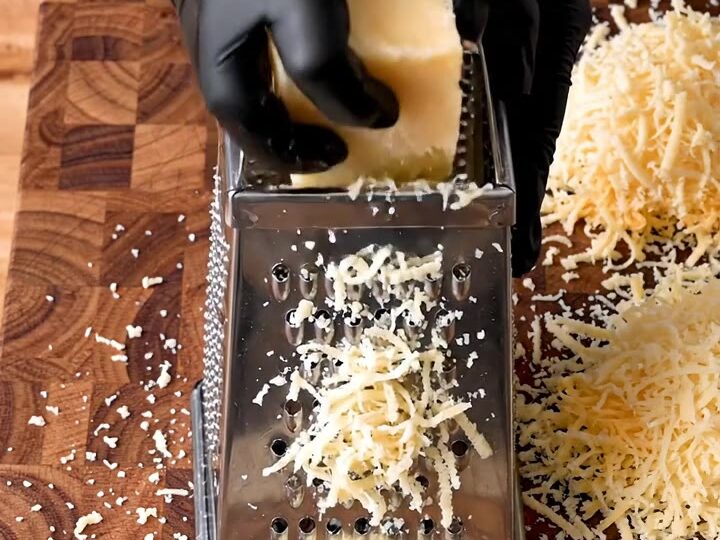
- Top with GruyèreGrate the Gruyère over a box grater, letting the shreds fall onto a board. Scatter about two-thirds of the cheese over the pasta, then fold it in gently. Sprinkle the remaining cheese over the top in an even layer.Look for Cheese is partly melted into the pasta and a fluffy layer covers the top.Tip Freshly grated Gruyère melts more smoothly than pre-shredded cheese.
The rigatoni should look glossy and coated in the onion mixture, with the broth reduced to a light, saucy consistency. The pasta should be tender with a slight bite, and the liquid should cling to the noodles rather than pool at the bottom of the skillet. Before you move on, stir the pasta gently and check that no noodles are sticking to the pan.
If the sauce looks too thin, simmer it for another minute or two so it thickens slightly. If it looks too thick, add a splash of hot broth. Sprinkle the cheese only once the pasta is evenly coated, so the Gruyère melts into the sauce in the oven instead of clumping. The skillet is then ready for the final bake and should look like a rich, savory pasta with the cheese partially melted into it.
Baking to a golden crust
- Bake until blisteredTransfer the skillet to the oven preheated to 400°F (200°C). Bake uncovered for 12 to 15 minutes, until the cheese is bubbling and browned in spots and the pasta is tender and saucy. Let the skillet rest for 5 minutes before serving.Look for Cheese bubbles around the edges and browns in blistered spots on top.Tip Set the skillet on a trivet, since the handle stays hot.
- Finish and serveScatter the reserved thyme leaves over the top and add a final grind of black pepper. Serve straight from the skillet while the crust is still hot and blistered.Look for The crust is golden and blistered, and the pasta is glossy and creamy.Tip Spoon from the skillet at the table so the crust stays intact.
After baking, the cheese should be bubbling along the edges and browned in blistered spots across the top. The pasta should look tender, and the sauce should be creamy and set around the noodles without looking dry. Before serving, check the center of the skillet by lifting a spoonful of pasta: it should be hot throughout and tender with a slight bite. If the cheese is still pale and not bubbling, bake for another two to three minutes and watch it closely. If the top is browning too fast, move the skillet to a lower rack. Let the skillet rest for five minutes before serving so the sauce thickens slightly and the crust stays crisp.
Common mistakes
The most common mistake is rushing the onions. If they are cooked over high heat, the outside burns while the inside stays pale and raw-tasting, and the whole dish turns bitter. Keep the heat at medium and give the onions time to soften and darken gradually. Another frequent error is overcooking the pasta before it goes into the skillet.
Rigatoni that is fully tender at the start will turn mushy during baking and absorb too much sauce. Pull it out a couple of minutes early and let it finish in the pan. Finally, do not add all the cheese at once without spreading it out. Clumped Gruyère melts unevenly and can leave greasy patches, so scatter it in an even layer for the crispest, most golden top.
How to tell it’s done
The dish is done when the cheese is bubbling around the edges and browned in blistered spots across the top, and the sauce looks creamy and glossy around the pasta. The rigatoni should be tender with a slight bite, not soft or falling apart. Check that the pasta is hot all the way through, and that the cheese has melted into the sauce rather than sitting in a separate layer.
For the best texture, pull the skillet once the crust is golden and the center is steaming. There is no protein in this recipe, so the cooking is judged by color, texture and bubbling rather than by a thermometer reading. A quick taste of the pasta will tell you whether it has the right balance of tenderness and sauce.
Up next · Part 3 of 3
4 variations · storage & make-ahead · 5 answers · printable card
Tips, FAQ & printable recipe (Part 3)← Back to the ingredients (Part 1)