Dinner · Part 1 of 3: Ingredients
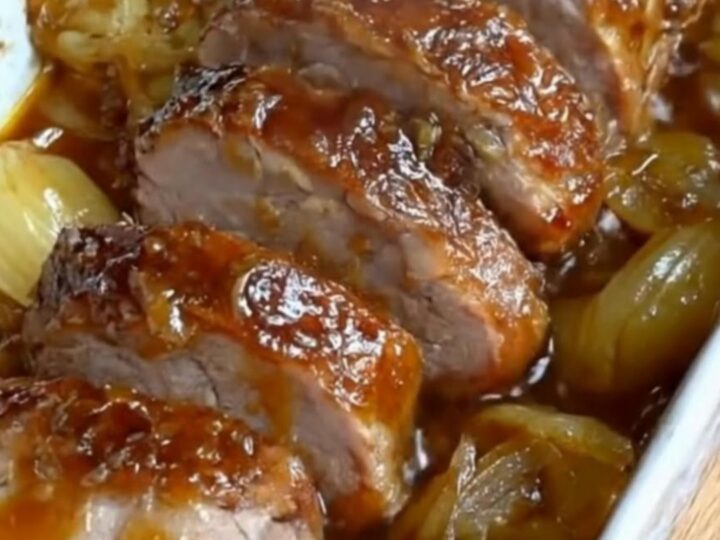
French Onion Pork Tenderloin — One Pan, Glossy Onion Sauce
- Prep
- Cook
- Total
- Serves
- 4
French onion flavor meets a weeknight timetable. Pork tenderloin gets a hard sear, then bakes over a pile of onions cooked down to a dark, jammy melt, and the whole thing finishes under a glossy broth-and-onion sauce. One skillet, one baking dish, and about an hour from cutting board to table — with slices so juicy the sauce barely survives the trip to the plate.
French onion soup is beloved for exactly two things: onions cooked far past the point of politeness, and the rich broth they swim in. This recipe borrows both and puts them where a weeknight dinner wants them — on a pork tenderloin. The tenderloin is seared in the same skillet the onions will use, so the browned bits left behind season the onions from underneath.
While the onions caramelize low and slow, the meat waits its turn. Then everything meets in a baking dish: pork on a bed of onions, a brief bake to temperature, and a final spoonful of sauce thickened on the stove. The result is a glossy, savory, faintly sweet plate of food that reads as far more effort than it is.
Ingredients
- 2 lb pork tenderloin, trimmed and patted dry
- 1 1/2 tsp kosher salt, divided
- 1/2 tsp coarsely ground black pepper
- 2 tbsp olive oil, divided
- 3 large yellow onions, halved and thinly sliced
- 3 garlic cloves, minced
- 2 tsp chopped fresh thyme leaves
- 1 tbsp light brown sugar, packed
- 1 1/2 cups beef broth
Slurry
- 1 tbsp cornstarch
- 2 tbsp cold water
Why this recipe works
The method works because it respects two different clocks. Onions need long, moderate heat to break down their sugars and turn amber without burning; pork tenderloin needs high heat briefly, then a gentle finish, or it turns chalky.
Running both in one pan in sequence solves the conflict: the sear happens first, at the heat the pork likes, and the leftover fond seasons the onions during their long, low cook. Nothing stands idle, and nothing overcooks.
The second secret is the sauce path. The broth deglazes the caramelized onion pan, picking up every browned bit, then sits out while the pork bakes so it can be reduced and thickened at the end with a quick cornstarch slurry.
Because the sauce never dilutes the onions under the meat, the layer stays concentrated and jammy, and the finished slices get coated in something glossy and intense rather than watery. Temperature, not guesswork, decides when the pork comes out.
Notes and substitutions
Choose two tenderloins around 1 lb each for even cooking; a single oversized one runs unevenly. Yellow onions are the classic choice because their high sugar and sulfur content build the deepest flavor, and three large ones sound like a lot but collapse dramatically.
Low-sodium beef broth gives control over the final seasoning, and fresh thyme beats dried here, though dried works in a pinch.
Equipment matters more than technique: an oven-safe skillet handles the sear and the caramelizing, and a white ceramic baking dish holds the assembly. An instant-read thermometer is strongly recommended — tenderloin is slender and moves from perfect to dry in minutes. If the onions threaten to scorch, lower the heat and add a splash of water rather than raising it; slow color is the goal.
- yellow onions: Sweet onions caramelize even faster and give a softer, rounder sauce; use the same weight and keep the heat moderate so they never scorch.
- beef broth: Chicken broth or unsalted vegetable broth works well; pick a low-sodium version so the sauce can be seasoned to taste at the end.
- fresh thyme: Use 3/4 tsp dried thyme, added with the garlic, or a sprig of fresh rosemary removed before baking.
- cornstarch slurry: Whisk 1 tbsp all-purpose flour into the onions and cook 1 minute before adding the broth; the sauce will be slightly denser and silkier.
Equipment
- large oven-safe skillet
- wooden spoon
- white ceramic baking dish
- instant-read thermometer
- tongs
- sharp carving knife
- cutting board
- small bowl
Up next · Part 2 of 3
10 steps · 45 min of cooking · what to look for at each stage
Step-by-step instructions (Part 2)