Dinner · Part 3 of 3: Tips & recipe card
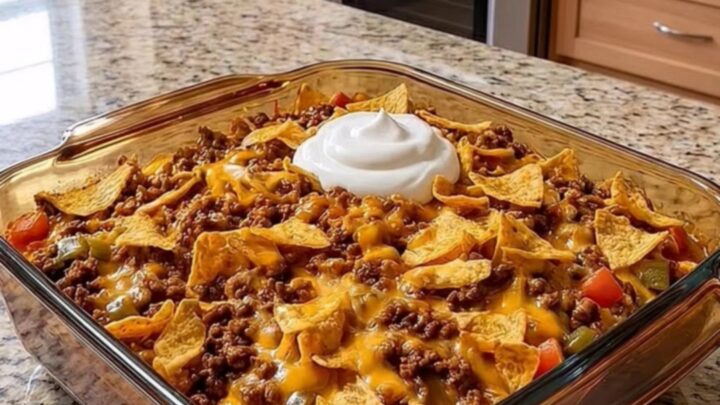
Easy Walking Taco Bake for a Crowd Tips, FAQ & printable recipe
- Prep
- Cook
- Total
- Serves
- 6
Tips for success
If you find that the edges of the casserole are browning too quickly, you can loosely tent the dish with aluminum foil for the first half of the baking time. This allows the center to heat through properly without burning the cheese on the perimeter.
Always remove the foil for the final few minutes of baking to ensure the cheese develops that perfect golden color and crispy finish that makes this dish so enjoyable to eat.
To add extra freshness, consider serving the bake with a side of diced tomatoes, shredded lettuce, or fresh cilantro. These additions provide a cool, crisp contrast to the warm, hearty casserole.
Adding these toppings at the table allows everyone to customize their portion to their own liking, which is particularly helpful when serving to a group with different preferences. Keep the toppings in separate bowls for a self-serve taco bar setup that feels festive and fun.
Variations
- Spicy Taco Bake: Add a tablespoon of chopped canned chipotle peppers or a dash of hot sauce to the ground beef while it browns to introduce a smoky, spicy kick to the dish.
- Vegetarian Taco Bake: Substitute the ground beef with a mixture of black beans, corn, and diced bell peppers, sautéing them briefly before layering to ensure they are tender and flavorful.
Storage and make-ahead
- Fridge
- Store in an airtight container for up to 3 days.
- Reheat
- Reheat in a 350°F (175°C) oven until warmed through, or use a microwave for a quicker option, though the chips will be softer.
If you have leftovers, allow the dish to cool completely for no more than 2 hours before transferring it to an airtight container. Store it in the refrigerator, where it will keep for up to 3 days. When ready to eat, reheat portions in the oven or a microwave until heated through, though the chips will lose some of their original crunch during the storage process.
You can prepare the ground beef mixture ahead of time and store it in the refrigerator for up to 24 hours. When you are ready to serve, simply assemble the layers with the fresh chips and cheese and bake as directed.
This saves significant time on busy evenings while ensuring the chips remain as crunchy as possible, as they are best when they have not been sitting in the beef juices for an extended period.
Serving ideas
Serve the walking taco bake directly from the baking dish for a casual, family-style presentation. Use a sturdy spatula to scoop generous portions onto plates, ensuring each serving gets a good mix of the beef, cheese, and crunchy chips. The combination of textures is best enjoyed immediately while the cheese is still warm and gooey, so encourage everyone to dig in as soon as it is plated.
For a more interactive experience, place the sour cream and any optional fresh toppings like diced tomatoes or cilantro in the center of the table.
This allows each person to garnish their own serving, making the meal feel more like a custom taco bar. The warmth of the casserole pairs well with a simple side salad or some fresh lime wedges to brighten the savory flavors of the seasoned meat.
Frequently asked questions
Can this be made ahead of time?
What is the best way to keep the chips crunchy?
How can the leftovers be reheated?
Easy Walking Taco Bake for a Crowd
Ingredients
- 1 lb ground beef
- 6 cups corn chips
- 2 cups shredded cheddar cheese
- 1/2 cup sour cream
Instructions
- Heat a large skillet over medium-high heat. Add the ground beef and cook, breaking it into small pieces with a spatula, until it is fully browned and no pink remains. Ensure the beef reaches an internal temperature of 160°F (71°C) to ensure it is cooked through safely.
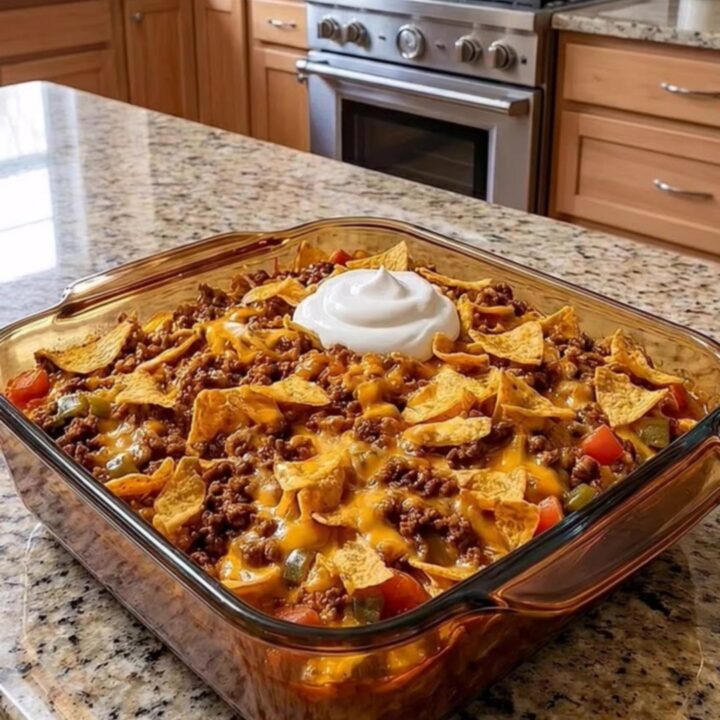
- Preheat your oven to 375°F (190°C). In a 9x9 inch glass baking dish, spread an initial layer of corn chips, followed by the cooked ground beef, and a generous portion of shredded cheddar cheese. Repeat these layers until all ingredients are used, ensuring the final layer is finished with cheese to create a golden crust.
- Place the baking dish in the preheated oven and bake for 15 to 20 minutes, or until the cheese is bubbling and golden brown. Remove the dish from the oven and let it rest for 5 minutes. Top the center with a dollop of sour cream and the remaining crushed corn chips before serving immediately.
Estimated nutrition per serving
- Calories
- 450
- Protein
- 22 g
- Carbohydrates
- 35 g
- Fat
- 25 g
- Fiber
- 3 g
- Sugar
- 2 g
- Sodium
- 750 mg
Next recipe

Golden Chicken Cordon Bleu Stromboli
See the recipe → →This recipe is based on a short cooking video and is published under the pen name Clara Weller. It was checked before publication, but errors can slip through. Nutrition, when shown, is an estimate. Read more in our editorial policy and on our food safety page.
More recipes to try

Cozy Beef and Noodle Casserole for a Comforting Dinner
Total time: 50 min
Loaded Beef Nacho Bake for Easy Game Day Snacking
Total time: 35 min
Creamy Chicken Alfredo Lasagna Rolls
Total time: 55 min
Easy Reuben Casserole with Melted Cheese
Total time: 50 min
Crispy Reuben Crescent Bake with Melted Swiss Cheese
Total time: 40 min