Desserts · Part 2 of 3: Instructions
Easy Red Velvet Gooey Butter Cake with White Chocolate Chips Step-by-step instructions
- Prep
- Cook
- Total
- Serves
- 12
Before you start
Take the cream cheese filling and the red velvet dough out of the refrigerator about thirty minutes before baking; a slightly relaxed dough presses without cracking, and a filling at cool room temperature spreads into an even layer instead of tearing the base. Heat the oven to 350°F (175°C) with a rack in the center.
Grease the 9x13-inch dish or line it with parchment, leaving an overhang on the two long sides. Measure the white chocolate chips and set out the offset spatula. Have a wire rack ready for cooling — the cake needs a full two hours in the dish before it is cut.
Ingredients at a glance (3)
- 1 lb red velvet cake dough, store-bought or made ahead
- Cream cheese filling, to taste (store-bought or made ahead)
- 3/4 cup white chocolate chips
Instructions
Press the Base
- Prep the Dish and OvenHeat the oven to 350°F (175°C) with a rack in the center, and grease a 9x13-inch baking dish or line it with parchment, leaving an overhang on the two long sides so the finished cake lifts out cleanly for neat, even squares.Look for The oven should be fully preheated and the dish ready before any mixing starts, so nothing waits around once the filling is poured.Tip Parchment with side overhangs lifts the whole cooled cake out in one piece for the cleanest cutting later.
- Press the Red Velvet BasePress the red velvet cake dough into an even, flat layer across the bottom of the prepared dish, patting it into the corners with your fingertips or the bottom of a measuring cup so the base bakes uniformly from edge to edge.Look for The dough should cover the bottom edge to edge in one even thickness, with no thin or bare patches showing the dish.Tip Dust your fingertips with flour or use the flat bottom of a measuring cup if the dough sticks.
When this phase is done, the dish holds a flat, even red velvet base that covers the bottom completely, edge to edge and corner to corner, with no thin patches showing the dish beneath. The surface should look smooth and slightly compressed where it was patted down, and the oven should be fully preheated to 350°F (175°C) so the dish can go in the moment the filling is ready.
Press firmly but do not pack the dough hard — a heavily compacted base bakes dense and hard rather than tender and chewy. Check the corners especially; dough that retreats from a corner bakes up thin and can scorch there while the rest of the base is still perfect.
Build the Layers
- Smooth the FillingStir the cream cheese filling in its bowl until completely smooth and spoonable, about 1 minute, scraping the bottom so no dense pocket hides there; a filling straight from the refrigerator spreads far more evenly after a brief rest at room temperature.Look for The filling should look completely smooth and thick, with no dense or lumpy pocket left at the bottom of the bowl.Tip Cold filling is firmer to spread; ten minutes at room temperature loosens it without weakening the set.
- Pour Over the BasePour the filling over the pressed base and let it flow toward the edges, then guide it gently with an offset spatula so it reaches every corner in one even layer, taking care not to disturb the red dough underneath as you work.Look for The filling should reach every corner in one even layer, with the red base still visible at the sides.Tip Tilt the dish gently rather than dragging the spatula to the very edge, so the base stays undisturbed.
- Scatter the ChipsScatter the white chocolate chips evenly over the filling, letting them sit on the surface where the oven's direct heat will soften them into creamy pockets; spread them with your fingertips so no spot piles up or stays bare.Look for The chips should sit in a single, even scattering across the whole surface, with no bare or piled spots.Tip Hold back a small handful of chips and add them halfway through baking for the most defined look.
The filling is ready when it looks completely smooth and thick, with no lumps and no dense pocket at the bottom of the bowl. Poured over the base, it should reach every corner in one even layer, and the white chocolate chips should sit scattered across the surface in a single, even scattering — not piled in any one spot.
The dish should look finished and ready for the oven: red base just visible at the sides, creamy filling above, chips on top. If the filling looks at all lumpy rather than creamy, stir another 30 seconds; lumps mean it has not fully relaxed yet, and they will show in the baked layer.
Bake and Cool
- Bake Until SetBake for 35 to 40 minutes, until the edges are pale golden and gently puffed and the top of the filling looks dry and set; the center should still look creamy, and that contrast is exactly what a gooey butter cake should show.Look for The edges should be pale golden and puffed, the surface dry and set, and the chips glossy where they have softened.Tip If the top colors before the center looks set, lay a sheet of foil loosely over the dish.
- Cool CompletelyCool the cake completely in the dish on a wire rack, about 2 hours, so the gooey layer settles from billowy to dense and creamy; do not judge the texture warm, because the middle firms to its signature sliceable state only when fully cooled.Look for As it cools, the filling settles and pulls slightly from the sides; the dish should feel close to room temperature at the base.Tip Resist cutting warm; a hot gooey layer smears, while a fully cooled cake cuts into clean, bakery-neat squares.
- Lift and CutLift the cooled cake out by the parchment overhang, or cut it straight in the dish, slicing into 12 even squares with a long thin knife; wipe the blade between cuts for the cleanest edges, and serve the squares at room temperature.Look for Each square should show a deep red base under a creamy filling layer, holding its shape with clean cut edges.Tip Chill the cooled cake for 30 minutes before cutting for the sharpest squares, then bring them back to room temperature.
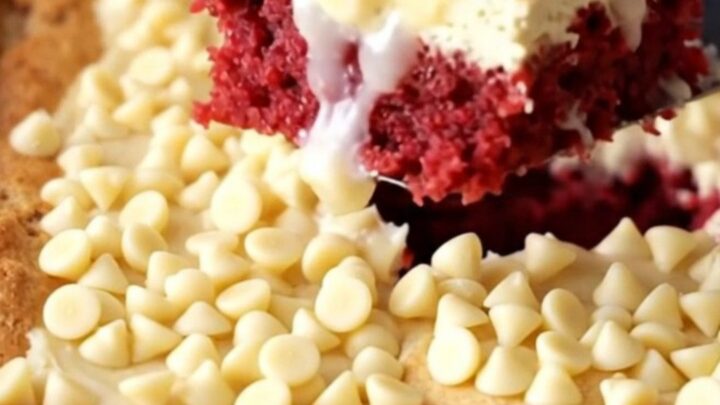
Out of the oven, the cake shows a pale golden, set top with puffed, lightly browned edges and chips that have gone glossy and slightly toasted. As it cools for about two hours in the dish, the gooey layer settles from billowy to dense and creamy, pulling slightly away from the sides. Do not judge the texture warm — the middle will seem too tender at first and will firm to its signature sliceable-gooey state only when fully cooled. Once the dish feels close to room temperature at the base, the cake is ready to lift out and cut into twelve squares.
Common mistakes
The most common trouble starts with an uneven base: thin spots bake hard while thick spots stay doughy, so pat the dough level corner to corner before the filling goes on. A filling straight from the refrigerator tears the soft base as it spreads; give it a few minutes at room temperature and stir it smooth first.
Overbaking is the other trap — the cake should come out with pale golden edges, not browned ones, and a dry, set surface. Finally, resist cutting warm: a hot gooey layer smears and sticks, while a fully cooled cake cuts into clean, bakery-neat squares.
How to tell it’s done
Look for three signs. First, the top: pale golden at the edges, dry and set across the surface, with the chips glossy where they have softened. Second, the shake: gently nudge the dish and the filling should move as one creamy layer, not ripple in waves — the center will still look tender and that is exactly right. Third, the sides: the filling pulls slightly from the dish walls and the edges sit a little puffed. Total bake time is usually 35 to 40 minutes. If the edges color too quickly, lay a sheet of foil loosely over the dish and continue.
Up next · Part 3 of 3
4 variations · storage & make-ahead · 5 answers · printable card
Tips, FAQ & printable recipe (Part 3)← Back to the ingredients (Part 1)