Desserts · Part 2 of 3: Instructions
Easy Pumpkin Pie Crescent Bars for Fall Step-by-step instructions
- Prep
- Cook
- Total
- Serves
- 12
Before you start
Before starting, ensure your oven is preheated to 375°F (190°C) to allow for consistent baking. Have your 9x13 inch baking dish clean and ready on a flat surface.
Take your crescent dough out of the refrigerator just before you begin to keep it manageable, and ensure your pumpkin pie filling is at room temperature for the smoothest application.
Ingredients at a glance (3)
- 2 cans refrigerated crescent dough
- 30 oz canned pumpkin pie filling
- 2 tbsp cinnamon sugar
Instructions
Assembling the base
- Prepare the crustPreheat your oven to 375°F (190°C). Take the refrigerated crescent dough sheets and unroll them into a large 9x13 inch rectangular baking dish. Press the dough firmly into the bottom of the dish, ensuring the corners are flat and the seams are sealed to create a uniform base for the filling.Look for The dough should cover the entire bottom of the baking dish evenly without large gaps or folds.Tip If the dough tears, simply pinch the seams together with your fingers to repair it.
The dough should be pressed firmly into the bottom of the dish, creating a smooth and even layer that covers every corner without any significant gaps, holes, or overlapping folds.
Adding the filling
- Add filling and toppingPour the pumpkin pie filling evenly over the prepared crescent dough base. Use a spatula if necessary to spread it out to the edges. Sprinkle the cinnamon sugar uniformly across the top of the pumpkin layer to add a sweet, spiced finish before the bars go into the oven.Look for The filling should look smooth and be evenly distributed across the entire surface of the dough.Tip Using a glass pitcher helps control the pour to keep the crust edges clean.
The pumpkin filling should be spread evenly across the dough, reaching all the way to the edges, and the cinnamon sugar should be sprinkled in a thin, uniform layer across the top surface.
Baking to perfection
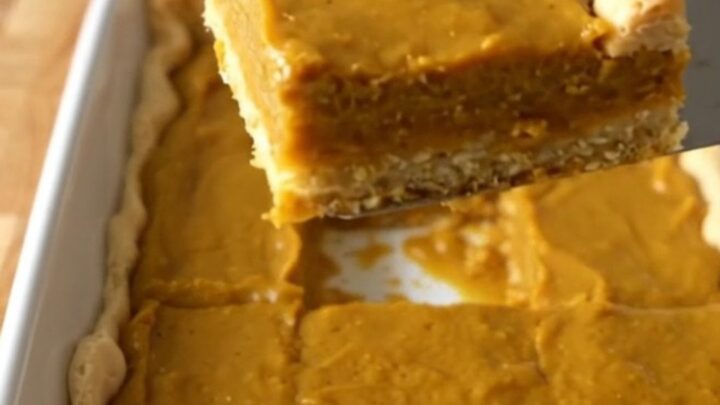
- Bake and coolPlace the dish in the preheated oven and bake for 25 minutes, or until the crust edges are golden brown and the pumpkin filling is set. Remove from the oven and allow to rest for at least 15 minutes before slicing into neat squares to serve.Look for The edges should be golden brown and the center should be firm to the touch.Tip Letting the bars cool fully ensures cleaner slices when you cut them into squares.
The edges of the crust will turn a rich golden brown, and the pumpkin filling will become firm and smooth, indicating that the bars are ready to be removed from the oven.
Common mistakes
Avoid overfilling the dish, as this can lead to a soggy crust that fails to crisp properly.
Ensure the crescent dough is sealed well at the seams to prevent the filling from leaking underneath the crust.
Finally, do not slice the bars while they are piping hot, as the filling needs time to firm up as it cools down.
How to tell it’s done
The bars are done when the edges of the crescent dough are a deep golden brown and the pumpkin filling appears set and firm when the dish is gently shaken.
The center should not wobble significantly. Allow the bars to rest for 15 minutes to let the filling finish setting before slicing.
Up next · Part 3 of 3
2 variations · storage & make-ahead · 3 answers · printable card
Tips, FAQ & printable recipe (Part 3)← Back to the ingredients (Part 1)