Desserts · Part 2 of 3: Instructions
Easy No-Bake Pineapple Cream Dessert with Graham Crust Step-by-step instructions
- Prep
- Cook
- Total
- Serves
- 8
Before you start
Before beginning, ensure that all necessary ingredients are measured and ready to use. The cream cheese must be softened to room temperature to ensure a smooth, lump-free filling. Prepare your 9x9 inch glass baking dish by clearing a space in the refrigerator, as the dessert will need to chill immediately after assembly.
Having your mixing bowls, spatula, and measuring tools clean and dry will facilitate a seamless process, allowing you to focus on achieving the perfect consistency for both the crust and the creamy pineapple layer.
Ingredients at a glance (4)
- 1 1/2 cups graham cracker crumbs
- 16 oz cream cheese, softened
- 16 oz crushed pineapple, drained
- 8 oz whipped topping
Instructions
Crust Formation
- Prepare the CrustPress the graham cracker crumbs firmly into the bottom of a 9x9 inch glass baking dish to form an even base.Look for The crumbs should be evenly spread and hold their shape when pressed.Tip Use the bottom of a measuring cup to press the crumbs down firmly for a more compact and sturdy crust layer.
The crust should be pressed into a uniform layer at the bottom of the baking dish. It should look cohesive and feel dense, with no loose crumbs remaining on the surface. The edges should be straight and clean against the glass walls, ensuring a solid foundation for the subsequent layers. If the mixture appears too crumbly, ensure the crumbs are fine and press again until the texture is correct.
Filling Preparation
- Make the Pineapple FillingIn a large mixing bowl, beat the softened cream cheese until smooth and creamy. Gently fold in the drained crushed pineapple and the whipped topping until the mixture is uniform and light.Look for The mixture should appear smooth, fluffy, and well-incorporated without any large lumps of cream cheese.Tip Ensure the cream cheese is at room temperature to avoid lumps in the final filling texture.
The filling should have a smooth, homogeneous appearance with a light, airy texture. The pineapple pieces should be evenly distributed throughout the cream cheese mixture, and the color should be uniform. The mixture should feel thick enough to hold its shape on the spatula without dripping rapidly. Check for any large, unmixed lumps of cream cheese and continue folding gently until the consistency is perfectly smooth and velvety.
Final Assembly and Setting
- Assemble and ChillSpread the pineapple cream mixture evenly over the prepared graham crust. Refrigerate the dessert for at least one hour before slicing to allow the layers to set properly.Look for The dessert should feel firm to the touch and hold its shape when sliced.Tip A clean, warm knife makes slicing through the chilled layers much easier and keeps the edges neat.
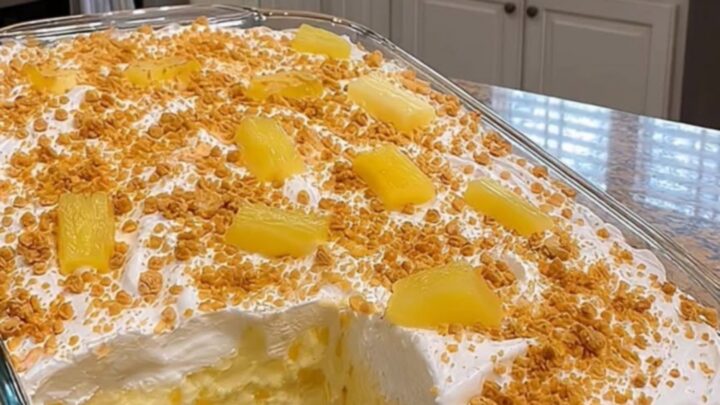
The filling should be spread evenly over the crust, reaching all corners of the dish. The surface can be smoothed with a spatula for a professional look or left with soft peaks for a rustic feel.
Once the dish is placed in the refrigerator, it should remain undisturbed for the duration of the chilling process. The final result will be a cool, set dessert that presents beautifully with defined, contrasting layers of crumb and pineapple cream.
Common mistakes
A common mistake is failing to drain the crushed pineapple adequately, which introduces excess moisture and prevents the filling from setting into a sliceable consistency.
Another error is not softening the cream cheese enough; cold cream cheese will not incorporate evenly with the other ingredients, leading to unpleasant lumps. Additionally, avoid over-mixing the filling once the whipped topping is added, as this can deflate the mixture and result in a dense, rather than airy, final texture.
How to tell it’s done
The dessert is considered done when the filling has firmed up sufficiently to hold its shape when sliced. After the required refrigeration time, the surface should feel set and slightly springy to the touch.
When using a clean knife, the slices should emerge with clean, distinct layers. If the filling appears too soft or runny, continue to refrigerate for an additional thirty minutes, as the chilling process is crucial for the structural integrity of the dessert.
Up next · Part 3 of 3
2 variations · storage & make-ahead · 3 answers · printable card
Tips, FAQ & printable recipe (Part 3)← Back to the ingredients (Part 1)