Desserts · Part 1 of 3: Ingredients
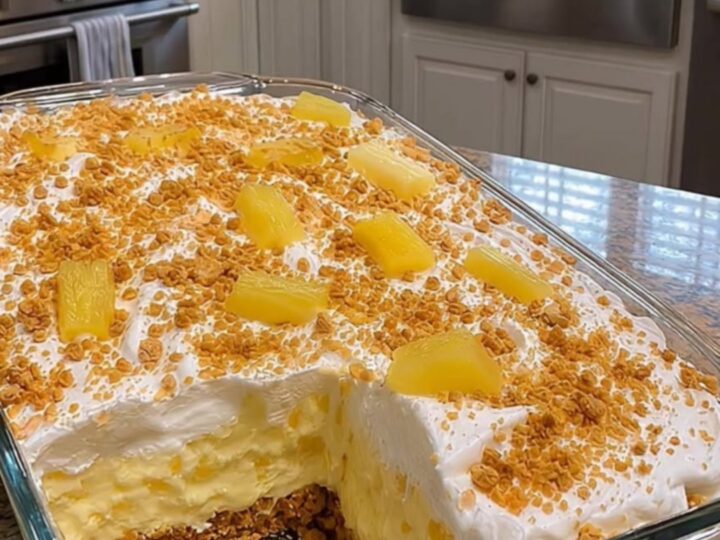
Easy No-Bake Pineapple Cream Dessert with Graham Crust
- Prep
- Cook
- Total
- Serves
- 8
Indulge in a delightful no-bake pineapple cream dessert that blends a golden graham cracker crust with a luscious, velvety pineapple-infused filling. This simple treat is designed for those who appreciate a quick, sophisticated dessert that impresses every time without the need to turn on the oven.
Each bite offers a harmonious balance of textures, from the crisp base to the airy, smooth cream layer, making it an ideal choice for busy schedules and relaxed gatherings alike.
This no-bake recipe is the perfect solution for satisfying cravings for something sweet and refreshing with minimal effort. By utilizing pantry staples like graham crackers, cream cheese, and canned pineapple, this dessert comes together rapidly, ensuring that you spend less time in the kitchen and more time enjoying the results.
Whether you are hosting a casual brunch, preparing for a dinner party, or simply treating yourself, this dish delivers a consistent, high-quality result that is sure to become a staple in your collection of go-to recipes. Its elegant appearance, characterized by clearly defined layers and a bright, inviting color, makes it a centerpiece that looks as good as it tastes.
Ingredients
Crust
- 1 1/2 cups graham cracker crumbs
Filling
- 16 oz cream cheese, softened
- 16 oz crushed pineapple, drained
- 8 oz whipped topping
Why this recipe works
The method of pressing a crumb mixture directly into the serving dish creates an immediate, stable base that does not require baking. This technique relies on the natural density of the crumbs to hold together as they chill, resulting in a firm crust that provides a satisfying crunch against the soft filling. The lack of heat ensures the delicate pineapple flavor remains vibrant and fresh throughout the entire dessert.
Folding the pineapple and whipped topping into the cream cheese creates an aerated, mousse-like consistency that is light yet rich. This approach avoids the need for complex thickening agents or lengthy chilling times associated with custards.
By incorporating the ingredients gently, the natural texture of the pineapple is preserved, and the whipped topping provides the necessary volume to keep the filling stable and easy to slice once it has been properly set in the refrigerator.
Notes and substitutions
Selecting high-quality cream cheese is essential, as it forms the body of the filling. Ensure the cream cheese is fully softened to room temperature before beginning, as this prevents the formation of lumps that can compromise the texture. Draining the crushed pineapple thoroughly is equally important; excess liquid can prevent the filling from setting properly, so take the time to remove as much syrup or juice as possible before adding it to the cream cheese mixture.
The choice of graham crackers can influence the final flavor; standard honey-flavored crackers work well, but cinnamon-flavored varieties can add a warm depth to the crust.
If a 9x9 inch dish is unavailable, an 8x8 inch dish will yield a thicker dessert, while a slightly larger rectangular dish will result in thinner, more delicate layers. Always ensure the dish is glass or ceramic to allow for a clean presentation, as the beautiful layering is a key component of this dessert's appeal.
- graham cracker crumbs: crushed digestive biscuits or vanilla wafers
- whipped topping: stabilized homemade whipped cream
Equipment
- 9x9 inch glass baking dish
- Mixing bowls
- Silicone spatula
- Measuring cups and spoons