Desserts · Part 2 of 3: Instructions
Easy No-Bake Oreo Icebox Cake Step-by-step instructions
- Prep
- Cook
- Total
- Serves
- 8
Before you start
Ensure the heavy whipping cream is kept in the coldest part of the refrigerator until the exact moment you are ready to start. Prepare the mixing bowl by chilling it in the freezer for ten minutes, which significantly helps the cream achieve maximum volume.
Clear enough space in your refrigerator to accommodate the 9-inch glass dish on a level surface. Have your offset spatula and electric mixer ready to go, as the whipping process happens quickly once the ingredients are combined.
Ingredients at a glance (2)
- 24 count chocolate sandwich cookies
- 3 cups heavy whipping cream, chilled
Instructions
Whipping the cream
- Prepare the whipped creamPour the heavy whipping cream into a large chilled mixing bowl. Using an electric hand mixer, begin whipping on medium speed until the cream starts to thicken. Continue to whip the mixture until stiff peaks form, ensuring the cream holds its shape without becoming buttery.Look for The whipped cream should be thick, smooth, and hold firm peaks when the beaters are lifted.Tip Ensure the cream is very cold before whipping to achieve the best volume and texture.
The whipped cream should be thick and glossy, with stiff peaks that stand straight up when the beaters are lifted. It must be stable enough to support the weight of the cookies without deflating. Check for a smooth, airy texture and ensure that the cream is fully incorporated without any graininess or separation remaining in the final mixture.
Layering the cake
- Assemble the layersSpread a thin layer of the prepared whipped cream onto the bottom of a 9-inch square glass dish to prevent the cookies from sliding. Arrange a single layer of chocolate sandwich cookies over the cream. Spread another layer of whipped cream over the cookies, smoothing it out with an offset spatula. Repeat these layers until all cookies are used, finishing with a final layer of whipped cream on top.Look for The layers should be even, with the whipped cream completely covering the cookies on each level.Tip Use an offset spatula to reach into the corners of the dish for a uniform look.
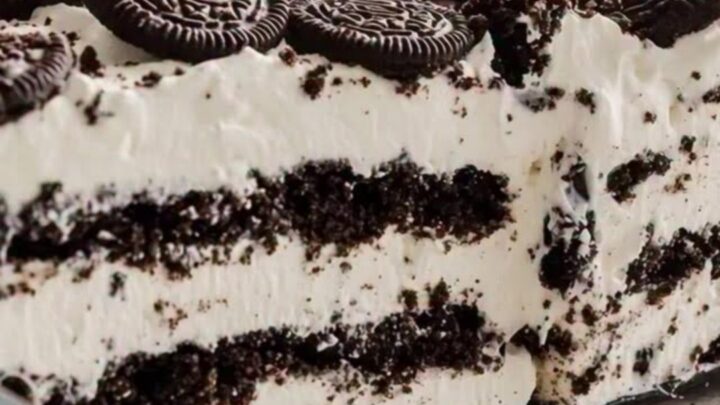
The layers should be visually consistent, with each cookie layer completely encased in a layer of cream. Ensure the edges are filled properly so the cake looks uniform when sliced.
The final layer of cream should be spread smoothly to create an attractive, flat surface, providing a clean finish that will look professional after the final chilling period.
Final chilling
- Chill and setCover the glass dish with plastic wrap and place it in the refrigerator. Allow the cake to chill for at least 4 hours, or ideally overnight, to let the cookies absorb moisture from the cream and soften into a cake-like consistency. Remove from the refrigerator, slice into squares, and serve immediately while cold.Look for The cake is ready when the cookies are soft enough to be easily cut through with a fork.Tip Chilling overnight yields the best results for a cohesive, sliceable cake.
The cake is properly set when it feels firm to the touch and the cookies have fully softened. The structure should feel unified, with no individual components sliding or shifting when the dish is tilted slightly. Before serving, verify that the dessert has chilled for the full duration to ensure the best possible texture and ease of slicing.
Common mistakes
A common error is rushing the chilling process; if the cake is removed from the refrigerator too soon, the cookies will remain crunchy, ruining the desired texture. Another mistake is over-whipping the cream, which can cause it to turn into butter; stop immediately once stiff peaks form.
Additionally, failing to spread the cream evenly across each layer can lead to an uneven, lopsided cake. Finally, ensure the container is covered properly to prevent the cream from absorbing other odors from the refrigerator.
How to tell it’s done
The dessert is done when the cookies have softened completely, which can be tested by gently pressing a fork into the center of the cake. It should offer minimal resistance, similar to cutting through a traditional sponge cake.
The layers should appear distinct yet unified, with no visible liquid pooling at the bottom of the dish. When sliced, the cake should hold its form perfectly, revealing the intricate, alternating pattern of dark cookies and white cream without crumbling or sliding apart on the plate.
Up next · Part 3 of 3
2 variations · storage & make-ahead · 3 answers · printable card
Tips, FAQ & printable recipe (Part 3)← Back to the ingredients (Part 1)