Dinner · Part 1 of 3: Ingredients
Crockpot Sweet and Sour Pineapple Chicken: Easy Takeout Fakeout
- Prep
- Cook
- Total
- Serves
- 6
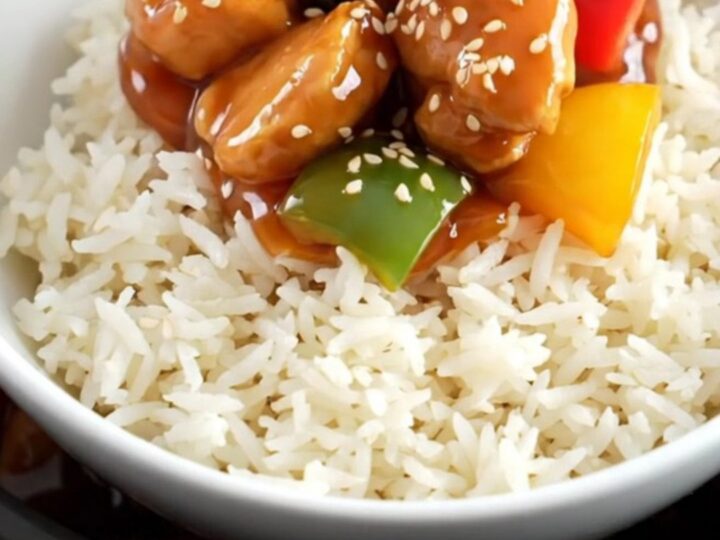
This Crockpot sweet and sour pineapple chicken is the ultimate weeknight dinner hack. Tender chicken, sweet pineapple, and crisp-tender bell peppers are simmered in a tangy, glossy sauce that tastes just like your favorite takeout—but without the delivery fee.
The slow cooker does all the work while you go about your day. Serve it over steamed rice for a complete meal that the whole family will love. It's easy, delicious, and perfect for busy nights when you need dinner on the table with minimal effort.
Forget ordering in—this slow cooker version of sweet and sour chicken is a game-changer. You simply dump cubed chicken, bell peppers, pineapple, and a homemade sweet and sour sauce into the Crockpot, then let it cook on high for three hours.
The result is juicy, fork-tender chicken coated in a thick, glossy glaze that's both sweet and tangy. Serve it over steamed rice with a sprinkle of sesame seeds, and you have a restaurant-quality meal at home. This recipe is perfect for meal prep, family dinners, or anytime you crave that classic takeout flavor.
Ingredients
- 2 lb boneless, skinless chicken breasts, cut into 1-inch cubes
- 1 red bell pepper, diced
- 1 green bell pepper, diced
- 1 can (20 oz) pineapple chunks in juice, drained
Sweet and Sour Sauce
- 1/2 cup apple cider vinegar
- 1/2 cup ketchup
- 1/2 cup packed brown sugar
- 3 tbsp low-sodium soy sauce
Slurry
- 3 tbsp cornstarch
- 3 tbsp water
For Serving
- Steamed white rice, for serving
- Sesame seeds, for garnish, to taste
Why this recipe works
The slow cooker method ensures the chicken stays incredibly tender and moist. Cooking on high for three hours is just enough time for the chicken to cook through without drying out, and the sauce reduces and concentrates in flavor.
The low, steady heat allows the chicken to absorb the sweet and sour sauce, so every bite is packed with flavor.
Using a cornstarch slurry at the end is the key to achieving that thick, glossy sauce that clings to the chicken and peppers. It's a simple step that transforms the thin cooking liquid into a luxurious glaze. Plus, the dump-and-go method means minimal prep and easy cleanup—just toss everything in the slow cooker and walk away.
Notes and substitutions
For the best results, use boneless, skinless chicken breasts and cut them into uniform 1-inch cubes so they cook evenly. If you prefer dark meat, chicken thighs work beautifully and stay even more moist. The bell peppers should be diced into similar-sized pieces so they cook evenly and remain slightly crisp-tender.
This recipe calls for a 6-quart slow cooker, which is the perfect size for this amount of food. If your slow cooker is smaller, you may need to adjust the cooking time slightly.
The sauce is a balance of sweet and tangy—if you like it more sour, add an extra tablespoon of vinegar; if you prefer it sweeter, add a bit more brown sugar.
- chicken breasts: chicken thighs, cut into cubes; they stay even more tender during the long cook.
- low-sodium soy sauce: regular soy sauce, but reduce the added salt elsewhere; or use tamari for a gluten-free option.
- apple cider vinegar: white vinegar or rice vinegar for a slightly milder tang.
- brown sugar: coconut sugar or a 1/2 cup of honey, added with the sauce ingredients.
Equipment
- 6-quart slow cooker
- Cutting board
- Chef's knife
- Measuring cups and spoons
- Small bowl for slurry
- Wooden spoon or spatula
Up next · Part 2 of 3
4 steps · 3 h of cooking · what to look for at each stage
Step-by-step instructions (Part 2)