Dinner · Part 1 of 3: Ingredients
Slow Cooker Pork Bulgogi: Sweet, Savory, Set-and-Forget
- Prep
- Cook
- Total
- Serves
- 4
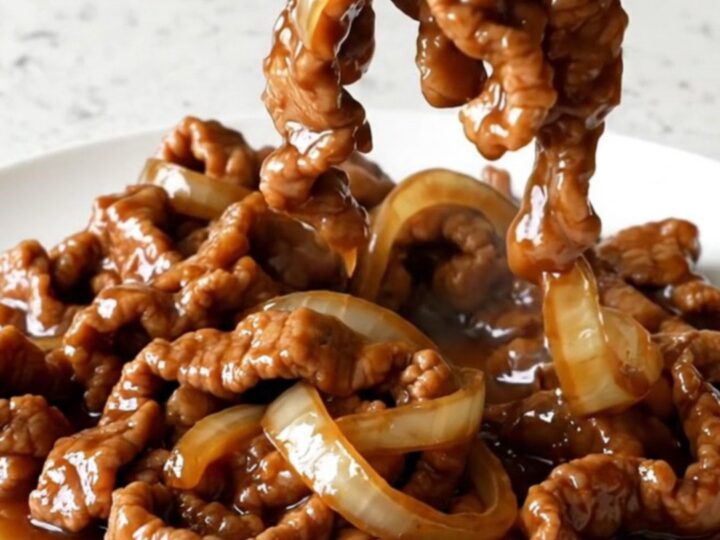
This slow cooker pork bulgogi turns a handful of simple ingredients into a deeply savory, slightly sweet Korean-inspired dinner with almost no effort. Thin strips of pork shoulder cook low and slow in a soy-pear sauce until they're fork-tender, while onions melt into the sauce and sesame seeds add a nutty finish.
Just layer everything in the crock, pour over the sauce, and walk away. The result is a rich, glossy dish that's perfect over rice or wrapped in lettuce leaves.
Bulgogi is a classic Korean dish of thinly sliced meat marinated in a sweet-savory sauce, traditionally grilled or stir-fried. This version takes a shortcut by using a slow cooker, which transforms the pork into meltingly tender strips while the sauce concentrates and thickens.
The key is the grated Asian pear, which not only adds natural sweetness but also helps tenderize the meat. With just a few minutes of prep, you can have a delicious, comforting dinner that tastes like it simmered all day—because it did. Serve it over steamed rice with kimchi on the side for a complete meal.
Ingredients
- 1 1/2 lb pork shoulder, thinly sliced into strips
- 1 medium yellow onion, thinly sliced into crescents
- 1 tsp garlic powder
- 1 tbsp sesame seeds
Bulgogi Sauce
- 1/2 cup soy sauce
- 1 ripe Asian pear, grated
- 2 tbsp brown sugar
- 3 cloves garlic, minced
- 1 tbsp fresh ginger, grated
- 1 tbsp toasted sesame oil
Why this recipe works
Cooking pork shoulder low and slow in a slow cooker breaks down the connective tissue, turning what could be a tough cut into fork-tender, succulent strips.
The gentle heat allows the meat to absorb the sweet and salty sauce without drying out, something that's hard to achieve with quick-cooking methods like stir-frying. The result is a deeply flavorful, melt-in-your-mouth texture that's perfect for bulgogi.
The sauce itself is a balanced blend of soy sauce, brown sugar, and grated Asian pear, which not only adds sweetness but also contains enzymes that help tenderize the meat.
As the pork cooks, the sauce reduces and thickens into a glossy glaze that clings to every strip. The onions cook down into soft, sweet strands that meld with the sauce, and the sesame seeds provide a nutty crunch that contrasts with the tender meat.
Notes and substitutions
For the best texture, choose pork shoulder (also labeled pork butt or Boston butt) and slice it thinly against the grain. If the pork is partially frozen, it's easier to slice into thin strips. You can also use pork loin or tenderloin, but they will be leaner and can dry out more easily; reduce the cooking time to 3-4 hours on low.
Asian pear is traditional and has a crisp, floral sweetness that works beautifully here. If you can't find it, a ripe Bosc or Anjou pear, or even a sweet apple like Fuji or Gala, can be substituted. Grate it on a box grater and use the flesh and juices. The sauce can be made up to 2 days ahead and stored in the refrigerator.
- pork shoulder: pork loin or boneless country-style ribs, thinly sliced
- Asian pear: regular ripe pear or apple, grated (adds sweetness and tenderizing enzymes)
- soy sauce: tamari or coconut aminos for a gluten-free option (use tamari for gluten-free)
- brown sugar: honey or maple syrup (reduce liquid slightly)
Equipment
- Slow cooker (5-6 quart)
- Cutting board
- Chef's knife
- Small bowl for sauce
- Measuring cups and spoons
- Grater
Up next · Part 2 of 3
7 steps · 4 h of cooking · what to look for at each stage
Step-by-step instructions (Part 2)