Desserts · Part 2 of 3: Instructions
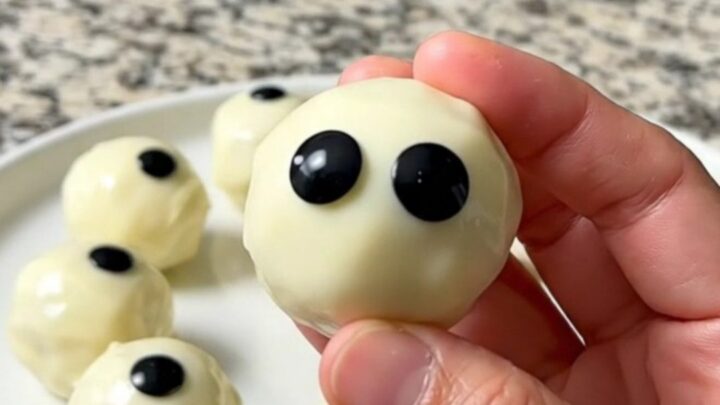
Easy Cookie Truffle Eyeballs for Spooky Treats Step-by-step instructions
- Prep
- Cook
- Total
- Serves
- 12
Before you start
Before beginning, ensure that all components are gathered and ready on the counter. Line a dark baking sheet with parchment paper to provide a clean nonstick surface. Have the dark cookie truffle balls chilled and ready to handle.
Set out a heatproof clear glass bowl, a standard dinner fork for dipping, and ensure the candy eyes are unwrapped and accessible within arm's reach of the workspace.
Ingredients at a glance (3)
- 12 dark cookie truffle balls, store-bought or made ahead
- 10 oz white chocolate, melted
- 12 candy eyes
Instructions
Staging the truffle centers
- Arrange the cookie truffle ballsLine a dark baking sheet with parchment paper. Place the dark cookie truffle balls in neat rows across the prepared baking sheet so they are organized and ready for dipping.Look for The cookie truffle balls should be firm, chilled, and resting in even rows on the parchment paper.Tip Keeping the truffle balls chilled prevents them from breaking apart or losing their round shape during dipping.
The dark cookie truffle balls should be arranged in neat, spaced rows across the parchment paper.
They should feel cool and firm to the touch, holding a smooth spherical shape without flattening out on the bottom. Confirm that all balls are intact before beginning the dipping phase.
Coating with melted white chocolate
- Dip the truffles in white chocolateMelt the white chocolate in a clear glass bowl until completely smooth. Using a fork, submerge each cookie truffle ball into the melted white chocolate until thoroughly coated, lift it out while letting excess chocolate drip through the tines, and return it to the parchment-lined sheet.Look for The coating should look smooth, glossy, and evenly distributed without heavy pooling around the base.Tip Gently tap the fork against the edge of the glass bowl to release any excess melted chocolate before transferring.
Each truffle ball should be enveloped in a smooth, opaque layer of melted white chocolate. Excess coating should be allowed to drip off so that excessive pooling does not form at the base on the tray. The surface must look glossy and fluid as each ball is returned to the parchment.
Placing the candy eyes to set
- Attach the candy eyes and setWhile the white chocolate coating remains wet, press one candy eye onto the center of each coated truffle ball. Allow the finished truffle eyeballs to rest undisturbed until the white chocolate shell sets completely firm.Look for The candy eyes should be securely anchored in place, and the white chocolate coating should be solid and completely dry to the touch.Tip Apply the candy eye immediately after dipping each ball before the outer shell has a chance to firm up.
Every truffle should have a candy eye pressed firmly into its center while the chocolate is still liquid. Check that the eyes sit straight and level. After resting, the white chocolate should be entirely firm, matte or softly glossy, and completely solid to a light touch.
Common mistakes
A common mistake is working with white chocolate that is overly hot, which can cause the truffle center to soften and melt into the bowl.
Let the chocolate cool slightly to a warm, fluid consistency before starting. Another error is waiting too long to attach the candy eyes; if the coating begins to form a skin, the eyes will not adhere properly.
How to tell it’s done
The truffles are ready when the white chocolate coating has hardened completely across the entire surface. When gently touched, the shell should feel completely firm, dry, and cool to the touch with no soft or tacky spots.
Each candy eye must be securely set in the hardened chocolate, and the finished truffle should lift cleanly off the parchment paper without sticking or tearing.
Up next · Part 3 of 3
2 variations · storage & make-ahead · 4 answers · printable card
Tips, FAQ & printable recipe (Part 3)← Back to the ingredients (Part 1)