Desserts · Part 2 of 3: Instructions
Easy Cherry Almond Oat Crisp Step-by-step instructions
- Prep
- Cook
- Total
- Serves
- 8
Before you start
Before you begin, ensure that your oven is fully preheated to 375°F (190°C). Gather all your ingredients on the counter so they are within reach. It is helpful to have your butter cubed and kept in the refrigerator until the very last second before you start mixing the crumble.
Clear enough space on your workstation to accommodate the baking dish and the mixing bowl, ensuring you have a clean surface to work on for the assembly process.
Ingredients at a glance (6)
- 2 cans cherry pie filling
- 1 1/2 cups rolled oats
- 1 cup all-purpose flour
- 1 cup brown sugar
- 1/2 cup unsalted butter, chilled and cubed
- 1/3 cup sliced almonds
Instructions
Base assembly
- Prepare the cherry basePreheat the oven to 375°F (190°C). Pour the cherry pie filling into a 9x13 inch ceramic baking dish, spreading it out evenly to cover the entire bottom of the dish.Look for The cherries should form a smooth, uniform layer across the bottom.Tip Ensure the baking dish is clean and dry before adding the fruit filling.
The cherry filling should be spread into a smooth, even layer across the entire base of the ceramic dish. Ensure there are no large gaps or uneven mounds of fruit so that the heat distributes evenly during the baking process. The dish should be centered on the oven rack, and your oven must be fully preheated to ensure the cooking process starts immediately upon placing the dish inside.
Crumble preparation
- Assemble the crumbleIn a medium bowl, combine the rolled oats, all-purpose flour, and brown sugar. Add the chilled, cubed butter and work it into the dry ingredients using a pastry cutter or your fingers until the mixture resembles coarse crumbs.Look for The mixture should look like sandy, buttery clumps once the butter is fully incorporated.Tip Keep the butter cold so the topping stays crisp rather than greasy during baking.
The topping mixture should have the texture of coarse, buttery crumbs. You should be able to see small, pea-sized bits of butter throughout the mixture, which is exactly what you want for a crispy result.
If the mixture feels too wet or sticky, add a tablespoon of flour at a time until you reach the desired crumbly consistency. Ensure the oats and flour are fully incorporated with the butter before proceeding to the final assembly.
Baking and finishing
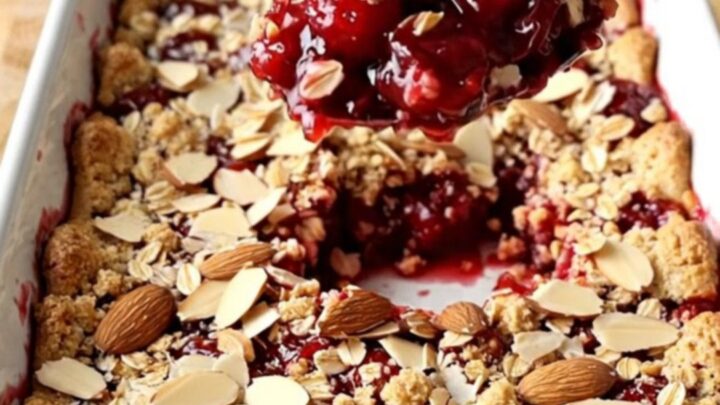
- Bake the crispScatter the prepared oat crumble evenly over the cherry filling. Sprinkle the sliced almonds over the top. Place in the oven and bake for 30 to 35 minutes until the filling is bubbling at the edges and the topping is golden brown.Look for Look for the cherry juices to be actively bubbling around the edges of the dish.Tip Let the crisp rest for 10 minutes before serving to allow the juices to thicken slightly.
The final phase is complete when the cherry filling is bubbling vigorously and the topping has transformed into a golden, crunchy crust. The sliced almonds should have a light tan color, indicating they have toasted correctly.
The entire kitchen should smell warm, buttery, and sweet. Once you remove the dish from the oven, place it on a heat-proof surface and allow it to rest, which is crucial for the perfect serving texture.
Common mistakes
Avoid over-mixing the crumble, as this can lead to a dense, paste-like consistency instead of a light, sandy texture. Another common mistake is failing to preheat the oven completely, which can result in a soggy topping because the butter melts before the oats have a chance to crisp up. Ensure you distribute the topping evenly across the entire surface of the cherries to provide consistent coverage in every single scoop.
How to tell it’s done
The crisp is finished when the cherry filling is visibly bubbling along the sides of the baking dish and the oat crumble has achieved a deep, golden-brown color. The almonds should be lightly toasted and fragrant.
If you press the center of the topping gently, it should feel firm and set rather than soft or mushy. Always allow the dish to rest for at least 10 minutes on a wire rack before serving to allow the juices to settle.
Up next · Part 3 of 3
2 variations · storage & make-ahead · 3 answers · printable card
Tips, FAQ & printable recipe (Part 3)← Back to the ingredients (Part 1)