Dinner · Part 2 of 3: Instructions
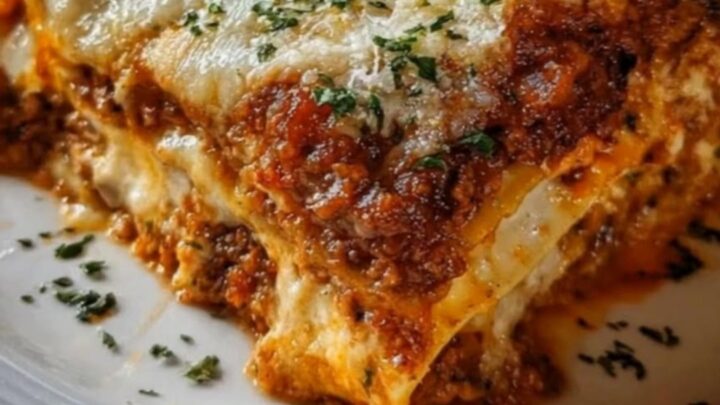
Easy Cheesy Meat Lasagna with Golden Crust Step-by-step instructions
- Prep
- Cook
- Total
- Serves
- 8
Before you start
Before you begin cooking, organize your workspace and gather all your ingredients. Boil the pasta sheets in a large pot of salted water according to the package directions, then drain them and lay them flat on parchment paper to prevent sticking.
Finely chop the fresh parsley for the garnish. Measure out your rich meat sauce, creamy cheese, and shredded cheese. Preheating your oven to 375°F (190°C) ensures it reaches the correct temperature by the time your assembly is complete, allowing for even cooking.
Ingredients at a glance (5)
- 4 cups rich meat sauce
- 12 pasta sheets, cooked
- 15 oz creamy cheese
- 3 cups shredded cheese, divided
- 2 tbsp chopped parsley, for garnish
Instructions
Preparing the Ingredients
- Simmer the Meat SauceHeat a large skillet over medium heat. Pour in the rich meat sauce and let it simmer gently for about 5 to 8 minutes, stirring occasionally. This heats the sauce through and concentrates its savory flavors, ensuring it is hot and ready for layering.Look for The sauce is hot, bubbling gently, and slightly thickened.Tip Stir the sauce occasionally to prevent it from sticking to the bottom of the skillet.
At the end of this phase, your rich meat sauce should be hot, fragrant, and bubbling gently in the skillet. Your pasta sheets should be cooked to al dente, drained, and laid out flat so they do not stick together.
The creamy cheese and shredded cheese should be measured and ready for assembly, ensuring a smooth and efficient layering process.
Assembling the Layers
- Start the Bottom LayersSpread 1 cup of the warm meat sauce evenly across the bottom of a 9x13-inch baking dish. Place 4 cooked pasta sheets side-by-side on top of the sauce, overlapping them slightly so they form a stable foundation for the cheese and sauce layers.Look for The bottom of the dish is fully coated with a thin layer of sauce under the pasta sheets.Tip A thin layer of sauce on the bottom prevents the pasta sheets from sticking to the dish.
- Layer the Cheese and SauceSpread half of the creamy cheese evenly over the pasta sheets. Spoon half of the remaining meat sauce over the creamy cheese, then sprinkle 1 cup of the shredded cheese on top. Repeat this process by adding another 4 pasta sheets, the remaining creamy cheese, another layer of meat sauce, and another cup of shredded cheese.Look for The layers are even and spread completely to the edges of the dish.Tip Use an offset spatula to spread the creamy cheese gently without tearing the pasta sheets.
- Assemble the Top LayerPlace the final 4 pasta sheets on top of the layers. Spread the remaining meat sauce evenly over the pasta, then sprinkle the remaining 1 cup of shredded cheese over the top to cover it completely, ensuring no pasta edges are left exposed.Look for The top of the lasagna is fully covered with cheese, hiding the pasta sheets.Tip Make sure cheese covers the edges of the pasta sheets so they do not dry out.
Your baking dish should be neatly packed with alternating layers of savory meat sauce, tender pasta sheets, creamy cheese, and shredded cheese. The top should be completely covered with a generous, even blanket of shredded cheese, with no pasta edges exposed to prevent them from drying out and becoming hard during baking.
Baking and Resting
- Bake to Golden PerfectionBake the assembled lasagna in the preheated oven at 375°F (190°C) for about 35 to 40 minutes. The cheese on top should become completely melted, bubbly, and deeply golden brown around the edges, indicating the dish is heated thoroughly.Look for The cheese is bubbly, deeply golden-brown, and the edges are slightly crispy.Tip Tent the foil slightly if the cheese begins to brown too quickly.
- Garnish and ServeRemove the lasagna from the oven and let it rest for 15 minutes to allow the layers to set. Sprinkle the chopped parsley over the golden cheese crust, then slice into squares and serve warm, enjoying the ultra-gooey cheese pull.Look for The lasagna is warm, firm enough to hold its shape when sliced, and beautifully garnished.Tip Use a sharp serrated knife to cut clean slices through the pasta layers.
When you pull the lasagna from the oven, the cheese on top should be deeply golden brown, with crisp, caramelized edges and active bubbling around the sides of the dish. After resting for 15 minutes, the lasagna should feel slightly firm to the touch, indicating the layers have set and are ready for clean slicing.
Common mistakes
One of the most common mistakes when making lasagna is slicing it immediately after removing it from the oven. While it is tempting to serve it hot, a freshly baked lasagna is too loose and will collapse into a messy heap on the plate.
Allowing the dish to rest for 15 minutes lets the cheese firm up and the layers set, ensuring clean, beautiful slices. Another mistake is using too much sauce between the layers, which can drown the pasta and make the final dish watery.
How to tell it’s done
To tell when the lasagna is perfectly cooked, look for active bubbling around the edges of the baking dish and a beautifully melted, golden-brown cheese crust on top.
Since all the ingredients are already cooked before assembly, the main goal is to heat the dish completely through and melt the cheeses. An instant-read thermometer inserted into the center of the lasagna should register at least 165°F (74°C) to ensure it is piping hot and ready to serve.
Up next · Part 3 of 3
2 variations · storage & make-ahead · 3 answers · printable card
Tips, FAQ & printable recipe (Part 3)← Back to the ingredients (Part 1)