Desserts · Part 2 of 3: Instructions
Easy Black and Orange Swirl Fudge Step-by-step instructions
- Prep
- Cook
- Total
- Serves
- 16
Before you start
Before you begin, ensure that your workspace is clean and that all ingredients are measured and ready, as the process moves quickly once you start swirling. Line your baking sheet with parchment paper, ensuring it covers the surface completely.
Having your orange candy already melted in a small, heat-safe bowl will allow you to proceed directly to the swirling phase while the chocolate base is at the ideal temperature for marbling.
Ingredients at a glance (3)
- 24 oz dark chocolate fudge, store-bought or made ahead
- 1/2 cup melted orange candy
- 2 tbsp orange, purple and black sprinkles
Instructions
Shaping the Fudge Base
- Prepare the Fudge BasePlace the thick slab of dark chocolate fudge onto a parchment-lined baking sheet. Use your hands to square the corners of the fudge to ensure a uniform shape.Look for The fudge should be in a thick, stable slab with even, squared edges.Tip Ensure the parchment paper is flat against the baking sheet for easier handling.
The base is ready when it is a uniform, thick slab with sharp, squared corners. It should be level and even across the parchment, providing a stable surface for the decorative swirls. The texture should be smooth and ready for the addition of the melted candy.
Marbling and Decorating
- Marble and DecorateDot the surface of the fudge with spoonfuls of the melted orange candy. Use the tip of a spoon to gently marble the orange candy into the dark chocolate fudge. Immediately shower the surface with the orange, purple and black sprinkles.Look for The orange candy should create distinct swirls against the dark chocolate base.Tip Work quickly so the candy remains soft enough to swirl effectively.
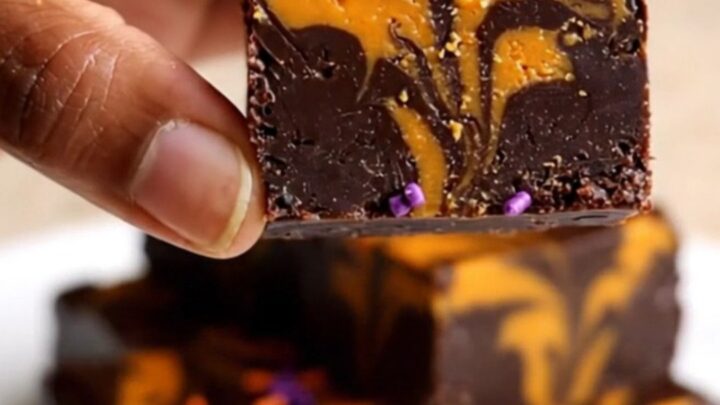
The marbling is complete when you see clear, distinct ribbons of orange candy woven through the dark chocolate.
The sprinkles should be evenly distributed across the surface and slightly pressed into the fudge to ensure they adhere during the setting process. The surface should look vibrant and festive.
Setting and Slicing
- Chill and ServeTransfer the fudge to a cool environment or refrigerator to set completely. Once firm, cut the fudge into squares and arrange them on a plate for serving.Look for The fudge should be firm to the touch and hold its shape when lifted.Tip Use a sharp knife to ensure clean, professional edges on each square.
The fudge is ready when it is completely firm and chilled throughout. When lifted from the parchment, it should hold its shape without bending or sagging. The cuts should be clean, revealing the marbled interior of the fudge, with each square holding its shape perfectly for a neat presentation.
Common mistakes
A common mistake is over-swirling the orange candy; if you move the spoon too much, you will lose the distinct marbled effect and end up with a single, muddy color.
Gentle, deliberate strokes are the key to success. Another error is waiting too long to add the sprinkles; apply them immediately after swirling so they adhere properly to the surface of the fudge.
How to tell it’s done
The fudge is done when it is completely set and feels firm to the touch throughout the entire block. It should not feel sticky or soft when you press the center.
After sufficient chilling, the fudge will have reached a stable consistency that allows for clean, sharp cuts. If you notice any softness, return it to the refrigerator for an additional thirty minutes before attempting to slice it into squares.
Up next · Part 3 of 3
2 variations · storage & make-ahead · 3 answers · printable card
Tips, FAQ & printable recipe (Part 3)← Back to the ingredients (Part 1)