Desserts · Part 1 of 3: Ingredients
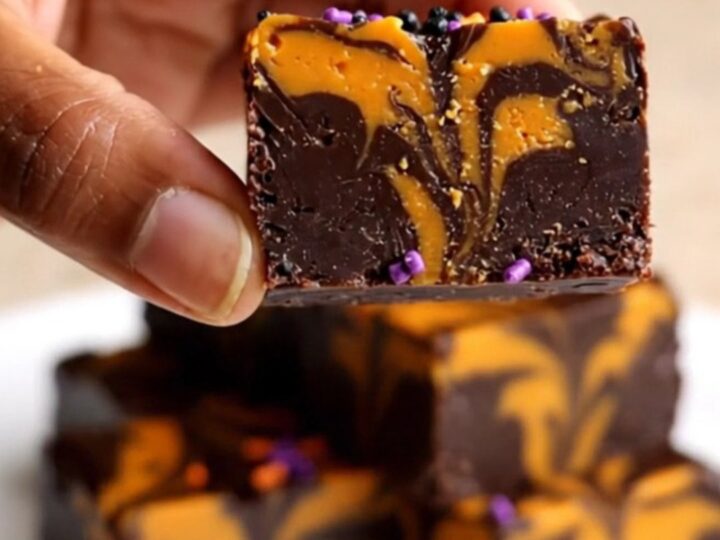
Easy Black and Orange Swirl Fudge
- Prep
- Cook
- Total
- Serves
- 16
Discover how a simple combination of chocolate and candy melts can transform into a visually stunning, decadent dessert. This swirl fudge is designed for simplicity, relying on basic techniques to achieve a professional, marbled look that impresses at any event.
Whether you are hosting a festive gathering or simply craving a rich chocolate indulgence, this recipe provides the perfect balance of ease and elegance.
Fudge is a classic confection that feels luxurious, yet it is surprisingly straightforward to prepare at home. This recipe focuses on creating a dense, velvety chocolate base that serves as a canvas for vibrant orange swirls.
By using melted candy melts, the marbling process becomes effortless, allowing for a beautiful contrast in colors. With a scattering of festive sprinkles, this dessert becomes a centerpiece that tastes as good as it looks. The process is quick, requiring only a few minutes, followed by time in the refrigerator to set perfectly.
Ingredients
Fudge Base
- 24 oz dark chocolate fudge, store-bought or made ahead
Swirl
- 1/2 cup melted orange candy
Topping
- 2 tbsp orange, purple and black sprinkles
Why this recipe works
The method of using a pre-prepared fudge slab allows for immediate assembly without the need for complex cooking or tempering.
This approach ensures a consistent, dense texture that is ideal for marbling, as the base provides a stable foundation for the decorative elements. By starting with a high-quality fudge, you guarantee a rich, professional result every time.
Swirling the orange candy melts into the dark chocolate base while both are still pliable creates a beautiful marbled effect.
Because the candy melts have a slightly different viscosity than the chocolate base, they remain distinct enough to form ribbons of color rather than blending completely. This technique creates a visual contrast that makes each piece of fudge unique and visually striking.
Notes and substitutions
For the best results, use a high-quality dark chocolate fudge. The richness of the chocolate balances the sweetness of the candy melts perfectly. Ensure the fudge is at room temperature before you begin, as this makes it easier to shape and marble without the candy setting too quickly.
The choice of equipment is minimal, but using a flat, parchment-lined surface is essential for easy cleanup and removal. A small spoon is the best tool for creating the marbled effect, as it allows for precise control when dotting and swirling the orange candy. When lining the surface, ensure the parchment paper is smooth to avoid indentations in the fudge.
- dark chocolate fudge: milk chocolate fudge for a milder flavor profile
- melted orange candy: white chocolate tinted with orange food coloring
Equipment
- 8x8 inch square baking pan
- parchment paper
- spoon
Up next · Part 2 of 3
3 steps · 5 min of cooking · what to look for at each stage
Step-by-step instructions (Part 2)