Dinner · Part 2 of 3: Instructions
Easy Beef Enchilada Casserole with Molten Cheese Step-by-step instructions
- Prep
- Cook
- Total
- Serves
- 6
Before you start
Before you begin cooking, gather all your ingredients and equipment to ensure a smooth preparation process. Measure out the taco seasoning. Shred the Colby Jack cheese from the block if you are not using pre-shredded cheese.
Cut the corn tortillas into halves or quarters so they are ready for quick assembly. Preheat your oven to 375°F (190°C) and place a 9x13-inch baking dish on your work surface. Having everything prepped and within reach makes assembling this comforting casserole incredibly fast and effortless.
Ingredients at a glance (5)
- 1 1/2 lb lean ground beef
- 2 tbsp taco seasoning
- 20 oz red enchilada sauce, divided
- 12 corn tortillas, cut into halves or quarters
- 2 cups shredded Colby Jack cheese, divided
Instructions
Cooking the Seasoned Beef
- Brown the Ground BeefHeat a large skillet over medium-high heat. Add the ground beef and cook, breaking it apart with a wooden spoon, until it is browned and no longer pink, which takes about 5 to 7 minutes. Carefully drain any excess fat from the skillet to keep the casserole from becoming greasy.Look for The beef should be completely browned and broken into small crumbles.Tip Using a ground meat chopper helps break up the beef evenly.
- Season and Simmer the BeefReduce the heat to medium. Stir in the taco seasoning. Simmer the mixture for 3 to 5 minutes, stirring occasionally, until the beef is well coated and fragrant. Ensure the ground beef is fully cooked and reaches a safe internal temperature of 160°F (71°C).Look for The seasoning should coat the beef thoroughly.Safe temperature 160°F (71°C) internal temperature (ground meat)Tip Adjust the seasoning with a pinch of salt if desired.
At the end of this phase, the ground beef should be completely browned, finely crumbled, and thoroughly coated in a thick, savory taco seasoning.
There should be no standing liquid left in the skillet, and the meat should smell highly aromatic with hints of chili, cumin, and garlic. Ensure the beef has reached a safe internal temperature of 160°F (71°C) before proceeding to assembly.
Assembling the Layers
- Begin Layering the CasserolePreheat the oven to 375°F (190°C). Spread 1/2 cup of the red enchilada sauce over the bottom of a 9x13-inch baking dish. Arrange half of the corn tortillas over the sauce, overlapping them slightly to cover the bottom. Top with half of the seasoned ground beef, another 1/2 cup of enchilada sauce, and 1 cup of the shredded Colby Jack cheese.Look for The bottom of the baking dish should be fully covered with the first layer.Tip Cutting the tortillas into halves helps them fit neatly into the corners.
- Complete the LayersRepeat the layering process by adding the remaining corn tortillas over the cheese. Layer the rest of the seasoned ground beef over the tortillas, pour the remaining enchilada sauce evenly on top, and finish by scattering the remaining 1 cup of Colby Jack cheese over the entire surface.Look for The top should be evenly covered with a thick layer of cheese.Tip Press down gently on the layers to compact the casserole before baking.
By the end of this phase, the baking dish should be neatly packed with alternating layers of softened corn tortillas, seasoned ground beef, rich red enchilada sauce, and shredded cheese. The top layer should be completely covered with an even, generous blanket of Colby Jack cheese, with no tortillas or meat exposed to prevent them from drying out in the oven.
Baking and Resting
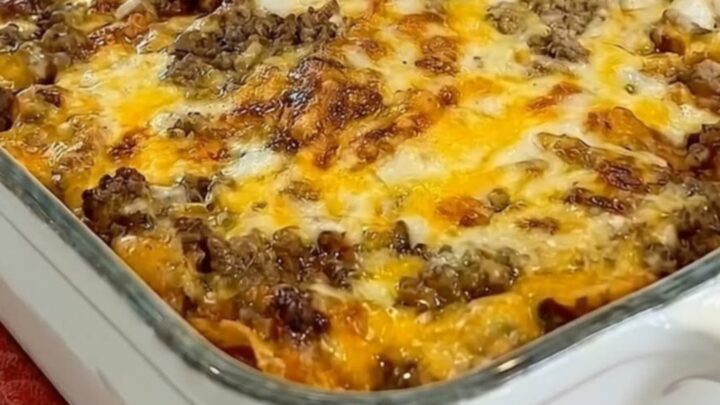
- Bake Until BubblyPlace the baking dish in the preheated oven and bake for 20 to 25 minutes. The casserole is ready when the cheese is completely melted, bubbly, and has developed a beautiful golden-brown crust around the edges. Remove from the oven and let it rest for 10 minutes before slicing and serving.Look for The cheese should be molten and bubbling vigorously at the edges.Tip Broil for the last 2 minutes for an extra golden crust.
At the end of the baking phase, the cheese on top should be completely melted, bubbling vigorously around the edges of the dish, and dotted with golden-brown spots. The sauce will be hot and active. After resting for 10 minutes, the casserole should feel slightly firmer, making it easy to slice cleanly with a spatula without falling apart.
Common mistakes
One common mistake is using cold enchilada sauce and cold meat during assembly, which can lead to uneven baking and a cold center. Always ensure your beef is hot from the skillet when layering.
Another frequent error is failing to drain the excess fat from the ground beef after browning, which results in a greasy casserole and soggy tortillas. Lastly, slicing the casserole immediately after removing it from the oven will cause it to lose its structure; letting it rest is crucial for clean, beautiful portions.
How to tell it’s done
To determine if the beef enchilada casserole is perfectly done, look for a bubbly, golden-brown cheese crust on top and active bubbling around the edges of the baking dish.
Since the ground beef is already fully cooked to a safe internal temperature of 160°F (71°C) during the skillet phase, the oven's primary job is to melt the cheese and heat all the layers thoroughly. A kitchen thermometer inserted into the center of the casserole should read at least 165°F (74°C) to ensure it is hot throughout.
- Ground meat: 160°F (71°C) in the thickest part
Up next · Part 3 of 3
2 variations · storage & make-ahead · 3 answers · printable card
Tips, FAQ & printable recipe (Part 3)← Back to the ingredients (Part 1)