Desserts · Part 2 of 3: Instructions
Dreamy No-Bake Coconut Cream Icebox Cake Step-by-step instructions
- Prep
- Cook
- Total
- Serves
- 8
Before you start
Before beginning, ensure that all ingredients are thoroughly chilled. Place the coconut cream cans in the coldest part of your refrigerator for at least 12 hours. Clear a space in your refrigerator that is large enough to hold the glass dish flat.
Assemble your electric mixer, a large mixing bowl, and a clean spatula. Having everything prepared and ready will ensure that the whipping and layering processes are efficient, preventing the coconut cream from warming up while you work.
Ingredients at a glance (4)
- 2 cups coconut cream, chilled
- 1 box crisp graham wafers
- 1/2 cup toasted coconut flakes
- 1/4 cup white chocolate curls
Instructions
Whipping the Cream
- Prepare the Coconut CreamWhip the chilled coconut cream in a large mixing bowl using an electric hand mixer until it becomes light, airy, and fluffy. Ensure the peaks are firm enough to hold their shape during the layering process.Look for The cream should be smooth, thick, and hold stiff, velvety peaks when the beaters are lifted.Tip Keep the coconut cream in the refrigerator until the very last second to ensure it whips properly.
The coconut cream should look like thick, billowy clouds. When you pull the beaters out of the bowl, the cream should stand up straight in stiff, glossy peaks.
It should feel cool to the touch and have a uniform, velvety consistency without any visible lumps of solid fat or liquid pockets.
Layering the Dish
- Assemble the LayersSpread a thin layer of the whipped coconut cream into the bottom of an 8-inch glass dish. Arrange a layer of crisp graham wafers over the cream. Continue alternating layers of cream and wafers until the dish is filled, finishing with a generous layer of coconut cream on top.Look for The wafers should be completely covered by the cream to ensure they soften perfectly in the refrigerator.Tip Break the wafers to fit the edges of the dish if necessary, creating an even foundation for each layer.
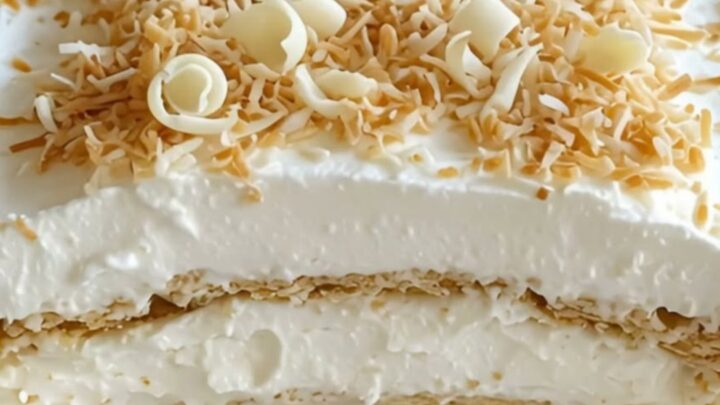
The dish should show clear, alternating bands of white coconut cream and golden graham wafers. Ensure that the cream is spread all the way to the edges of the glass to seal the wafers inside. The final layer should be a smooth, even coating of cream that covers all the wafers completely.
Setting and Garnish
- Garnish and ChillSprinkle the toasted coconut flakes and white chocolate curls evenly over the top of the cake. Place the dish in the refrigerator for at least 4 hours, or until the wafers have softened into a cake-like texture.Look for The topping should be evenly distributed, and the cake should feel firm to the touch after chilling.Tip Cover the dish loosely with plastic wrap if chilling for more than 4 hours to prevent the coconut from absorbing fridge odors.
After chilling, the surface should be firm and the garnish should be evenly distributed. When you press slightly on the top, it should spring back gently. The entire dish should look cohesive, with no loose wafers or uneven gaps between the layers, signaling that it is ready to be sliced.
Common mistakes
A common mistake is using coconut milk instead of coconut cream. The higher water content in coconut milk prevents the mixture from whipping into the necessary stiff, stable peaks. Another error is rushing the chilling process.
If the cake is not allowed to rest for the full 4 hours, the wafers will remain hard and the texture will be disjointed. Finally, ensure the cream is not over-whipped, which can cause the fat to separate and become grainy.
How to tell it’s done
The cake is done when the graham wafers have fully softened, which can be tested by gently pressing a fork into the center of the dish. The fork should sink through the layers with minimal resistance, indicating that the wafers have reached the desired tender, cake-like consistency.
The top should be set and the coconut flakes should remain crisp. There is no internal temperature to monitor for this dish, as it is a cold-set dessert.
Up next · Part 3 of 3
2 variations · storage & make-ahead · 3 answers · printable card
Tips, FAQ & printable recipe (Part 3)← Back to the ingredients (Part 1)