Desserts · Part 1 of 3: Ingredients
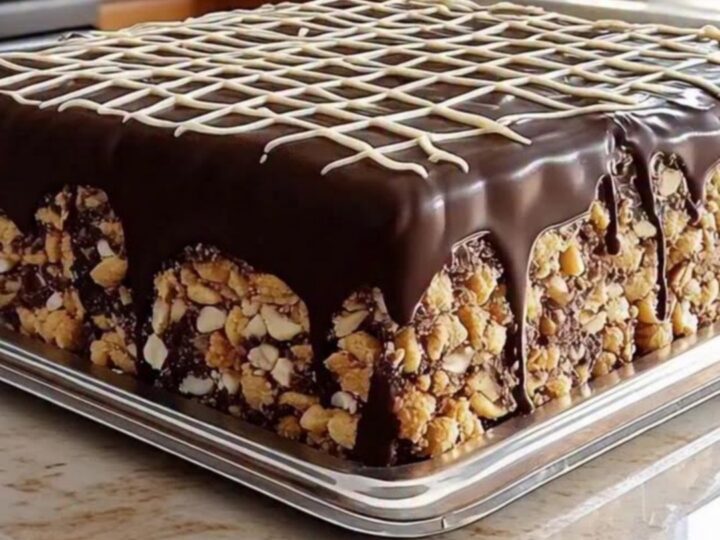
Decadent No-Bake Chocolate Biscuit Cake
- Prep
- Cook
- Total
- Serves
- 8
Elevate your dessert game with a no-bake chocolate biscuit cake that combines deep, velvety ganache with the perfect crunch of classic biscuits. This recipe is designed for those who appreciate the intersection of simple preparation and sophisticated, professional-looking presentation.
With just a few high-quality ingredients, you can craft a stunning centerpiece that satisfies every chocolate craving without ever turning on the oven. It is the ultimate solution for quick entertaining or a luxurious weekend treat that feels entirely indulgent.
This chocolate biscuit cake is a masterclass in texture and balance. By utilizing a simple ganache method, the rich chocolate coats every piece of biscuit, creating a cohesive yet multi-dimensional dessert. The process focuses on the contrast between the silky, dark chocolate exterior and the crunchy, golden interior.
Whether you are hosting a dinner party or simply looking for a reliable, no-fuss dessert, this recipe provides a consistent, delicious result that looks as though it came straight from a patisserie. Follow these steps to achieve a perfectly set, glossy finish every single time.
Ingredients
Base
- 8 oz biscuits, crushed
Ganache
- 10 oz dark chocolate, chopped
Decoration
- 2 oz white chocolate, for piping
Why this recipe works
The method relies on the natural emulsification of chocolate, which creates a stable ganache that sets firmly as it cools. This ensures the cake holds its square shape perfectly when sliced, providing clean, sharp edges that showcase the internal layers of biscuits. The lack of baking preserves the crispness of the biscuits, preventing them from softening too much, which maintains that essential textural contrast throughout the entire cake.
By controlling the temperature during the melting process, the ganache achieves a superior, professional-grade gloss. This technique also allows for the controlled incorporation of the biscuit pieces, ensuring each bite contains an even distribution of chocolate and crunch.
The final chilling phase is crucial, as it allows the fats in the chocolate to solidify properly, resulting in a firm, sliceable dessert that remains velvety on the tongue upon consumption.
Notes and substitutions
For the best results, use high-quality dark chocolate with at least 60% cocoa solids. The quality of the chocolate directly impacts the richness and mouthfeel of the ganache. If the chocolate is too low in cocoa butter, the ganache may not set as firmly. Always chop the chocolate into uniform, small pieces to ensure it melts evenly, which prevents grainy or uneven textures in the final mixture.
Regarding equipment, a heavy-bottomed bowl is recommended for melting the chocolate to prevent scorching. A professional-style piping bag with a small round tip provides the most control for the white chocolate lattice decoration, though a parchment paper cone can serve as a suitable substitute.
Ensure the serving tray is chilled before placing the cake on it, as this helps maintain the structure of the ganache during the initial plating process.
- Dark chocolate: Milk chocolate for a sweeter, creamier ganache flavor.
- Biscuits: Digestive biscuits or graham crackers for a similar crunchy texture.
Equipment
- Chef's knife
- Mixing bowl
- Piping bag
- 8-inch square cake pan
- Silver serving tray
Up next · Part 2 of 3
3 steps · 10 min of cooking · what to look for at each stage
Step-by-step instructions (Part 2)