Desserts · Part 2 of 3: Instructions
Decadent Black Forest Sheet Cake with Cream and Cherries Step-by-step instructions
- Prep
- Cook
- Total
- Serves
- 12
Before you start
Ensure that the chocolate sponge cake is completely cool before attempting to slice it. Prepare the whipped cream and the cherry filling in advance so they are ready for immediate assembly.
Have your workspace clean and clear, with your offset spatula and serrated knife easily accessible to maintain a smooth workflow.
Ingredients at a glance (4)
- 1 whole chocolate sponge cake, made ahead
- 2 cups cherry filling
- 2 cups heavy whipping cream, whipped
- 1 cup chocolate ganache
Instructions
Sponge Preparation
- Prepare the Sponge BasePlace the pre-baked chocolate sponge cake on a flat working surface. Using a long serrated knife, carefully slice the cake horizontally into two even layers. Set the bottom layer aside on a clean serving platter or a flat tray to begin the assembly process.Look for The cake layers should be cool to the touch before slicing to ensure they do not crumble during the process.Tip Use a gentle sawing motion with the knife to keep the edges of the sponge neat and even.
The sponge layers should be level and uniform in thickness. Check that the edges are clean and that the cake is firm enough to handle without breaking during the assembly process.
Layering Components
- Layer the FillingSpread the cherry filling evenly over the bottom sponge layer, leaving a small border near the edges. Carefully spread a thick, uniform layer of the whipped cream over the cherries. Place the second sponge layer on top, pressing down very gently to secure the layers together.Look for The cream should be stiff enough to hold its shape when spread, preventing it from leaking out the sides.Tip Chill the cream before whipping to ensure it reaches maximum volume and stability for the filling layer.
The cherry filling and whipped cream should be contained within the sponge boundaries.
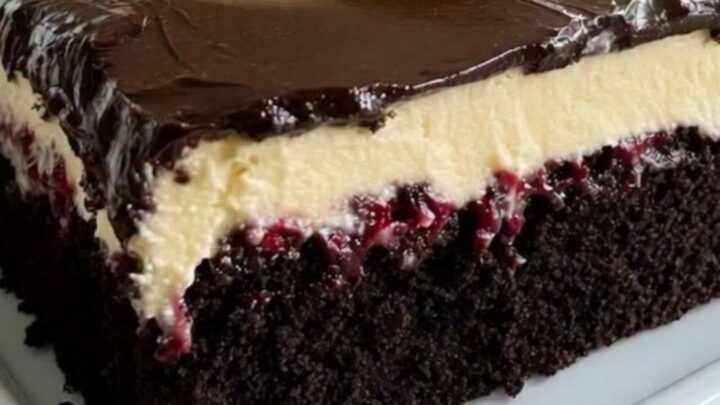
The layers should look distinct and stable, with no visible signs of the filling oozing out from the sides.
Final Glazing
- Add Ganache and ChillPour the glossy chocolate ganache over the top of the cake, using an offset spatula to spread it to the edges. Ensure any egg-based custard component reaches 160°F (71°C) if cooked. Allow the ganache to set slightly at room temperature before placing the cake in the refrigerator. Let the cake rest for at least thirty minutes to allow the layers to firm up before slicing.Look for The ganache should appear smooth and reflective, coating the top surface of the cake completely.Safe temperature 160°F (71°C) internal temperature (egg dishes)Tip Warm the spatula under hot water and wipe it dry to achieve a perfectly smooth finish on the chocolate ganache.
The ganache should be smooth, shiny, and completely cover the top layer. The cake should appear set and ready for portioning into neat squares upon final inspection before serving to guests.
Common mistakes
A common mistake is attempting to assemble the cake while the sponge is still warm, which will cause the whipped cream to melt and the layers to slide.
Another error is over-whipping the cream, which can result in a grainy texture. Finally, ensure the ganache is not too hot when poured, as it could compromise the whipped cream layer underneath.
How to tell it’s done
The cake is considered ready once the ganache has set to a firm but spreadable consistency and the entire assembly has chilled for at least thirty minutes.
While there are no raw meat proteins, ensure any egg-based components reach 160°F (71°C) to ensure safety, and keep the whipped cream cold to maintain its structure throughout the serving process.
- Egg dishes: 160°F (71°C) in the thickest part
Up next · Part 3 of 3
2 variations · storage & make-ahead · 3 answers · printable card
Tips, FAQ & printable recipe (Part 3)← Back to the ingredients (Part 1)