Desserts · Part 2 of 3: Instructions
Molten Peanut Butter Lava Cake Step-by-step instructions
- Prep
- Cook
- Total
- Serves
- 4
Before you start
Before starting, make the peanut butter spheres and freeze them for at least an hour—overnight is even better. Measure out all ingredients and have them ready. Preheat the oven to 425°F (220°C). Butter the ramekins thoroughly.
Chop the dark chocolate and cut the butter into pieces for quick melting. If using a microwave, have a heatproof bowl ready. A baking sheet to hold the ramekins will make transferring them in and out of the oven easier.
Ingredients at a glance (12)
- 1/2 cup creamy peanut butter
- 1/4 cup confectioners' sugar
- 4 oz dark chocolate (60-70% cacao), chopped
- 1/2 cup unsalted butter, plus more for ramekins
- 2 large eggs
- 2 large egg yolks
- 1/4 cup granulated sugar
- 1 tsp vanilla extract
- 1/4 cup all-purpose flour
- 1/4 tsp salt
- 2 tbsp crushed roasted peanuts
- 2 tbsp melted peanut butter
Instructions
Prepare the Frozen Centers
- Make the Peanut Butter SpheresIn a small bowl, stir together the creamy peanut butter and confectioners' sugar until smooth and well combined. Scoop out 8 tablespoons of the mixture and roll each into a 1-inch sphere. Place the spheres on a parchment-lined tray and freeze for at least 1 hour, until solid.Look for The spheres should be firm to the touch and hold their shape when handled.Tip For easier rolling, lightly wet your hands or dust them with confectioners' sugar.
- Preheat the OvenPreheat the oven to 425°F (220°C). Butter four 6-ounce ramekins generously, making sure to coat the bottom and sides well.Look for The butter should melt slightly on the warm ramekins.Tip Place the ramekins on a baking sheet for easy handling.
The peanut butter mixture should be smooth and easy to shape. The spheres should be firm after freezing—if they are soft, return them to the freezer for another 30 minutes. The oven should be preheated and the ramekins buttered, ready for the batter.
Mix the Chocolate Batter
- Make the Chocolate BatterIn a medium heatproof bowl, combine the chopped dark chocolate and 1/2 cup butter. Melt over a pot of simmering water or in the microwave in 30-second bursts, stirring until smooth. Let cool slightly.Look for The mixture should be glossy and completely melted.Tip Do not overheat the chocolate, or it may seize.
- Whisk Eggs and SugarIn a large bowl, whisk the eggs, egg yolks, granulated sugar, and vanilla extract together until thick and pale, about 2 minutes. The mixture should double in volume and fall in ribbons from the whisk.Look for The whisk leaves a ribbon that holds its shape for a few seconds.Tip Use an electric mixer for a faster and more stable foam.
- Combine Chocolate and Egg MixturePour the melted chocolate mixture into the egg mixture and fold gently with a rubber spatula until just combined. Do not overmix.Look for The batter should be smooth and uniformly dark.Tip Fold in a figure-eight motion to keep the air in the eggs.
- Add Dry IngredientsSift the all-purpose flour and salt over the batter and fold gently until no streaks of flour remain. The batter will be thick and glossy.Look for No dry spots should be visible.Tip Sifting prevents lumps and ensures even distribution.
The melted chocolate and butter should be glossy and smooth. When whisked with the eggs and sugar, the mixture should be thick, pale, and hold a ribbon shape. After folding in the flour, the batter should be uniform and free of lumps.
Bake and Serve
- Assemble the RamekinsSpoon about 2 tablespoons of batter into each prepared ramekin, spreading it to cover the bottom. Place a frozen peanut butter sphere in the center, then cover with the remaining batter, dividing it evenly and smoothing the tops.Look for The ramekins should be about 3/4 full.Tip Make sure the sphere is completely covered to prevent leaking.
- Bake the Lava CakesPlace the ramekins on a baking sheet and bake in the preheated oven for 13 minutes, until the edges are set and the tops are slightly puffed but the centers still look moist.Look for The cakes will rise around the peanut butter center, and the tops will be just firm to the touch.Safe temperature 160°F (71°C) internal temperature (egg dishes)Tip Do not overbake; the center should remain molten.
- Cool and UnmoldLet the cakes cool in the ramekins for 1 minute. Run a thin knife around the edges, then carefully invert each ramekin onto a serving plate. Let stand for another minute before serving.Look for The cakes should release cleanly from the ramekins.Tip If they stick, gently tap the bottom of the ramekin.
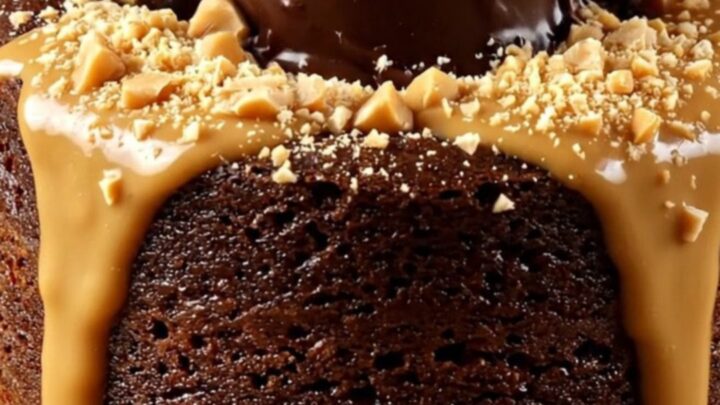
- Finish and ServeDrizzle the melted peanut butter over the warm cakes and sprinkle with crushed roasted peanuts. Serve immediately while the centers are molten.Look for The peanut butter should flow out when you cut into the cake.Tip Warm the peanut butter slightly for an easy drizzle.
The cakes should be puffed and set at the edges, with a slight jiggle in the center. After resting for a minute, they should release from the ramekins cleanly. When you cut into one, the peanut butter should flow out in a thick, glossy stream.
Common mistakes
The most common mistake is overbaking, which results in a fully cooked center and no lava flow. Keep a close eye on the oven and pull the cakes out at the 13-minute mark even if they seem underdone.
Another pitfall is not buttering the ramekins well, causing the cakes to stick. Also, ensure the peanut butter spheres are fully frozen; otherwise, they may melt and blend into the batter.
Finally, don't skip the brief cooling time—it makes unmolding much easier.
How to tell it’s done
The lava cakes are done when the edges are set and the tops are puffed but the centers still look slightly moist and soft. The internal temperature of the cake should reach 160°F (71°C) in the center, but the peanut butter core will be molten.
To test, gently press the top; it should feel firm at the edges and give slightly in the middle. Let them rest for 1 minute before unmolding to help them hold their shape.
- Egg dishes: 160°F (71°C) in the thickest part
Up next · Part 3 of 3
4 variations · storage & make-ahead · 5 answers · printable card
Tips, FAQ & printable recipe (Part 3)← Back to the ingredients (Part 1)