Desserts · Part 1 of 3: Ingredients
Dark Chocolate Honeycomb Bark Bars
- Prep
- Cook
- Total
- Serves
- 8
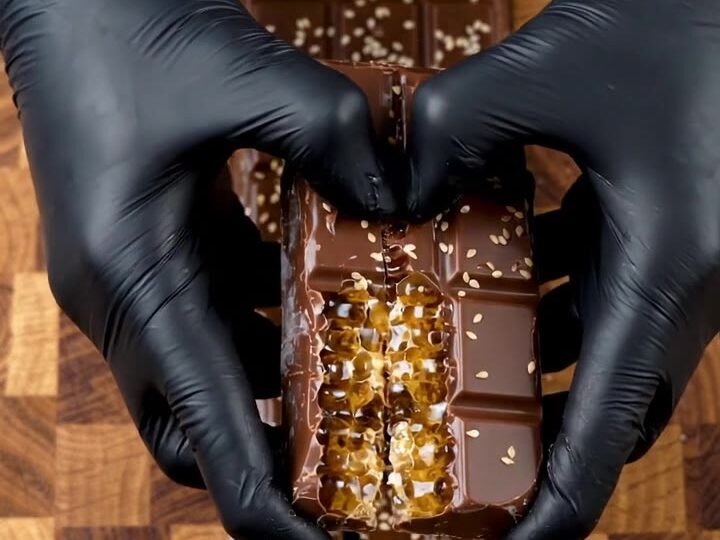
These dark chocolate honeycomb bark bars bring together two textures that were made for each other: a thick, glossy shell of 72% dark chocolate and a core of golden, airy honeycomb sponge candy. The bars are sliced thick, so each bite delivers a satisfying crunch that gives way to a light, melt-in-your-mouth interior.
The contrast is as beautiful as it is delicious—deep cocoa on the outside, pale and honeycombed within. Perfect for gifting or for a special treat, these bars are surprisingly simple to assemble and require no baking.
Honeycomb candy, also known as sponge candy or cinder toffee, is a classic confection with a crisp, airy structure that shatters pleasantly. When embedded in dark chocolate, it creates a bar that is both indulgent and texturally exciting.
This recipe uses a high-percentage dark chocolate to balance the sweetness of the honeycomb, and the result is a sophisticated treat that looks impressive with minimal effort. The process is straightforward: grate the chocolate, melt it, pour it into a tray, press in the honeycomb, chill, and slice. The key is to work quickly while the chocolate is still fluid and to chill thoroughly before cutting.
Ingredients
- 12 oz 72% dark chocolate, finely chopped
- 2 cups golden honeycomb sponge candy chunks
- parchment paper, for lining, to taste
Why this recipe works
Using a high-percentage dark chocolate, such as 72%, provides a deep, slightly bitter counterpoint to the sugary honeycomb. This balance prevents the bars from becoming cloying and highlights the cocoa's fruity and earthy notes. Grating the chocolate before melting ensures even, gentle melting, reducing the risk of scorching and producing a glossy, fluid result that sets with a satisfying snap.
The honeycomb sponge candy is the star of the texture. Its porous, crystalline structure shatters when bitten, creating a light, airy sensation that contrasts with the dense chocolate.
Pressing the chunks into the surface rather than mixing them throughout keeps the honeycomb crisp and visible, allowing the layers to remain distinct. Chilling the slab firms the chocolate so it can be sliced into clean bars without crumbling.
Notes and substitutions
For the best flavor, choose a high-quality dark chocolate with at least 72% cacao. The chocolate should be solid and firm for grating; if it is too soft, chill it for 10 minutes before grating.
The honeycomb sponge candy can be store-bought or homemade. If using store-bought, look for pieces that are crisp and not stale. If making your own, ensure it is fully set and dry before pressing into the chocolate.
A metal tray with straight sides makes it easier to spread the chocolate evenly and release the slab. Parchment paper with overhang is essential for lifting the finished slab without breaking. A sharp chef's knife is key for clean slicing; a serrated knife may crush the honeycomb. For the cleanest cuts, score the chocolate lightly with the knife tip before applying full pressure.
- 72% dark chocolate: Use any dark chocolate with at least 60% cacao for a slightly sweeter, still intense flavor.
- Golden honeycomb sponge candy: Store-bought honeycomb toffee or sponge candy works well; crush into chunks if needed.
- Parchment paper: A silicone baking mat can replace parchment for lining the tray.
Equipment
- Box grater
- Parchment paper
- Metal tray (8x8-inch)
- Chef's knife
- Cutting board
Up next · Part 2 of 3
6 steps · 15 min of cooking · what to look for at each stage
Step-by-step instructions (Part 2)