Dinner · Part 1 of 3: Ingredients
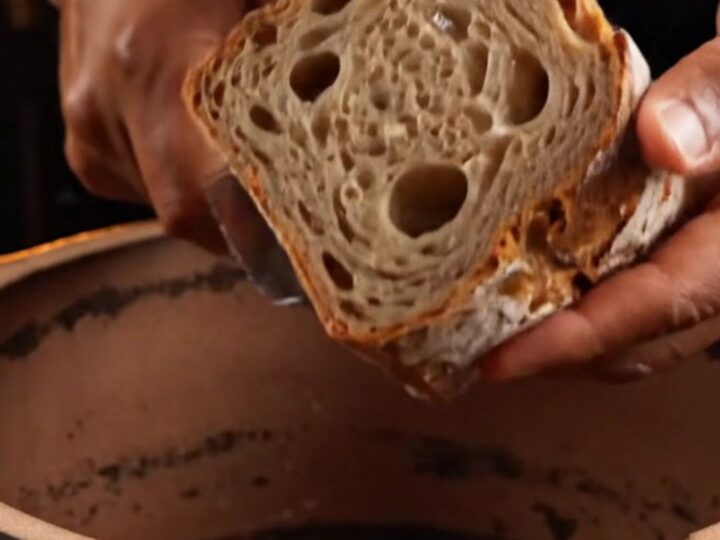
Crusty Artisan Sourdough Bread with Open Crumb
- Prep
- Cook
- Total
- Serves
- 1
This crusty artisan sourdough delivers a crackling, mahogany crust and an open, glossy crumb that is the hallmark of a perfect loaf. The method is straightforward: a long autolyse, gentle stretch-and-folds, and an overnight cold ferment develop deep flavor and structure.
Baked in a screaming-hot Dutch oven with a touch of steam, the bread rises dramatically and finishes with a blistered, rustic exterior. The result is a bakery-quality loaf that fills the kitchen with an irresistible aroma and slices into beautiful, airy pieces.
Baking artisan sourdough at home is deeply rewarding, and this recipe produces a loaf with a dramatic open crumb and a crust that crackles as it cools. The process begins with a simple mix of flour, water, starter, and salt. A 45-minute autolyse allows the flour to fully hydrate, making the dough easier to work with and improving the final texture.
Four sets of stretch-and-folds over two hours build gluten strength without heavy kneading. An overnight cold ferment in the refrigerator develops complex, tangy flavors. Finally, baking in a preheated Dutch oven with an ice cube creates the steam needed for a perfect rise and a blistered, crunchy crust.
Ingredients
- 3 1/2 cups unbleached bread flour
- 1 1/2 cups warm water
- 1/2 cup bubbly active sourdough starter
- 2 tsp fine sea salt
- rice flour for dusting, to taste
Why this recipe works
The autolyse step is crucial because it allows the flour to absorb water fully before the salt and starter are added. This hydration softens the gluten and makes the dough more extensible, which contributes to a more open crumb. The long rest also begins enzymatic activity that breaks down complex sugars, resulting in a more flavorful loaf.
The stretch-and-fold technique gently develops gluten strength without deflating the air bubbles that form during fermentation. This method mimics the effects of kneading but is much gentler, preserving the gas that creates the open, airy structure.
The overnight cold ferment further tightens the gluten and deepens the sourdough flavor, while making the dough easier to shape and score.
Notes and substitutions
Use unbleached bread flour for the best structure and rise. Bread flour has a higher protein content than all-purpose, which supports the development of a strong gluten network. If you only have all-purpose flour, the loaf will be slightly less open but still delicious. The sourdough starter should be bubbly and active—ideally fed 4 to 6 hours before mixing.
A banneton proofing basket lined with rice flour gives the dough its beautiful spiral pattern and prevents sticking. If you don't have a banneton, use a mixing bowl lined with a floured kitchen towel.
The Dutch oven must be preheated thoroughly to achieve the intense heat needed for a good oven spring. An ice cube added to the pot creates steam, which keeps the crust pliable during the initial bake.
- unbleached bread flour: all-purpose flour (may produce a slightly less open crumb)
- fine sea salt: kosher salt (use same weight, not volume)
- rice flour: all-purpose flour or semolina for dusting
Equipment
- Large mixing bowl
- Dutch oven with lid
- Banneton proofing basket
- Razor blade or lame
- Parchment paper
- Plastic wrap or kitchen towel
Up next · Part 2 of 3
8 steps · 40 min of cooking · what to look for at each stage
Step-by-step instructions (Part 2)