Desserts · Part 2 of 3: Instructions
Crunchy Hazelnut Praline Chocolate Bars Step-by-step instructions
- Prep
- Cook
- Total
- Serves
- 8
Before you start
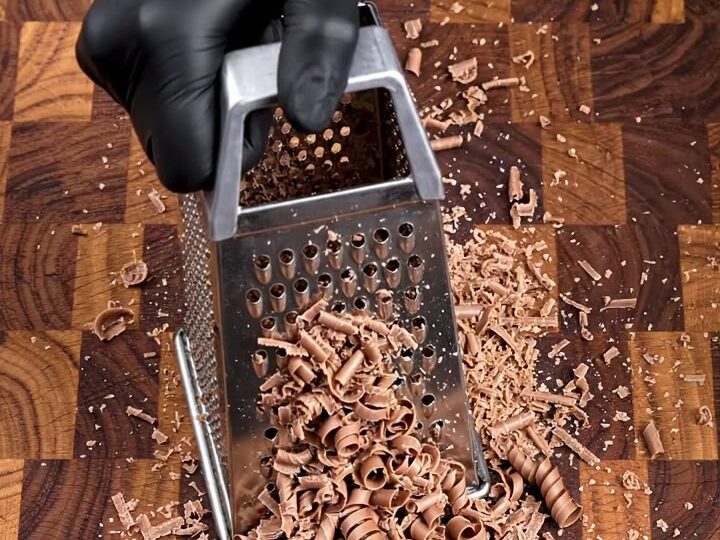
Before starting, gather all ingredients and equipment. Chop the hazelnut wafer crunch chocolate bars into smaller pieces for easier melting. Grate the Swiss milk chocolate using a box grater into a bowl.
Line a metal tray with parchment paper, ensuring it covers the bottom and sides for easy removal. Have the praline, crushed wafers, and melted chocolate ready. If the melted chocolate has cooled and thickened, gently reheat it until smooth and pourable.
Ingredients at a glance (5)
- 4 hazelnut jonduya wafer crunch milk chocolate bars
- 200 g creamy Swiss milk chocolate
- 1/2 cup creamy hazelnut jonduya praline
- 1/2 cup crushed crispy wafers
- 1 cup glossy melted chocolate
Instructions
Prep and Mix
- Prepare the chocolatePlace the hazelnut jonduya wafer crunch milk chocolate bars on a cutting board. Using a sharp stainless steel chef's knife, slice each bar into smaller pieces. Grate the creamy Swiss milk chocolate on a box grater into a bowl to create a pile of fluffy chocolate shavings.Look for The chocolate bars are cut into chunks and the Swiss chocolate is grated into fine, fluffy shavings.Tip Chill the chocolate bars for 10 minutes before slicing to get cleaner cuts.
- Mix the fillingIn a bowl, combine the creamy hazelnut jonduya praline with the crushed crispy wafers. Stir until the wafers are evenly coated with the praline, creating a thick, spreadable mixture.Look for The mixture is uniform, with the wafers fully coated in the praline.Tip If the mixture is too stiff, warm the praline slightly to make it easier to spread.
At the end of this phase, the chocolate bars are chopped and the Swiss chocolate is grated into a fluffy pile. The praline and crushed wafers are combined into a uniform, spreadable mixture. Everything is ready for assembly.
Assemble and Top
- Assemble the slabLine a metal tray with parchment paper. Spread the praline-wafer mixture evenly across the tray, pressing it into a flat, even layer. Ensure the layer is uniform so the bars have a consistent thickness.Look for The praline mixture is spread into an even layer, about 1/2 inch thick.Tip Use an offset spatula to smooth the top for a neat finish.
- Pour the melted chocolatePour the glossy melted chocolate over the praline-wafer layer. Use a spatula to spread the chocolate evenly, covering the entire surface and reaching the edges. Smooth the top to create a glossy finish.Look for The chocolate completely covers the praline layer, and the surface is smooth and shiny.Tip Tap the tray gently on the counter to release any air bubbles.
The praline-wafer mixture is spread evenly on the parchment-lined tray, and the melted chocolate is poured over the top. The surface is smooth and glossy, with no gaps or air bubbles. The slab is ready to chill.
Chill and Slice
- Chill and slicePlace the tray in the refrigerator and chill for at least 30 minutes, or until the chocolate is fully set and firm. Once set, remove the slab from the tray and place it on a cutting board. Use a sharp chef's knife to slice the slab into thick bars.Look for The chocolate is firm to the touch and the slab lifts easily from the parchment.Tip For clean cuts, wipe the knife between slices and slice in one firm motion.
- Snap and serveLift one thick bar and snap it cleanly in half to reveal the crunchy layered interior. Serve the bars as a quick dessert or snack.Look for The bar snaps cleanly, showing a layered cross-section with praline and wafer crunch.Tip Store any leftover bars in an airtight container in the refrigerator.
After chilling, the slab is firm and lifts easily from the tray. Slicing into thick bars reveals a clean cross-section with a distinct praline layer. The bars snap cleanly when broken, showing a crunchy interior.
Common mistakes
One common mistake is over-spreading the praline layer too thin, which makes the bars less crunchy. Aim for a layer about 1/2 inch thick. Another issue is pouring the melted chocolate while it’s too hot, which can melt the praline and cause the layers to blend.
Let the melted chocolate cool slightly before pouring. Using a dull knife to slice the bars can crush the layers; always use a sharp chef’s knife and wipe it clean between cuts.
Finally, don’t skip chilling—without it, the bars won’t set properly and will be messy to slice.
How to tell it’s done
The bars are done when the chocolate is fully set and firm to the touch. The slab should lift easily from the parchment paper, and when sliced, the bars should break with a clean snap, revealing a layered interior of praline and wafers.
If the chocolate is still soft or sticky, return the tray to the refrigerator for additional chilling. The finished bars should be thick, glossy, and hold their shape at room temperature for a short time, but are best stored chilled.
Up next · Part 3 of 3
4 variations · storage & make-ahead · 5 answers · printable card
Tips, FAQ & printable recipe (Part 3)← Back to the ingredients (Part 1)