Dinner · Part 1 of 3: Ingredients
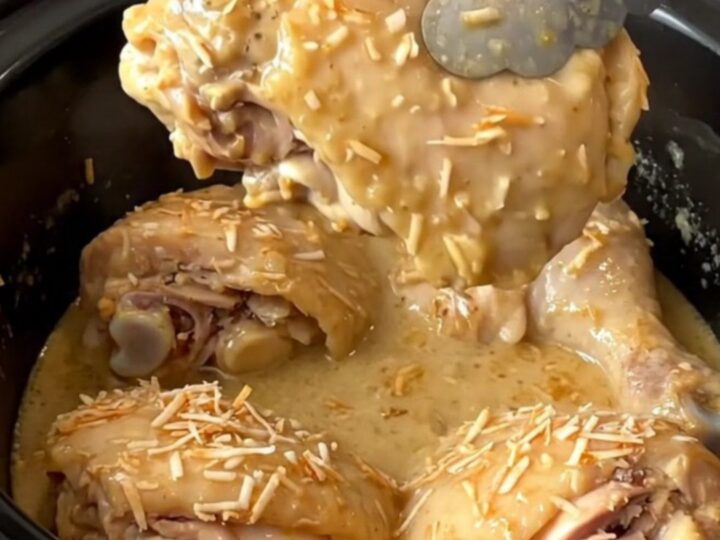
Slow Cooker Sticky Coconut Chicken Thighs
- Prep
- Cook
- Total
- Serves
- 6
This slow cooker sticky coconut chicken is proof that the simplest ingredients can make the most satisfying dinner. Boneless chicken thighs cook low and slow in a bath of coconut milk, shredded coconut, brown sugar, and ginger until they are so tender they practically fall apart.
The sauce turns creamy, lightly sweet, and faintly savory, clinging to every bite. It is a hands-off meal that fills the kitchen with a warm, tropical aroma and delivers rich flavor with almost no effort.
This recipe is built on a handful of pantry staples and a slow cooker. The chicken thighs go in raw, get topped with coconut, sugar, and ginger, and then bathe in coconut milk and soy sauce for a few hours.
The result is a sticky, creamy, deeply flavored dish that tastes like it simmered all day on the stove—but without any stirring or watching. Serve it over rice, with veggies, or on its own. It is the kind of meal that makes a weeknight feel special, yet it comes together in minutes.
Ingredients
- 2 lb boneless skinless chicken thighs
- 1 cup unsweetened shredded coconut
- 1/4 cup packed brown sugar
- 1 tbsp ground ginger
- 1 can full-fat coconut milk (13.5 oz)
- 2 tbsp low-sodium soy sauce
Why this recipe works
The magic of this recipe lies in the slow cooker's gentle, even heat. Low and slow cooking breaks down the connective tissue in chicken thighs, turning them meltingly tender.
As the chicken cooks, it releases its juices into the coconut milk, creating a rich, savory-sweet sauce that thickens naturally. The shredded coconut and brown sugar dissolve into the liquid, adding body and a subtle caramelized note.
The combination of coconut milk and shredded coconut gives the sauce a luxurious, creamy texture without any cream. The soy sauce adds a savory umami backbone that balances the sweetness of the brown sugar and the warmth of the ginger.
Because the chicken is cooked in a single layer, it absorbs the flavors evenly, and the sauce reduces just enough to coat every piece with a glossy, sticky finish.
Notes and substitutions
Use full-fat coconut milk for the best texture and flavor. Light coconut milk will work, but the sauce will be thinner and less creamy. Unsweetened shredded coconut is essential; sweetened coconut will make the dish overly sweet and change the texture. Ground ginger is convenient, but fresh grated ginger can be substituted for a brighter, more pungent kick.
Boneless skinless chicken thighs are ideal here because they stay juicy and shred beautifully. Chicken breasts can be used, but they will dry out more easily and should be cooked for a shorter time. The soy sauce adds salt and depth; low-sodium soy sauce is recommended so the dish does not become too salty. For a gluten-free option, use tamari or coconut aminos.
- Ground ginger: 1 tablespoon freshly grated ginger for a brighter, fresher flavor.
- Low-sodium soy sauce: Coconut aminos for a soy-free option (still contains no gluten).
- Unsweetened shredded coconut: Desiccated coconut, but reduce the amount to 3/4 cup as it is drier and more absorbent.
- Boneless skinless chicken thighs: Bone-in, skin-on thighs, but increase the cook time by 30 to 45 minutes and remove the skin before serving if desired.
Equipment
- Slow cooker (6-quart or larger)
- Tongs
- Measuring cups and spoons
- Small bowl
Up next · Part 2 of 3
6 steps · 4 h of cooking · what to look for at each stage
Step-by-step instructions (Part 2)