Dinner · Part 1 of 3: Ingredients
Crockpot Roasted Red Pepper Goat Cheese Chicken (Dump-and-Go)
- Prep
- Cook
- Total
- Serves
- 4
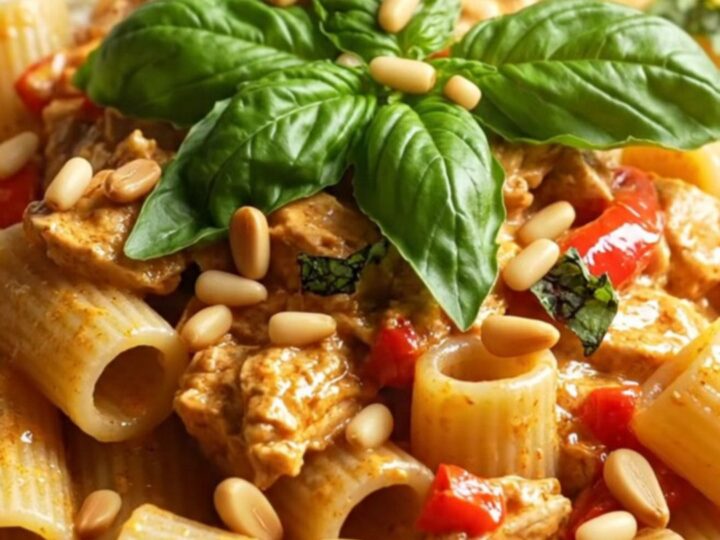
This Crockpot Roasted Red Pepper Goat Cheese Chicken is pure silk with almost no effort. Four chicken breasts, a jar of roasted red peppers, garlic, broth, and a log of goat cheese go into the slow cooker raw and come out four hours later as tender shredded chicken swaddled in a coral-pink, velvety sauce. Toss it with hot rigatoni, finish with basil and pine nuts, and dinner tastes far fancier than the ten minutes of work behind it.
Dump-and-go cooking rarely looks this polished. Here, the entire sauce builds itself while the chicken cooks: the peppers soften, the goat cheese melts, and the two emulsify into a creamy, tangy sauce that clings to every shred of meat and every ridge of rigatoni. There is no roux, no blender, no stovetop babysitting.
The only hands-on moments are layering the ingredients, shredding the chicken with two forks, and swirling the sauce until it turns glossy. The result lands somewhere between a weeknight slow-cooker dinner and a trattoria pasta special, with sweet peppers, tangy cheese, and juicy chicken in every bite. It serves four generously and scales easily if a crowd shows up.
Ingredients
- 4 boneless skinless chicken breasts (about 6 oz each)
- 12 oz jar roasted red peppers, drained
- 4 garlic cloves, smashed
- 1/2 cup chicken broth
- 6 oz chevre log (creamy goat cheese)
For serving
- 12 oz rigatoni, cooked and kept hot
- Fresh basil leaves, for serving
- 3 tbsp pine nuts, for serving
Why this recipe works
The method works because everything the sauce needs is already in the pot. Roasted red peppers are soft and sweet from the jar, so four hours of gentle heat is all they need to collapse into a spoonable base.
The goat cheese sits directly against that warmth and melts slowly, its fat and tang dispersing through the broth instead of breaking. As the chicken releases its own juices, the liquid level rises just enough to submerge the aromatics and create a naturally emulsified sauce.
Shredding, rather than slicing, is the second half of the trick. Shredded chicken presents miles of surface area for the sauce to coat, and each strand carries flavor into the pasta. Stirring the shredded meat back into the peppers and cheese mashes the solids into the liquid, thickening the sauce without any added starch. The pasta's starchy cooking water, added only if needed, finishes the job and keeps everything glossy instead of greasy.
Notes and substitutions
Choose jarred roasted red peppers packed in water or brine rather than oil-marinated ones; the brined kind blend more cleanly into the sauce. A fresh, mild goat cheese log melts smoothest, so skip anything crumbly or heavily coated in herbs for this recipe.
Boneless skinless chicken breasts of similar size cook evenly; if the sizes vary a lot, check the smaller ones early. A 6-quart ceramic slow cooker gives the breasts room to sit in one layer, which matters for even cooking.
The rigatoni, basil, and pine nuts are the finishing layer, and they go on at the very end so the textures stay distinct. Any short, ridged pasta works if rigatoni is unavailable, but the tubes are especially good at trapping sauce.
Toast the pine nuts briefly in a dry skillet before serving; raw pine nuts taste flat by comparison. If the sauce tightens while the pasta cooks, a splash of the reserved pasta water brings it right back to a silky consistency.
- goat cheese: Swap in an equal amount of cream cheese or Boursin-style herbed cheese for a milder, equally creamy sauce.
- rigatoni: Any short, ridged pasta works: penne, orecchiette, or shells all hold the sauce well.
- pine nuts: Toasted chopped walnuts or almonds give a similar crunch if pine nuts are hard to find.
- chicken breasts: Boneless skinless chicken thighs work too; keep the same low setting and check for doneness at the same point.
Equipment
- 6-quart slow cooker
- glass lid
- two forks
- large pot for pasta
- colander
- tongs
Up next · Part 2 of 3
8 steps · 4 h 10 min of cooking · what to look for at each stage
Step-by-step instructions (Part 2)