Dinner · Part 2 of 3: Instructions
Crockpot Pork Loin in Creamy Bacon Gravy — Dump-and-Go Dinner Step-by-step instructions
- Prep
- Cook
- Total
- Serves
- 6
Before you start
Everything goes into the cooker raw or already cooked, so prep is short. Chop the cooked bacon into small pieces and halve the baby potatoes — leave the skins on; they hold the potatoes together through the long cook. Open the can of cream of chicken soup and set out the onion powder so nothing needs hunting once the layering starts.
Check that the pork loin fits the insert with an inch or two of room around it, and give the ceramic insert a moment to come to room temperature if it has just been washed. Keep the instant-read thermometer nearby for the end. Once the ingredients are staged, the whole assembly takes about ten minutes.
Ingredients at a glance (5)
- 3 lb boneless pork loin roast
- 8 slices cooked bacon, chopped
- 1 1/2 lb baby potatoes, halved
- 2 tsp onion powder
- 10.5 oz cream of chicken soup (one can)
Instructions
Load the slow cooker
- Place the pork loinSet the boneless pork loin roast in the center of the slow cooker insert and press it down gently with your hand so it sits flat and level on the ceramic. A level roast cooks evenly; if it teeters on a fat cap, turn it until it rests steady.Look for The roast sits centered with visible space on every side for the potatoes.Tip If the roast is very cold, keep it out for no more than 30 minutes while staging the other ingredients.
- Add bacon and potatoesScatter the chopped cooked bacon and the halved baby potatoes around the roast, letting them pile naturally against the sides of the insert. Aim for an even ring rather than a heap, so every potato has contact with the ceramic and picks up the bacon drippings as they render.Look for Bacon and potatoes ring the roast without covering the top.Tip Halve any potato larger than a golf ball so it cooks through on the same timeline.
- Sprinkle the onion powderSprinkle the onion powder evenly over the pork, bacon and potatoes. Reach across the whole insert rather than dumping it in one spot — an even dusting seasons the gravy that forms later, while a single pile dissolves into one concentrated patch and leaves the rest flat.Look for A light, even veil of powder covers the whole surface.Tip Clumpy onion powder? Rub it between your fingers as it goes on to break it up.
- Spoon on the cream soupSpoon the cream of chicken soup over the top of everything, letting it sit in generous dollops rather than stirring it in. The soup stays concentrated on the surface through the cook, then melts down into the drippings to become the gravy at serving time.Look for Dollops of soup rest on the potatoes and pork, unmixed.Tip Resist stirring now — an early stir thins the gravy before it has a chance to build.
At the end of the loading phase, the insert should look layered, not mixed: the roast flat and centered on the bottom, a ring of halved potatoes and chopped bacon packed around it, a fine veil of onion powder over the top, and thick dollops of soup resting on the very top. Nothing has been stirred. Check that the lid still sits flush — if the mound touches it, move a few potatoes to the sides rather than pressing down on the pork. The cooker should smell faintly of raw pork and onion powder at this point; the bacon aroma comes later.
Slow-cook to temperature
- Cover and slow-cookCover and cook on low for 4 to 5 hours, or on high for about 3 hours, until the pork is fork-tender. Keep the lid closed the whole time; every lift releases the steam that is doing the cooking and adds roughly 20 minutes to the clock.Look for A steady haze of condensation on the lid means the cooker is holding its heat.Tip Low gives the most tender, sliceable pork; high is fine when the evening runs short.
- Check the temperatureCheck the pork with an instant-read thermometer in the thickest part of the roast: it should read 145°F (63°C), the safe internal temperature for whole cuts of pork. Let the roast rest at least 3 minutes before slicing so the juices settle back into the meat.Look for 145°F (63°C) at the center, with clear juices at the thermometer hole.Safe temperature 145°F (63°C) internal temperature (steaks, chops and roasts)Tip If the reading comes in low, re-cover and give it another 30 minutes on low.
The cooking phase ends when the pork reads 145°F (63°C) at its thickest point and gives easily when prodded with a fork. Lift the lid after the low-cook window and expect a strong, savory smell of bacon and simmering soup — if the aroma is faint, the cooker may be running cool and needs more time.
The potatoes should be tender enough to split under a fork but still holding their shape, and the liquid around them should have thickened slightly and turned a pale, creamy tan. If the thermometer reads below 145°F, re-cover, keep the heat on low, and check again in 30 minutes rather than guessing.
Slice and serve
- Rest and slice the roastLift the roast out with tongs or two large forks and set it on a cutting board. Tent it loosely with foil and slice it into thick, even pieces — about half an inch — while the potatoes and gravy stay warm in the insert below.Look for Slices that hold together with a moist, even crumb at the edge.Tip Slice against the grain for the most tender bite.
- Stir the bacon gravyGive the gravy in the insert a good stir, folding in any soup that has pooled at the edges and scraping the bottom where the bacon flavor collects. The sauce should be thick enough to coat a spoon; if it looks thin, leave the lid off on high for 10 minutes.Look for A thick, glossy gravy that clings to the potatoes.Tip Stirring also redistributes the bacon so every serving gets some.
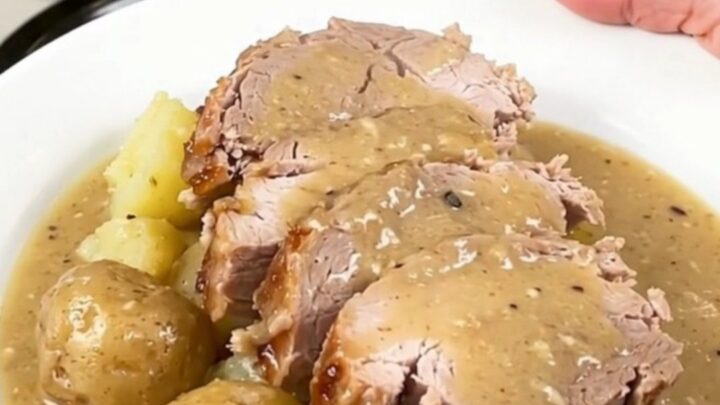
- Plate with the gravyPlate the pork slices over the soft potatoes and ladle the creamy bacon gravy generously over everything, letting it run into the crevices. Serve straight away, with extra gravy passed at the table, while the steam is still rising off the plate.Look for Gravy pools slightly around the potatoes on the plate.Tip Briefly warmed plates keep the gravy fluid to the last bite.
By the end of the final phase, the roast is sliced, the gravy is stirred and thick, and the plates are being filled. Look for slices with a moist, even interior and clean edges — no gray, dry band along the outside. The gravy should coat the back of a spoon and cling to the potatoes instead of running off them, with visible flecks of bacon in every ladle.
Steam should still rise from the insert as the last servings go out. Before sitting down, check that the temperature was confirmed at 145°F with a 3-minute rest, and that the leftover pork and gravy will be in the refrigerator within 2 hours of cooking.
Common mistakes
The most common slip is stirring the soup in at the start. Stirring early thins the gravy before the drippings have built and leaves the pork less protected on top. Lifting the lid to check on things is the second offender — each peek drops the temperature and stretches the cook.
Overshooting the time is the third: pork loin is lean, and an extra hour on high can take it from tender to dry, so trust the thermometer over the clock. Overcrowding matters too; a roast wedged into a small cooker cooks unevenly. Finally, skip adding water or broth — the soup plus the natural juices are the full sauce, and extra liquid keeps the gravy from thickening.
How to tell it’s done
Pork loin is done at 145°F (63°C) measured in the thickest part of the roast, followed by a rest of at least 3 minutes — that combination is both the safe standard for whole cuts of pork and the point where this lean cut is at its most tender. Visually, the meat should be pale throughout with clear juices and a soft, even crumb; there is no need to chase a rosy center. The potatoes are done when a fork slides in with no resistance and they still hold their halved shape. The gravy is ready when it coats a spoon and stays put on the plate.
- Steaks, chops and roasts: 145°F (63°C) in the thickest part, then a 3-minute rest
Up next · Part 3 of 3
4 variations · storage & make-ahead · 5 answers · printable card
Tips, FAQ & printable recipe (Part 3)← Back to the ingredients (Part 1)