Dinner · Part 2 of 3: Instructions
Crockpot Parmesan Sausage Marinara Tortellini: A Set-It-and-Forget-It Dinner Step-by-step instructions
- Prep
- Cook
- Total
- Serves
- 6
Before you start
Before starting, remove the sausage casings and crumble the meat. Grate the Parmigiano-Reggiano if not already grated. Measure out the marinara sauce and have the tortellini and shredded cheese ready.
No need to pre-cook the tortellini—it will cook in the slow cooker. Make sure your slow cooker is clean and ready to use. You'll also want a large skillet for browning the sausage and a wooden spoon for breaking it up.
Ingredients at a glance (5)
- 1 lb sweet Italian pork sausage, casings removed
- 20 oz refrigerated three-cheese tortellini
- 24 oz crushed San Marzano marinara sauce
- 2 cups shredded Italian four-cheese blend
- 1/2 cup freshly grated Parmigiano-Reggiano
Instructions
Brown and Layer
- Brown the SausageHeat a large skillet over medium-high heat. Add the sweet Italian sausage (casings removed) and cook, breaking it up with a wooden spoon, until browned and cooked through, about 8–10 minutes. Use a slotted spoon to transfer the sausage to the slow cooker insert, leaving any excess fat behind.Look for The sausage is browned and crumbly, with no pink remaining.Safe temperature 160°F (71°C) internal temperature (ground meat)Tip Browning the sausage first adds deep flavor that you can't get from just dumping it in raw.
- Layer the Tortellini and SauceScatter the refrigerated three-cheese tortellini evenly over the sausage in the slow cooker. Pour the crushed San Marzano marinara sauce over the tortellini, making sure the sauce covers most of the pasta. Do not stir.Look for The tortellini is nestled under a layer of rich red sauce.Tip Keeping the tortellini submerged in sauce helps it cook evenly without drying out.
- Top with CheesesSprinkle the shredded Italian four-cheese blend evenly over the sauce, followed by the freshly grated Parmigiano-Reggiano. Cover the slow cooker with the lid.Look for The top is covered with a generous layer of shredded and grated cheese.Tip For the best texture, use freshly grated Parmesan rather than pre-shredded.
The sausage is browned and crumbly, with no pink remaining. The tortellini is scattered evenly over the sausage, and the marinara sauce covers most of it.
The top is blanketed with a generous layer of shredded Italian cheeses and grated Parmesan. The slow cooker is filled and ready to cook.
Slow Cook and Let It Bubble
- Slow Cook on LowSet the slow cooker to LOW and cook for 3 to 4 hours, until the tortellini is tender and the sauce is bubbling around the edges. Do not lift the lid during the first 2 hours to keep the heat steady.Look for The sauce is gently bubbling and the cheese has melted into a golden crust.Tip Cooking on LOW prevents the tortellini from turning mushy and lets the flavors meld.
- Check for DonenessAfter 3 hours, gently lift the lid and check the tortellini: it should be tender but still hold its shape. If the sauce looks too thick, stir in a splash of water or chicken broth. If the tortellini is still firm, re-cover and cook for another 30 minutes.Look for The tortellini is al dente and the sauce is creamy and thick.Tip Taste a tortellini to ensure it's cooked through; it should be tender with no raw flour taste.
After 3–4 hours on low, the sauce is bubbling gently around the edges, and the cheese has melted into a golden, crusty layer. The tortellini is tender, and the kitchen smells like a cozy Italian restaurant. The mixture looks creamy and cohesive, with the cheese blended into the sauce.
Stir, Serve, and Enjoy
- Stir Gently and ServeOnce the tortellini is cooked, stir the mixture gently to combine the sauce and cheese into a creamy, cohesive dish. Spoon the tortellini and sausage onto plates or into bowls, making sure to get plenty of the cheesy sauce. Serve hot.Look for The tortellini is coated in a rich, cheesy tomato sauce with melted cheese pulls.Tip For the best texture, serve immediately while the cheese is stretchy and hot.
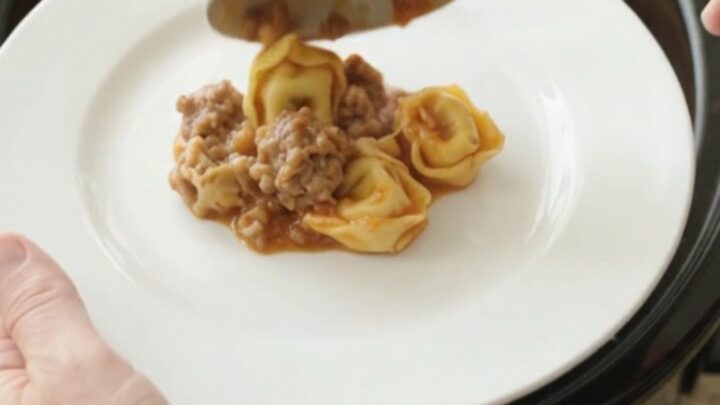
After a gentle stir, the tortellini and sausage are coated in a rich, cheesy tomato sauce. The cheese pulls in long strands as you spoon it out. The dish looks hearty and inviting, with golden cheese and savory sausage in every bite. Serve immediately for the best texture.
Common mistakes
One common mistake is lifting the lid too often, which lets out heat and extends cooking time. Trust the slow cooker and keep the lid on. Another is overcooking the tortellini, which turns it mushy. Stick to the recommended 3–4 hours on low.
Also, avoid stirring too early—this can break up the tortellini and make the sauce cloudy. Let the layers set, then stir gently at the end. If the sauce is too thick, add a splash of broth or water.
How to tell it’s done
The dish is done when the tortellini is tender but still holds its shape, and the sauce is bubbling around the edges. The cheese should be melted and golden in spots. To check, gently press a tortellini with a spoon—it should give slightly but not fall apart.
The internal temperature of the sausage should be at least 160°F (71°C) if you want to verify with a thermometer. If the sauce seems too thin, let it cook uncovered for 15–20 minutes to thicken.
- Ground meat: 160°F (71°C) in the thickest part
Up next · Part 3 of 3
4 variations · storage & make-ahead · 5 answers · printable card
Tips, FAQ & printable recipe (Part 3)← Back to the ingredients (Part 1)