Dinner · Part 2 of 3: Instructions
Slow-Cooker Herb Butter Garlic Corn Sea Scallops Step-by-step instructions
- Prep
- Cook
- Total
- Serves
- 4
Before you start
Before you start, make sure your slow cooker is clean and dry. If you're using frozen sweet corn, there's no need to thaw it—just add it straight from the freezer. Smash the garlic cloves with the flat side of a knife to release their flavor.
Cut the parsley-garlic scampi butter into 6 equal pats so they melt evenly. Measure the white wine. Have a slotted spoon and serving plates ready. This recipe comes together in minutes, so there's no need to prep anything else. The slow cooker does the rest.
Ingredients at a glance (6)
- 1 lb dry-pack sea scallops
- 1 lb raw peeled jumbo shrimp
- 2 cups frozen sweet corn kernels
- 12 cloves garlic, smashed
- 6 tbsp parsley-garlic scampi butter, cut into pats
- 1/2 cup dry white wine
Instructions
Layer and Set
- Layer the Seafood and AromaticsPlace the dry-pack sea scallops and raw peeled jumbo shrimp in the bottom of a 6-quart slow cooker in an even layer. Scatter the frozen sweet corn kernels and the smashed garlic cloves over the seafood, distributing them evenly.Look for The seafood and corn fill the slow cooker in a single layer, with garlic scattered throughout.Tip Pat the scallops and shrimp dry with paper towels before adding them to the slow cooker to help the butter sauce cling better.
- Add the Butter and WinePlace the pats of parsley-garlic scampi butter on top of the seafood and corn. Pour the dry white wine evenly over everything. Do not stir.Look for The butter pats sit on top of the seafood, and the wine pools around the edges.Tip Keeping the butter on top allows it to melt slowly and baste the seafood as it cooks.
At the end of this phase, you'll have a slow cooker filled with raw seafood, corn, garlic, butter pats, and wine. The butter is still solid, and the wine pools around the edges. The ingredients are arranged in a single layer, with the garlic and corn scattered evenly.
This is the starting point—no cooking has begun yet, but the stage is set for a delicious meal. Before moving on, make sure the butter is evenly distributed and the wine covers the bottom of the slow cooker.
Slow-Cook to Tender
- Slow-Cook the SeafoodCover the slow cooker and cook on LOW for 2 to 2 1/2 hours, until the scallops are opaque and firm to the touch and the shrimp are pink and curled. The internal temperature of the scallops and shrimp should reach 145°F (63°C) when checked with an instant-read thermometer.Look for The butter is melted and bubbling, the garlic is tender, and the seafood is opaque and cooked through.Safe temperature 145°F (63°C) internal temperature (shellfish)Tip Check the seafood at the 2-hour mark to avoid overcooking; slow cookers vary in heat.
After 2 to 2 1/2 hours on low, the slow cooker will be filled with a bubbling, golden sauce. The butter has melted and combined with the wine, creating a glossy emulsion. The scallops are opaque and firm, the shrimp are pink and curled, and the garlic is soft and fragrant. The corn is tender and has absorbed some of the buttery sauce. The aroma is rich with garlic and herbs. Check the internal temperature of the seafood to ensure it reaches 145°F (63°C).
Serve and Enjoy
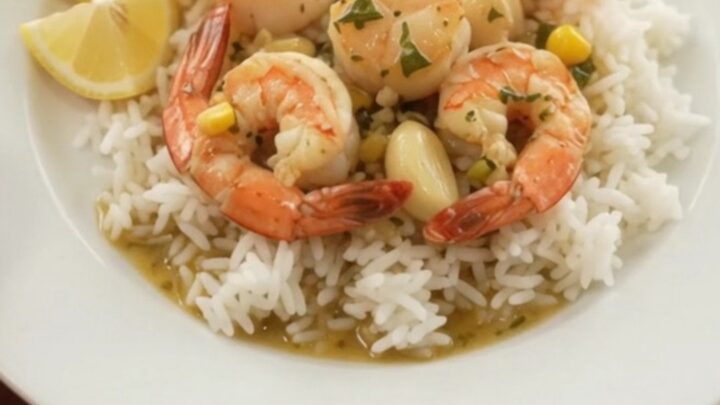
- Serve the Seafood BoilUsing a slotted spoon, lift the scallops, shrimp, corn, and garlic from the butter sauce and divide among shallow bowls or plates. Spoon a little of the remaining butter sauce over each serving. Serve hot, with steamed white rice and lemon wedges on the side.Look for The seafood is glistening with butter sauce, and the garlic is soft and golden.Tip For a more elegant presentation, arrange the seafood and corn on a platter and pour the sauce over the top.
The final phase is all about serving. Using a slotted spoon, lift the seafood, corn, and garlic from the sauce and divide among plates. The seafood is glistening with butter, and the garlic is golden and soft. Spoon extra sauce over the top for maximum flavor. Serve hot with steamed rice and lemon wedges on the side. The dish looks like a rustic coastal feast, with the golden sauce coating every ingredient. Enjoy the tender seafood and the rich, garlicky sauce.
Common mistakes
One common mistake is overcooking the seafood. Because slow cookers vary in temperature, it's important to check the seafood at the 2-hour mark and not leave it on low for more than 2 1/2 hours. Another mistake is using wet-packed scallops, which release water and dilute the sauce, resulting in a thin, less flavorful dish.
Also, avoid stirring the ingredients during cooking—this can break up the scallops and make the sauce cloudy. Let the slow cooker do its work undisturbed. Finally, don't skip the white wine; it adds essential acidity that balances the butter.
How to tell it’s done
The seafood is done when the scallops are opaque and firm to the touch, and the shrimp are pink and curled. The internal temperature should read 145°F (63°C) on an instant-read thermometer inserted into the thickest part of the scallop or shrimp.
The garlic cloves should be soft and golden, and the corn should be tender. The butter sauce will be bubbling gently around the edges. Be careful not to overcook, as seafood can become rubbery if left in the slow cooker too long. Start checking at the 2-hour mark.
- Shellfish: 145°F (63°C) in the thickest part
Up next · Part 3 of 3
4 variations · storage & make-ahead · 5 answers · printable card
Tips, FAQ & printable recipe (Part 3)← Back to the ingredients (Part 1)