Dinner · Part 2 of 3: Instructions
Crockpot Green Potion Split Pea Soup with Ham Step-by-step instructions
- Prep
- Cook
- Total
- Serves
- 6
Before you start
Before starting, ensure all ingredients are measured and ready. Rinse the dried split peas under cold running water in a fine-mesh colander until the water runs clear, which helps remove excess starch.
Prepare the ham and carrots by dicing them into uniform pieces to ensure they cook at the same rate. Check that the slow cooker is clean and positioned on a stable, heat-resistant surface away from any edges.
Ingredients at a glance (6)
- 1 lb diced ham
- 1 lb dried split peas
- 2 cups diced carrots
- 1 tsp dried thyme
- 1 tsp onion powder
- 6 cups chicken broth
Instructions
Layering the ingredients
- Assemble the basePlace the diced ham into the bottom of the slow cooker insert. Scatter the dried split peas and diced carrots evenly over the ham to ensure consistent cooking throughout the process.Look for The bottom of the slow cooker should be evenly covered with the ham and vegetables.Tip Ensure the ham is distributed well to prevent sticking at the bottom.
At this phase, the slow cooker contains the raw ham, dry peas, and diced carrots. The ingredients should be layered evenly to ensure proper heat distribution. Verify that the ham is at the very bottom to receive the most direct heat, and that the peas and carrots are spread out so they cook uniformly without clumping together in the center of the pot.
Seasoning and liquid addition
- Season and add liquidSprinkle the onion powder and dried thyme over the top of the peas and carrots. Pour the chicken broth over the ingredients until everything is fully submerged.Look for The broth should just cover the top of the ingredients.Tip Stir gently once to ensure the spices are distributed without disturbing the layers too much.
The soup now contains the dry seasonings and the broth. Ensure the broth level is sufficient to just submerge the solid ingredients. The onion powder and thyme should be evenly distributed so they do not clump. Check that no ingredients are stuck to the sides of the ceramic insert, as these may burn or dry out during the long cooking process.
Slow simmering
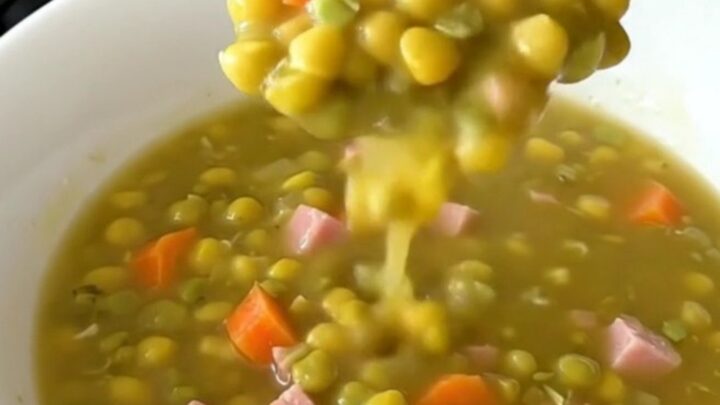
- Slow cook and serveCover the slow cooker and cook on low for 6 to 8 hours, or on high for 3 to 4 hours, until the peas are soft and the soup has thickened. Once finished, ladle the hot soup into bowls and serve immediately while steaming.Look for The soup should be thick, bright green, and the peas should be completely tender when pressed with a spoon.Tip If the soup becomes too thick, stir in a splash of warm water or additional broth before serving.
The soup is now cooking and the ingredients are softening. By the end of this phase, the kitchen should smell savory and earthy. The peas will have expanded and thickened the broth significantly.
Perform a final check before serving to ensure the peas have fully dissolved and the soup reaches the desired creamy consistency before ladling it into individual bowls.
Common mistakes
A common mistake is adding too much liquid at the start, which leads to a thin soup. Start with the recommended amount and only add more if the consistency is too thick after cooking. Another error is not rinsing the peas, which can make the soup cloudy or gritty.
Avoid lifting the lid frequently during the cooking process, as this releases heat and moisture, significantly extending the cooking time and potentially preventing the peas from softening correctly.
How to tell it’s done
The soup is done when the split peas have completely broken down and lost their distinct shape, resulting in a thick, creamy texture. The carrots should be tender enough to be easily pierced with a fork, and the ham should be heated through and soft.
The consistency should be pourable yet thick, coating the back of a spoon. There is no specific internal temperature required for this vegetable-based soup, but ensure it is steaming hot throughout before serving.
Up next · Part 3 of 3
2 variations · storage & make-ahead · 3 answers · printable card
Tips, FAQ & printable recipe (Part 3)← Back to the ingredients (Part 1)