Breakfast · Part 2 of 3: Instructions
Crockpot Cheesy Chorizo Egg & Hashbrown Fiesta Breakfast Casserole Step-by-step instructions
- Prep
- Cook
- Total
- Serves
- 8
Before you start
Before you start, make sure your slow cooker is clean and ready. If using frozen hashbrowns, thaw them in the refrigerator overnight and pat them dry with paper towels. Slice the bell peppers into thin strips and chop the cilantro for serving.
Measure out all the ingredients and have them within reach. Browning the chorizo first is essential—it not only cooks the meat but also develops its flavor. The eggs should be whisked thoroughly with the cream and seasoning to ensure a smooth custard.
Ingredients at a glance (12)
- 30 oz shredded hashbrowns
- 1 lb fresh Mexican chorizo, browned
- 2 medium bell peppers, sliced
- 12 large eggs
- 1/2 cup heavy cream
- 2 tbsp taco seasoning
- 3 cups shredded cheddar-Jack cheese
- 1 Hass avocado, sliced, for serving
- 1/2 cup sour cream, for serving
- 1 cup pico de gallo, for serving
- 1/4 cup fresh cilantro, chopped, for serving
- 1 lime, cut into wedges, for serving
Instructions
Prep and Brown
- Brown the Chorizo and Prep the VegetablesHeat a large skillet over medium-high heat. Add the fresh Mexican chorizo and cook, breaking it up with a spatula, until browned and cooked through, about 6 to 8 minutes. Transfer the cooked chorizo to a plate lined with paper towels to drain excess grease. Slice the bell peppers into thin strips.Look for Chorizo is browned and crumbly, with no pink remaining.Safe temperature 160°F (71°C) internal temperature (ground meat)Tip Draining the chorizo prevents the casserole from becoming greasy.
- Whisk the Egg MixtureIn a large mixing bowl, crack the 12 eggs and add the heavy cream and taco seasoning. Whisk vigorously until the eggs are fully beaten and the mixture is smooth and slightly frothy.Look for Egg mixture is uniform in color with no streaks of yolk.Tip Whisking well ensures a fluffy, set custard.
The chorizo is browned and crumbly, with no pink remaining, and the bell peppers are sliced. The egg mixture is well combined and frothy.
The slow cooker is ready with all ingredients measured. The kitchen smells of toasted spices and savory meat, setting the stage for the layers to come.
Layer and Slow-Cook
- Layer the Casserole in the CrockpotLightly coat the inside of a 6-quart slow cooker with nonstick spray. Spread half of the shredded hashbrowns evenly over the bottom. Top with half of the browned chorizo and half of the sliced bell peppers. Pour half of the egg mixture over this layer. Sprinkle with half of the shredded cheddar-Jack cheese. Repeat the layers with the remaining hashbrowns, chorizo, peppers, egg mixture, and cheese.Look for Layers are evenly distributed and the cheese covers the top.Tip Press down gently on each layer to help the egg mixture settle.
- Slow-Cook the CasseroleCover the slow cooker with the lid. Cook on LOW for 6 hours or on HIGH for 4 hours, until the egg custard is set and the cheese is bubbling and golden around the edges.Look for The center is set and a knife inserted comes out clean.Safe temperature 160°F (71°C) internal temperature (egg dishes)Tip Avoid lifting the lid during cooking to maintain even heat.
The layers are evenly distributed, and the cheese forms a golden, bubbly crust. The casserole is set in the center, and a knife inserted comes out clean. The aroma of chorizo, peppers, and melted cheese fills the kitchen. The eggs are fully cooked, and the texture is fluffy and tender.
Rest and Serve
- Rest and Serve with Fresh ToppingsTurn off the slow cooker and let the casserole rest for 10 minutes. Slice into squares and serve warm, topped with sliced avocado, a dollop of sour cream, pico de gallo, chopped cilantro, and a squeeze of fresh lime juice.Look for Casserole is firm enough to slice and holds its shape.Tip Letting it rest helps the layers set for cleaner slices.
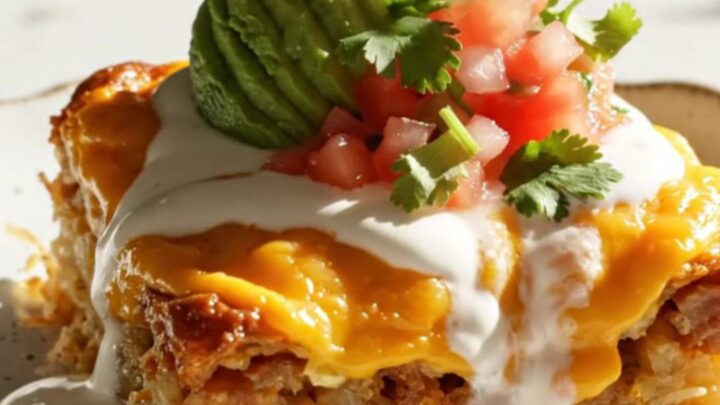
The casserole has rested for 10 minutes and holds its shape when sliced. The toppings are fresh and vibrant, and the lime adds a bright finish. The presentation is colorful and inviting, with avocado, sour cream, pico de gallo, and cilantro creating a festive plate ready to serve.
Common mistakes
One common mistake is lifting the lid too often to check on the casserole, which lets heat escape and extends cooking time. Another is using frozen hashbrowns without thawing, which adds excess water and makes the casserole soggy.
Overcooking can also dry out the eggs, so stick to the recommended times. Also, be sure to fully brown the chorizo before layering; undercooked chorizo won't have the same flavor and may not cook through properly in the slow cooker.
How to tell it’s done
The casserole is done when the eggs are fully set and the internal temperature in the center reaches 160°F (71°C). A knife inserted into the middle should come out clean, and the cheese should be melted and bubbling.
The edges should be golden and slightly crispy, while the center remains moist and tender. If the top is browning too quickly but the center is still soft, turn the slow cooker to LOW and continue cooking for another 30 minutes.
- Ground meat: 160°F (71°C) in the thickest part
- Egg dishes: 160°F (71°C) in the thickest part
Up next · Part 3 of 3
4 variations · storage & make-ahead · 5 answers · printable card
Tips, FAQ & printable recipe (Part 3)← Back to the ingredients (Part 1)