Appetizers · Part 1 of 3: Ingredients
Crispy Za’atar-Crusted Halloumi Fingers with Pomegranate Molasses
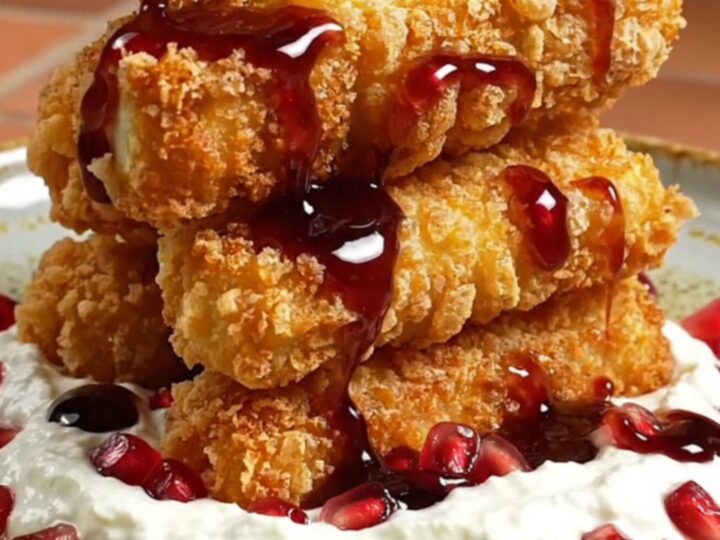
- Prep
- Cook
- Total
- Serves
- 4
Elevate your appetizer game with these crispy za'atar-crusted halloumi fingers. This simple yet sophisticated dish combines the salty, squeaky texture of halloumi cheese with a crunchy, aromatic sesame and za'atar coating, finished with the bright, tangy sweetness of pomegranate molasses.
These halloumi fingers are perfect for entertaining or as a quick, indulgent snack. By coating the cheese in a blend of panko, toasted sesame, and wild za'atar, you create a crust that blisters beautifully in olive oil.
Served over a bed of cool, garlicky labneh and brightened with fresh pomegranate arils, the contrast in temperatures, textures, and flavors creates an unforgettable experience in every single bite.
Ingredients
Main
- 250 g halloumi cheese, sliced into 8 thick sticks
Breading
- 50 g all-purpose flour
- 1 egg, whisked
- 80 g panko breadcrumbs
- 2 tbsp toasted white sesame seeds
- 1 tbsp wild za'atar
Cooking
- 100 ml olive oil
Serving
- 1/2 cup garlic labneh for serving
- 2 tbsp pomegranate arils for serving
- 1 tbsp pomegranate molasses for serving
Why this recipe works
The method of shallow frying in high-quality olive oil ensures that the panko-sesame crust becomes perfectly crispy and golden while the halloumi inside softens just enough to become warm and pliable without losing its signature firm texture.
This technique locks in the savory notes of the za'atar while the pomegranate molasses provides a necessary acidic sweetness that cuts through the richness of the fried cheese.
Using a three-step breading process—flour, egg, and a mix of panko and za'atar—creates a robust barrier that prevents the cheese from melting too quickly. The flour acts as a dry base for the egg to stick, while the panko and sesame seeds provide the structural crunch. This layering approach is essential for achieving a professional finish with consistent, golden-brown results every time you prepare this dish.
Notes and substitutions
When selecting ingredients, choose a firm block of halloumi, as it holds its shape best during the frying process. If you cannot find wild za'atar, a standard high-quality za'atar blend will work perfectly.
Ensure the panko is fresh to achieve the best crunch; stale breadcrumbs will not provide the same airy, light texture required for this specific crust, which is vital for the overall success of the recipe.
The equipment used is minimal but important. A heavy stainless steel pan is recommended because it retains heat effectively, allowing for a consistent fry temperature.
If you do not have a thermometer to check the oil, you can test it by dropping a small piece of breadcrumb into the pan; it should sizzle immediately and turn golden within seconds. Always use fresh olive oil to avoid any burnt flavors affecting the delicate cheese.
- Pomegranate molasses: A reduction of balsamic vinegar mixed with a small amount of honey can provide a similar sweet and tangy profile.
- Labneh: Greek yogurt thinned with a little lemon juice and minced garlic works well as a creamy base substitute.
Equipment
- Heavy stainless steel pan
- Small bowls for breading
- Tongs
- Paper towels
Up next · Part 2 of 3
4 steps · 5 min of cooking · what to look for at each stage
Step-by-step instructions (Part 2)