Desserts · Part 2 of 3: Instructions
Crispy Walnut Kadayıf Custard Dessert Step-by-step instructions
- Prep
- Cook
- Total
- Serves
- 8
Before you start
Before starting, gather all ingredients and equipment. Measure the kadayıf, walnuts, sugar, and butter for the toasted layer. For the custard, measure the milk, sugar, flour, cornstarch, butter, and vanilla.
Have a large skillet, a saucepan, a hand mixer, and a 9x13-inch baking dish ready. The custard needs to chill for at least 30 minutes before whipping, so plan accordingly. The assembled dessert requires at least 4 hours of chilling, so it’s best to make it a day ahead.
Ingredients at a glance (11)
- 3 cups shredded kadayıf pastry
- 2 tbsp butter
- 1/2 cup sugar
- 1 cup chopped walnuts
- 1 liter whole milk
- 1 cup sugar
- 1/2 cup all-purpose flour
- 1/2 cup cornstarch
- 1 tbsp butter
- 1 tsp vanilla extract
- 1 packet whipped cream powder (krem şanti)
Instructions
Toast and Custard
- Toast the KadayıfMelt the butter in a large skillet over low heat. Add the shredded kadayıf pastry and sugar, stirring constantly with a spatula to coat every strand. Continue toasting for about 8–10 minutes, until the kadayıf turns golden and crisp. Add the chopped walnuts and cook for another 2–3 minutes, stirring often, until the nuts are fragrant and the mixture is a deep amber color. Remove from heat and set aside to cool slightly.Look for The kadayıf should be deeply golden and crackle when pressed; the walnuts smell toasty.Tip Keep the heat low to prevent burning; stir frequently for even toasting.
- Make the Custard BaseIn a large saucepan, whisk together the whole milk, sugar, all-purpose flour, and cornstarch until smooth and no lumps remain. Place over medium heat and cook, whisking constantly, until the mixture thickens and comes to a gentle boil. This should take about 10–12 minutes. Once bubbling, reduce the heat to low and cook for 1–2 minutes more, then remove from heat. Stir in the butter and vanilla extract until fully incorporated.Look for The custard should coat the back of a spoon and have a thick, pourable consistency.Tip Whisk constantly to avoid scorching on the bottom of the pan.
- Chill the CustardPour the hot custard into a large bowl. Press a piece of plastic wrap directly onto the surface to prevent a skin from forming. Refrigerate for at least 30 minutes, or until completely cooled and thickened. The custard should be firm enough to hold its shape when stirred.Look for The custard is cool to the touch and has a pudding-like thickness.Tip Chilling thoroughly ensures the final dessert sets properly.
The kadayıf should be golden and crackling, with a deep amber color and a butterscotch aroma. The custard should be thick and smooth, with no lumps, and have cooled completely in the refrigerator. When you stir it, it should hold its shape briefly before settling.
Whip and Layer
- Whip the CustardRemove the chilled custard from the refrigerator. Sprinkle the whipped cream powder (krem şanti) over the top. Using an electric hand mixer on medium speed, whip the custard for 2–3 minutes, until it becomes light, fluffy, and glossy. The mixture should increase in volume and have a cloud-like texture.Look for The custard is velvety, glossy, and holds soft peaks when the beaters are lifted.Tip Do not over-whip or the mixture may become runny.
- Layer the DessertSpread half of the toasted kadayıf mixture evenly over the bottom of a large glass baking dish (about 9x13 inches). Press down gently with a spatula to create a firm base. Pour the whipped custard over the kadayıf layer and smooth the top with an offset spatula. Sprinkle the remaining toasted kadayıf mixture evenly over the custard, covering it completely.Look for The layers are distinct: crunchy base, creamy middle, and crispy top.Tip Ensure the top layer covers the custard fully to prevent drying.
- Chill to SetCover the baking dish with plastic wrap or a lid. Refrigerate the assembled dessert for at least 4 hours, or overnight, to allow the layers to set and the flavors to meld. The dessert should be firm enough to slice cleanly.Look for The dessert is firm and holds its shape when a spoon is pressed into it.Tip Overnight chilling gives the best texture and flavor.
The custard is whipped to a light, glossy cloud that holds soft peaks.
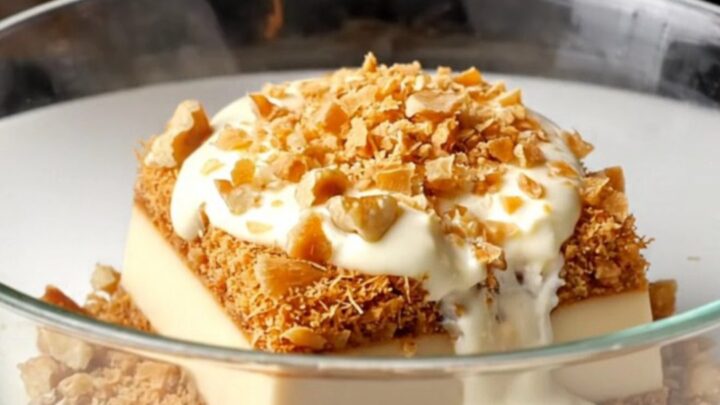
The baking dish has a firm layer of toasted kadayıf on the bottom, a smooth custard layer in the middle, and a generous topping of crunchy kadayıf on top. The dessert should look inviting and ready to chill.
Chill and Serve
- Slice and ServeRemove the dessert from the refrigerator just before serving. Using a sharp knife, cut into squares or rectangles. Lift each portion with a spatula, ensuring the layers stay intact. Serve cold, scooping a generous piece onto each plate.Look for Clean, neat slices with visible layers of crunchy kadayıf and creamy custard.Tip Wipe the knife between cuts for cleaner slices.
After chilling, the dessert is firm and slices cleanly. The top layer is still crunchy, the custard is creamy and set, and the bottom layer provides a sturdy base. Each serving shows distinct layers and a beautiful contrast of textures.
Common mistakes
One common mistake is toasting the kadayıf over too high heat, which burns the sugar before the pastry crisps. Keep the heat low and stir constantly. Another pitfall is not whisking the custard enough, leading to lumps; whisk vigorously from the start.
Over-whipping the custard after adding the whipped cream powder can make it thin and watery. Finally, cutting the dessert too soon after chilling will result in messy slices—be patient and let it set fully.
How to tell it’s done
The kadayıf is done when it turns a deep amber color and every strand is crisp and crackly; it should sound crunchy when stirred. The custard is ready when it thickens to a pudding-like consistency and coats the back of a spoon.
After whipping, it should be glossy and hold soft peaks. The assembled dessert is done after chilling for at least 4 hours—it should be firm enough to slice cleanly without the layers sliding apart.
Up next · Part 3 of 3
4 variations · storage & make-ahead · 5 answers · printable card
Tips, FAQ & printable recipe (Part 3)← Back to the ingredients (Part 1)