Desserts · Part 2 of 3: Instructions
Crispy Walnut Kadayıf Custard Dessert Step-by-step instructions
- Prep
- Cook
- Total
- Serves
- 8
Before you start
Before starting, gather all your ingredients and equipment. Shredded kadayıf is often sold in a tangled mass; gently pull it apart with your fingers to separate the strands.
Measure out all the ingredients for both the kadayıf mixture and the custard so you can move quickly. Have a 9x13-inch baking dish ready. The custard will thicken quickly once it boils, so stay close to the stove and keep your whisk handy.
Ingredients at a glance (10)
- 3 cups shredded kadayıf pastry
- 2 tbsp unsalted butter, melted
- 1/2 cup granulated sugar
- 1 cup chopped walnuts
- 1 liter whole milk
- 1 cup granulated sugar
- 1/2 cup all-purpose flour
- 1/2 cup cornstarch
- 1 tbsp unsalted butter
- 1 tsp vanilla extract
Instructions
Toasting the Kadayıf
- Toast the KadayıfMelt the 2 tablespoons of butter in a large skillet over low heat. Add the shredded kadayıf, sugar, and chopped walnuts. Cook, stirring frequently, until the kadayıf is deeply golden and crisp, about 8-10 minutes. Remove from heat and let cool slightly.Look for The kadayıf should be golden brown and smell nutty and buttery.Tip Stir constantly to prevent burning; low heat is key.
At the end of this phase, the kadayıf should be a rich golden brown, with the walnuts fragrant and the butter fully absorbed. The mixture will look slightly glossy and smell nutty and sweet. It's important to let it cool slightly before layering, as hot kadayıf could make the custard curdle.
Custard Perfection
- Make the CustardIn a medium saucepan, whisk together the milk, sugar, flour, and cornstarch. Place over medium heat and cook, whisking constantly, until the mixture thickens and comes to a boil. Boil for 1 minute, then remove from heat. Stir in the butter and vanilla until smooth.Look for The custard should be thick enough to coat the back of a spoon.Tip Whisk continuously to avoid lumps and scorching.
The custard should be thick enough to coat the back of a spoon and leave a clear trail when you run your finger through it. It will continue to thicken as it cools, so don't overcook it.
The texture should be smooth and glossy, with no lumps. The butter and vanilla should be fully incorporated, giving it a rich, aromatic finish.
Assembling and Chilling
- Layer and ChillSpread half of the toasted kadayıf mixture evenly in the bottom of a 9x13-inch baking dish. Pour the hot custard over it. Top with the remaining kadayıf mixture, pressing gently. Let cool to room temperature, then refrigerate for at least 2 hours before serving.Look for The layers should be distinct and the top crispy.Tip Chill thoroughly to allow the custard to set completely.
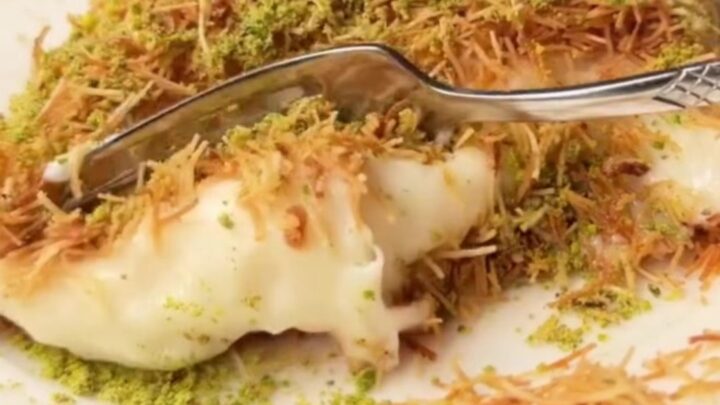
The layers should be clearly visible: a crunchy base, a creamy middle, and a crisp topping. After chilling, the custard should be firm to the touch and the top kadayıf should still have some crunch. The dessert should be cold throughout, and when you cut into it, the layers should hold their shape.
Common mistakes
One common mistake is not toasting the kadayıf long enough. It should be a deep golden brown, not pale, to develop the nutty flavor and crisp texture.
Another is undercooking the custard—it must come to a boil to activate the starch, otherwise it will be thin and runny. Finally, be gentle when spreading the top layer of kadayıf; pressing too hard will crush it and make the layers less distinct.
How to tell it’s done
The dessert is done when the kadayıf is deeply golden and crisp, and the custard has thickened to a pudding-like consistency. When you tilt the pan, the custard should not run. For the assembled dessert, the custard should be fully set after chilling—no jiggle in the center.
If you insert a knife into the middle, it should come out clean. The top layer of kadayıf should remain crunchy; if it softens, that's okay, it will still taste delicious.
Up next · Part 3 of 3
4 variations · storage & make-ahead · 5 answers · printable card
Tips, FAQ & printable recipe (Part 3)← Back to the ingredients (Part 1)