Desserts · Part 2 of 3: Instructions
Crispy Turkish Şöbiyet Baklava with Semolina Cream Step-by-step instructions
- Prep
- Cook
- Total
- Serves
- 12
Before you start
Before starting, make sure the filo dough is fully thawed if using frozen. Clarify the butter if making it from scratch, and have all ingredients measured. Cook the semolina cream and the syrup in advance so they have time to cool.
Preheat the oven to 375°F (190°C). Set up a clean work surface for layering the filo. Have a pastry brush, sharp knife, and 9x13-inch baking dish ready. The syrup should be at room temperature when the baklava comes out of the oven.
Ingredients at a glance (8)
- 20 sheets fresh Turkish baklava yufka (or filo dough)
- 150 g clarified butter, melted
- 150 g finely ground Antep pistachios
- 200 ml milk
- 40 g semolina
- 250 g granulated sugar
- 200 ml water
- 1 tsp lemon juice
Instructions
Cream and Syrup
- Make the Semolina Cream and SyrupIn a medium saucepan, combine the milk and semolina. Cook over medium heat, whisking constantly, until the mixture thickens into a thick pudding, about 5 minutes. Remove from heat and let cool slightly. In a separate small saucepan, combine the sugar and water. Bring to a boil, stirring to dissolve the sugar, then add the lemon juice and simmer for 5 minutes. Set aside to cool completely.Look for The semolina pudding is thick and smooth; the syrup is clear and slightly thickened.Tip Whisk the semolina constantly to avoid lumps. The syrup must be cool before pouring over the hot pastries.
- Layer the Filo with ButterPreheat the oven to 375°F (190°C). Brush the bottom of a 9x13-inch baking dish with some of the clarified butter. Lay one sheet of yufka in the dish, brush it lightly with butter, and repeat with the remaining sheets, brushing each layer. Keep the stack even and flat.Look for The filo stack is evenly buttered and lies flat in the dish.Tip Work quickly to prevent the filo from drying out; cover unused sheets with a damp towel.
At the end of this phase, the semolina cream is thick and smooth, with no lumps, and the syrup is clear and slightly thickened, with a hint of lemon. Both should be cooled to room temperature before proceeding.
The cream should hold its shape when spooned, and the syrup should not be too thick or too thin. This is the foundation for the filling and the final soak.
Layering and Baking
- Cut and Stuff the PastriesUsing a sharp knife, cut the layered filo into 12 equal squares. Place a dollop of the semolina cream and a sprinkle of ground pistachios in the center of each square. Fold each square diagonally to form a triangle, pressing the edges to seal.Look for The triangles are neatly folded and hold the filling without leaking.Tip Seal the edges firmly with your fingers or a fork to keep the filling inside during baking.
- Bake Until Golden and PuffedArrange the triangles in the baking dish, leaving a little space between them. Pour the remaining clarified butter over the top, making sure each triangle is coated. Bake for 30 minutes, until the pastries are puffed, golden, and shatteringly crisp.Look for The pastries are deep golden brown and crisp to the touch.Tip Rotate the dish halfway through baking for even browning.
The filo stack is evenly buttered and cut into neat squares. The triangles are filled and sealed without any leaking. After baking, the pastries are golden, puffed, and crisp to the touch. The kitchen smells of butter and toasted nuts. The pastries should be evenly browned, with no burnt edges, and the layers should separate easily when pierced.
Syrup and Finish
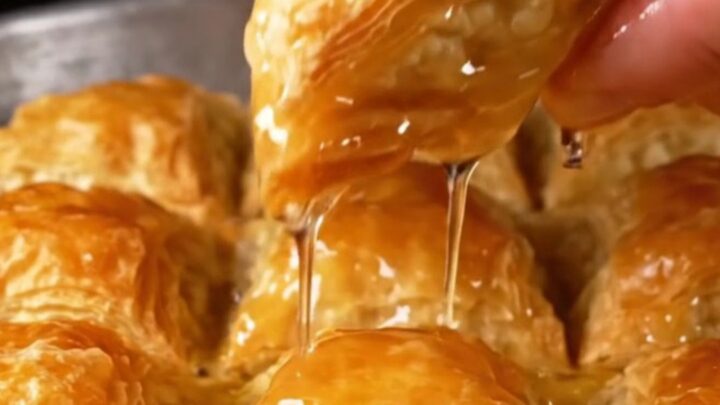
- Soak in Cool SyrupRemove the baklava from the oven and immediately pour the cooled syrup evenly over the hot pastries. The sizzling sound indicates the syrup is being absorbed. Let the pastries sit for at least 30 minutes to soak up the syrup.Look for The syrup bubbles and is absorbed, leaving the pastries glossy.Tip Pour the syrup slowly and evenly; do not stir or move the pastries.
- Garnish and ServeDust the top of the baklava with the remaining ground pistachios. Lift a syrup-soaked triangle with your fingers or tongs and serve at room temperature.Look for The pistachios add a bright green contrast to the golden pastry.Tip Serve the same day for the crispiest texture; the pastries soften as they sit.
The cool syrup sizzles as it hits the hot pastries, and the baklava absorbs it gradually. The top becomes glossy and the pastries look inviting. After resting, the pastries are ready to serve, with a visible syrup sheen and a sprinkle of green pistachios. The texture should be crisp-tender, with the syrup adding moisture without making the pastry soggy.
Common mistakes
One common mistake is pouring warm syrup over the hot baklava, which makes the pastry soggy. Always cool the syrup completely. Another is over-brushing the filo with too much butter, which can make the layers greasy instead of flaky.
Use a light hand. Cutting the filo with a dull knife can crush the layers; use a sharp, thin-bladed knife. Finally, do not skip the resting time after syruping—this allows the syrup to distribute evenly and the pastries to set.
How to tell it’s done
The baklava is done when the filo is deep golden brown and puffed, and the pastry feels crisp when lightly tapped. The syrup should have been fully absorbed, leaving the top glossy.
If using a thermometer, the internal temperature of the filling should reach 160°F (71°C) to ensure the milk-based cream is safe. Let the pastries rest for at least 30 minutes after syruping so the layers can absorb the syrup evenly. The texture should be crisp on the outside and moist inside.
Up next · Part 3 of 3
4 variations · storage & make-ahead · 5 answers · printable card
Tips, FAQ & printable recipe (Part 3)← Back to the ingredients (Part 1)