Appetizers · Part 2 of 3: Instructions
Crispy Turkish Sigara Böreği with Feta and Parsley Step-by-step instructions
- Prep
- Cook
- Total
- Serves
- 8
Before you start
Before starting, make sure the feta is crumbled and the parsley is finely chopped. Have the egg white ready in a small bowl.
Lay out a damp kitchen towel to cover the yufka sheets while you work, as they dry out quickly. Set up a skillet with oil and have paper towels ready for draining. Prepare a serving platter with lemon wedges.
Ingredients at a glance (6)
- 1 packet triangular yufka sheets (24 triangles)
- 250 g Turkish white feta cheese, crumbled
- 1/2 cup flat-leaf parsley, chopped
- 1 egg white
- frying oil, for shallow frying, to taste
- lemon wedges, for serving
Instructions
Prep and Roll the Cigars
- Make the Cheese FillingIn a mixing bowl, combine the crumbled Turkish white feta, chopped flat-leaf parsley, and egg white. Mash with a fork until the mixture is cohesive and holds together when pressed. Set aside.Look for The filling should be slightly sticky but not wet; it should hold its shape when pinched.Tip Do not overmix; a few small crumbles of feta add texture.
- Roll the CigarsLay one triangular yufka sheet flat on a clean work surface. Place a line of the cheese filling along the wide base of the triangle, about 1 inch from the edge. Fold the two side corners inward over the filling, then roll tightly from the wide end toward the pointed tip, forming a slender cigar. Seal the tip with a dab of water.Look for The cigar should be tight and uniform, about 4 inches long, with no gaps in the filling.Tip Keep the roll snug but not so tight that the filling squeezes out.
- Repeat with Remaining SheetsRepeat the filling and rolling process with the remaining yufka triangles and cheese mixture. Place the finished cigars on a plate or tray, seam side down, and cover with a damp cloth to prevent drying.Look for You should have 24 cigars ready for frying.Tip If the yufka tears, press the edges together gently to patch.
The filling should be cohesive but not pasty, with visible flecks of parsley. The cigars should be uniformly rolled, about 4 inches long, with the seam tightly sealed.
They should hold their shape without unrolling. Cover them with a damp cloth to prevent drying while you heat the oil.
Fry to Golden Crisp
- Heat the OilPour about 1/2 inch of frying oil into a large skillet. Heat over medium heat until the oil shimmers and a small piece of yufka sizzles immediately when dropped in.Look for The oil should be hot but not smoking; a bread cube browns in about 30 seconds.Tip If the oil is too hot, the outside will burn before the cheese melts.
- Shallow-Fry the CigarsCarefully place several cigars in the hot oil, seam side down, without overcrowding. Fry for about 2 minutes per side, turning gently with tongs, until the cigars are blistered, golden amber, and rigid all over. The egg white in the filling is fully cooked when the internal temperature reaches 160°F (71°C).Look for The cigars should be deep golden brown with a blistered texture and feel crisp to the touch.Safe temperature 160°F (71°C) internal temperature (egg dishes)Tip Turn them gently to avoid breaking the phyllo.
- Drain on Paper TowelsRemove the fried cigars from the skillet with tongs and place them on a plate lined with paper towels to drain excess oil. Continue frying the remaining cigars in batches.Look for The paper towels will absorb the oil, leaving the cigars crispy.Tip Keep the cooked cigars warm in a low oven (200°F) while frying the rest.
The oil should be shimmering but not smoking. The cigars should sizzle immediately when placed in the pan. After frying, they should be deep golden amber with a blistered, crackled surface. They should feel rigid and crisp, not floppy. Drain on paper towels to remove excess oil.
Serve Hot and Crispy
- Serve ImmediatelyArrange the hot cigars on a serving platter with lemon wedges on the side. Serve right away, while they are at their crispiest.Look for The cigars should be hot, with a visible crackle when broken.Tip Squeeze fresh lemon over the top just before eating for brightness.
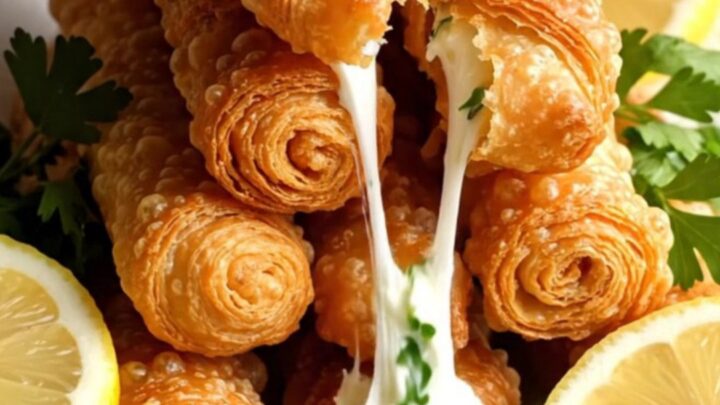
Serve the cigars immediately, while they are still hot and crackling. The lemon wedges should be on the side for squeezing. When broken, the pastry should shatter with a loud crunch, and the cheese should be molten and aromatic with parsley.
Common mistakes
One common mistake is overfilling the cigars, which causes the filling to burst out during frying. Keep the filling to a thin line and roll tightly. Another pitfall is frying at too high a temperature, which burns the phyllo before the cheese melts.
Use medium heat and adjust as needed. Also, do not overcrowd the skillet, as this lowers the oil temperature and makes the cigars greasy. Finally, ensure the yufka edges are sealed with water so they do not unroll.
How to tell it’s done
The cigars are done when they are deep golden brown and blistered on all sides, and feel rigid and crisp when touched.
The filling should be hot and melted; if you have a thermometer, the internal temperature of the filling should reach at least 160°F (71°C) to ensure the egg white is fully set. A test cigar can be broken in half to check that the cheese is bubbling and the pastry is cooked through.
- Egg dishes: 160°F (71°C) in the thickest part
Up next · Part 3 of 3
4 variations · storage & make-ahead · 5 answers · printable card
Tips, FAQ & printable recipe (Part 3)← Back to the ingredients (Part 1)