Desserts · Part 2 of 3: Instructions
Crispy Turkish Mussel Baklava with Lemon Syrup Step-by-step instructions
- Prep
- Cook
- Total
- Serves
- 12
Before you start
Before starting, measure all ingredients and have them at room temperature. Prepare the dough, roll it, and let it rest while you prepare the filling and syrup.
Preheat the oven to 350°F (180°C) and lightly grease a 9x13-inch baking dish. Have a rolling pin, sharp knife, and pastry brush ready. The syrup can be made ahead and kept in the refrigerator, but it must be cool when used.
Ingredients at a glance (12)
- 3 cups all-purpose flour
- 1 cup milk
- 1/2 cup vegetable oil
- 1 large egg
- 1 tbsp white vinegar
- 1/2 tsp salt
- 1/2 cup cornstarch, for dusting
- 2 cups shelled pistachios, crushed
- 70 g unsalted butter, melted
- 2 cups granulated sugar
- 1 cup water
- 2 tbsp fresh lemon juice
Instructions
Prepare the Dough
- Make the doughIn a large bowl, whisk together the flour, salt, milk, oil, egg, and vinegar. Knead on a floured surface for about 10 minutes until smooth and elastic. Cover with a damp cloth and let rest for 30 minutes. Divide the dough into 20 equal balls.Look for The dough should be smooth, not sticky, and springs back when pressed.Tip If the dough is too sticky, add a little more flour; if too dry, add a teaspoon of milk.
- Roll and stack the layersRoll each ball into a thin circle, about 8 inches in diameter. Dust each layer generously with cornstarch and stack them on top of each other. Roll the stacked layers together into a large paper-thin sheet, about 20 inches wide. Then roll the sheet into a tight cylinder.Look for The dough should be translucent enough to see your hand through it.Tip Work quickly to prevent the dough from drying out; keep unused balls covered.
- Cut pinwheel discsUsing a sharp knife, slice the cylinder into 1-inch-wide discs. Each disc will show concentric rings of dough. Flatten each disc slightly with your palm to form a round piece.Look for The discs should have visible spiral layers.Tip If the dough sticks, dust the knife with cornstarch.
The dough should be smooth, elastic, and easy to roll. After resting, it should feel supple and not spring back too much. When rolled paper-thin, you should be able to see your hand through it.
The cylinder should be tight and even, and the discs should show clear spiral rings. This phase sets the foundation for the flaky texture.
Shape and Bake
- Fill and shape the baklavaTake each disc and roll it into an oval. Place a generous spoonful of crushed pistachios in the center. Fold the dough over the filling and pinch the edges firmly to create a half-moon shape. Repeat with all discs.Look for The edges should be well sealed to prevent filling from leaking.Tip Press the edges with a fork for extra security and a decorative edge.
- Arrange and butterPlace the filled pastries in a lightly greased 9x13-inch baking dish, seam side down, in a single layer. Melt the butter and brush it generously over the tops of all the pastries, making sure to coat every surface.Look for The butter should soak into the top layers, leaving a glossy sheen.Tip Use a pastry brush to reach into the crevices.
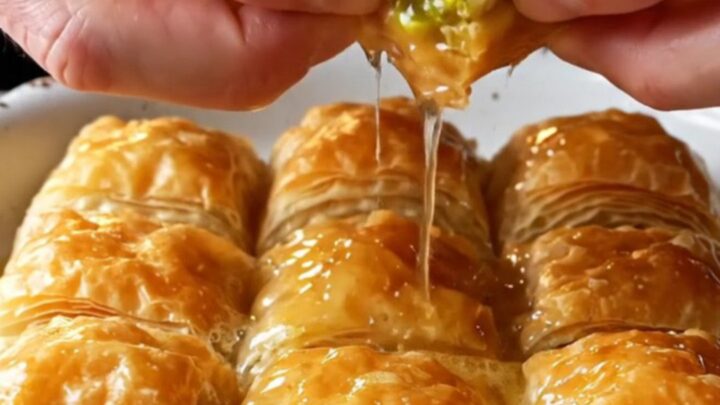
- Bake until goldenPreheat the oven to 350°F (180°C). Bake the baklava for 35–40 minutes, until the pastries are deep golden brown and the layers have visibly separated. The butter should be bubbling and the pastries should feel crisp to the touch.Look for The tops will be a rich amber color, and the layers will have puffed.Safe temperature 160°F (71°C) internal temperature (egg dishes)Tip Rotate the baking dish halfway through for even browning.
The pastries should be neatly shaped with sealed edges, and the butter should be evenly distributed. As they bake, the kitchen will fill with the warm aroma of toasting nuts and butter. The pastries will puff and turn a rich golden color. The layers should separate visibly, creating a crisp, crackly texture when touched.
Syrup and Rest
- Make the lemon syrupWhile the baklava bakes, combine the sugar, water, and lemon juice in a small saucepan. Bring to a boil, then reduce the heat and simmer for 10 minutes until slightly thickened. Remove from heat and let the syrup cool completely.Look for The syrup should coat the back of a spoon but still be pourable.Tip Cooling the syrup is essential—it should be cool when poured over hot pastry.
- Drench with syrupRemove the baklava from the oven and immediately pour the cool syrup evenly over the hot pastries. The syrup will sizzle as it hits the hot pastry. Let the baklava absorb the syrup for at least 30 minutes before serving.Look for The syrup should be absorbed, leaving the pastry glossy and sticky.Tip Pour slowly to ensure even distribution. Let rest to maximize crispness.
When the syrup hits the hot pastries, you'll hear a satisfying sizzle. The syrup will bubble and soak in, turning the surface glossy. After resting, the pastries should be crisp on the outside and moist on the inside. The lemon aroma will be bright and inviting. Let them cool completely to allow the syrup to fully absorb.
Common mistakes
One common mistake is rolling the dough too thick, which results in a dense, chewy texture instead of flaky layers. Use a generous amount of cornstarch between the layers to prevent sticking.
Another issue is pouring warm syrup over the pastries—this can make them soggy. Always use cool syrup and pour it over hot pastry. Finally, don't overfill the pastries; too much filling can cause them to burst open during baking.
How to tell it’s done
The baklava is done when the pastries are deeply golden brown and the layers have visibly separated. The butter should be bubbling, and the top should feel crisp when lightly pressed. To ensure the egg in the dough is fully cooked, the internal temperature should reach 160°F (71°C).
If using an instant-read thermometer, insert it into the center of a pastry without touching the baking dish. Let the baklava rest for at least 30 minutes after adding the syrup to allow it to absorb and crisp up.
- Egg dishes: 160°F (71°C) in the thickest part
Up next · Part 3 of 3
4 variations · storage & make-ahead · 5 answers · printable card
Tips, FAQ & printable recipe (Part 3)← Back to the ingredients (Part 1)